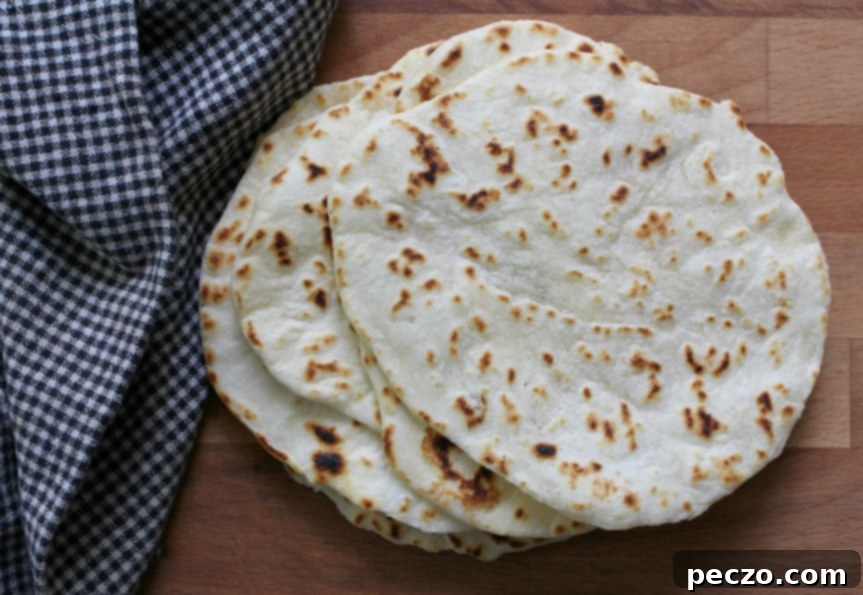
The Ultimate Guide to Homemade Flour Tortillas: Fresh, Flavorful & Easy
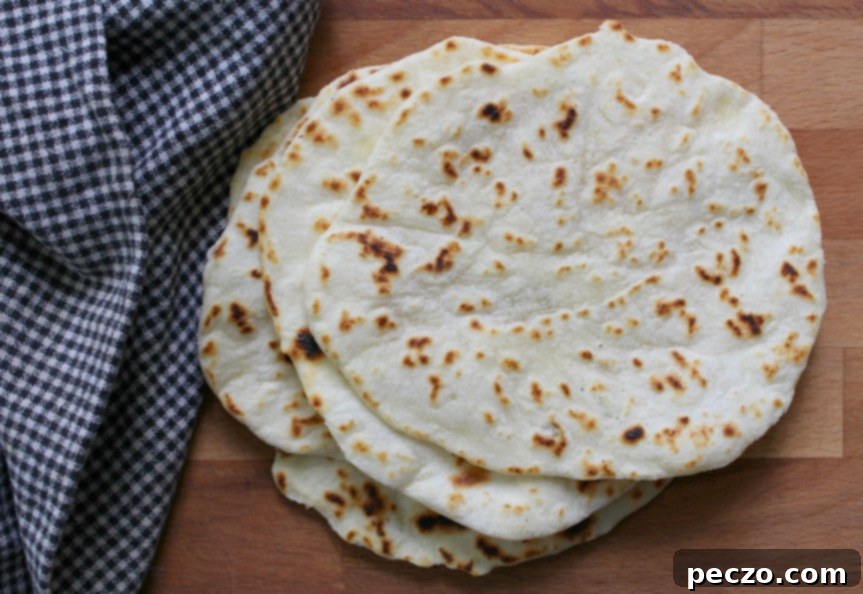
Imagine a stack of warm, impossibly soft, and pliable flour tortillas, straight from your skillet, ready to cradle your favorite taco fillings, wrap a hearty burrito, or simply be enjoyed on their own. You might have heard whispers of how simple it is to make your own, perhaps even rolling your eyes at the thought, considering how readily available and inexpensive store-bought versions are. But let’s be honest: just like any good bread, freshly baked is almost always infinitely better. And when you find yourself with a myriad of delicious taco stuffing possibilities but nothing to wrap them with, those fifteen minutes of effort to set a stack of warm, fragrant tortillas on the table are more than worth it. This comprehensive guide will walk you through everything you need to know to master the art of homemade flour tortillas, ensuring soft, delicious results every single time.
Why Homemade Flour Tortillas Are Simply the Best
There’s a significant difference between a fresh, warm homemade tortilla and a store-bought one. The texture, the aroma, the subtle flavor – it’s an experience that packaged versions simply can’t replicate. Here’s why you should embrace the homemade journey:
- Unmatched Freshness and Flavor: The moment a homemade tortilla comes off the griddle, it’s at its peak. It’s soft, warm, and carries a delicate, comforting aroma that mass-produced tortillas lack.
- Superior Texture: Homemade tortillas are incredibly pliable and soft, stretching without tearing, making them perfect for holding generous fillings. They don’t have that slightly stiff, sometimes rubbery texture of cold store-bought ones.
- Control Over Ingredients: Making tortillas from scratch means you control what goes in them. No preservatives, no questionable additives – just simple, wholesome ingredients you can pronounce. You can choose your preferred fat (lard, butter, or oil) and even experiment with different flours.
- Cost-Effectiveness: While store-bought tortillas are cheap, making them at home can be even more economical, especially if you buy your staples in bulk. All you need are flour, water, salt, fat, and a touch of baking powder – ingredients most home kitchens already have.
- A Rewarding Culinary Experience: There’s immense satisfaction in creating something delicious from basic ingredients. The process itself is surprisingly therapeutic, and the end result is a culinary triumph that will impress family and friends alike.
Beyond Tacos: Creative and Delicious Uses for Your Homemade Tortillas
While homemade tortillas are, of course, the ultimate vessel for tacos and burritos, their versatility extends far beyond. Don’t be afraid to nibble on one straight-up – for that matter, if you have little kids around, they aren’t crumbly, and can be easily carried around and gnawed on. But let’s explore some other delightful ways to enjoy your freshly made rounds:
- The Classic Snack: Cinnamon-Sugar Tortillas: While it’s still warm, spread one thinly with butter (or a dairy-free alternative) and generously sprinkle it with cinnamon-sugar. Roll it up, and you have a slightly breadier, unbelievably delicious version of a crepe – a perfect quick dessert or breakfast treat that’s especially popular with children.
- Peanut Butter & Banana Wraps: For a quick and nutritious snack or breakfast, spread a tortilla with your favorite peanut butter (or other nut/seed butter) and wrap it around a whole banana. It’s a convenient, housecoat-style meal that’s packed with energy.
- Homemade Quesadillas: Layer cheese (and perhaps some leftover cooked chicken, beans, or veggies) between two tortillas or fold one in half, then grill in a pan until golden and the cheese is melted and gooey. A perfect quick lunch or dinner.
- Breakfast Burritos: Fill them with scrambled eggs, sausage, bacon, cheese, and salsa for a hearty morning meal that’s easily customizable and portable.
- Mini Pizzas: Use a tortilla as a thin, crispy crust for individual pizzas. Spread with sauce, sprinkle with cheese and your favorite toppings, then bake until bubbly.
- Crispy Tortilla Chips: Cut tortillas into wedges, brush lightly with oil, sprinkle with salt, and bake or air fry until crispy. Serve with salsa, guacamole, or queso.
- Sweet Dessert Wraps: Spread with Nutella and add sliced strawberries, or fill with sweetened cream cheese and fruit for a delightful sweet treat.
The Science of a Perfect Tortilla: Understanding Your Ingredients
Traditionally, flour tortillas are made with just a few simple ingredients: flour, lard, and water. Over time, variations have emerged, with many recipes incorporating baking powder for a little lift and different fats. I’ve settled on a ratio that’s close to what Bon Appetit suggests – with slightly more water and a tablespoon of oil, alongside some baking powder for that perfect, subtle rise. Understanding the role of each ingredient is key to consistently perfect results.
Flour: The Foundation
- All-Purpose Flour: This is the most common and widely recommended flour for tortillas. Its moderate protein content (gluten) provides enough structure for rolling and flexibility without making the tortillas tough.
- High-Quality Flour: While any all-purpose flour works, a good quality unbleached all-purpose flour can make a subtle difference in flavor and texture.
Fat: For Tenderness and Flavor
The type of fat you choose significantly impacts the flavor and texture of your tortillas. The original content mentioned lard, which traditionally yields the most authentic results due to its unique fat crystal structure creating a tender crumb. Lard has less saturated fat than butter, so it isn’t as scary as it sounds. But if you’d rather not use it, there are excellent alternatives:
- Lard: Often considered the traditional choice for its superior flavor and ability to create incredibly soft, pliable tortillas. Look for good quality, rendered lard.
- Vegetable Shortening: A common substitute for lard, vegetable shortening also produces tender tortillas and is a good option for those avoiding animal products (just ensure it’s vegetable-based).
- Butter: If you prefer the flavor of butter or don’t have lard/shortening, it works beautifully. Butter will impart a slightly richer flavor. While the original noted lard having less saturated fat, butter is a perfectly acceptable and delicious alternative.
- Vegetable Oil: Some recipes (like the one we’re adapting) include a tablespoon of oil for added moisture and pliability, often in conjunction with a solid fat like lard or shortening. It helps keep the dough from drying out.
Water: The Binder
- Warm Water: This is crucial. Warm water helps activate the gluten in the flour and softens the fat, making the dough much easier to mix, knead, and roll out. It contributes to the dough’s elasticity.
- Just Enough: The amount of water can vary slightly depending on your flour and humidity. You want a dough that’s hydrated but not sticky.
Baking Powder: The Secret to Lift
A small amount of baking powder helps create a little lift and puffiness in the tortillas as they cook, contributing to their signature soft, airy texture. It’s not strictly traditional but greatly enhances the final product.
Salt: Flavor Enhancer
Don’t forget the salt! It balances the flavors and brings out the best in your tortillas.
Step-by-Step Guide to Mastering Your Homemade Flour Tortillas
Ready to get your hands dusty? Follow these detailed steps for perfect, soft flour tortillas.
Ingredients:
- 3 cups (360g) all-purpose flour
- 1 teaspoon salt
- 1 teaspoon baking powder
- 1/4 cup (56g) lard, vegetable shortening, or unsalted butter, cold and cut into small pieces
- 1 tablespoon vegetable oil (optional, but recommended for extra pliability)
- 1 cup (240ml) warm water (about 110°F/43°C)
Equipment:
- Large mixing bowl
- Pastry blender or your fingertips
- Rolling pin (traditional thin Mexican rolling pin or a French rolling pin works great)
- Cast iron skillet, griddle, or non-stick pan
- Clean kitchen towel (for keeping tortillas warm)
Instructions:
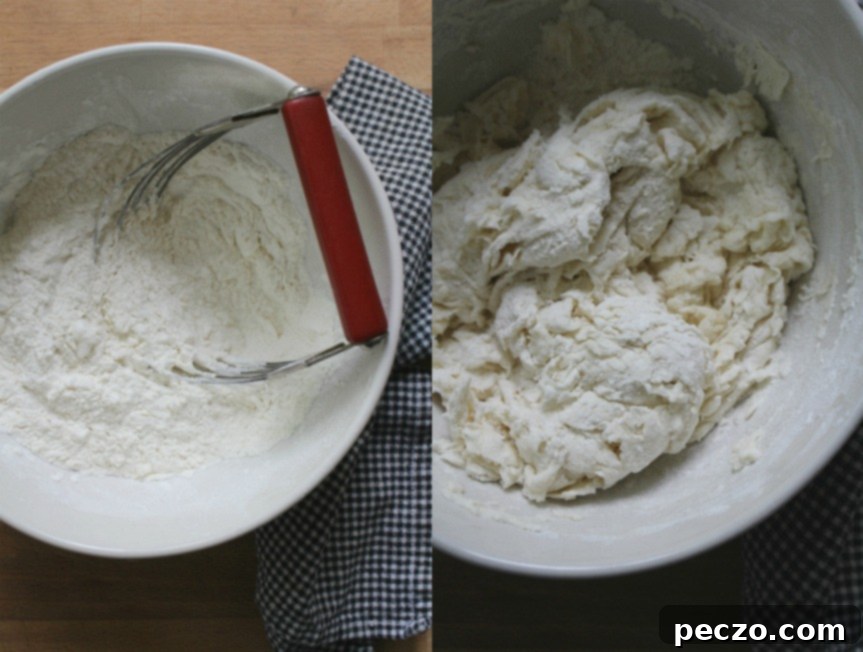
- Combine Dry Ingredients: In your large mixing bowl, whisk together the flour, salt, and baking powder until well combined. This ensures even distribution of the leavening agent and salt.
- Cut in the Fat: Add the cold lard, shortening, or butter to the dry ingredients. Using a pastry blender, two knives, or your fingertips, cut the fat into the flour mixture until it resembles coarse crumbs with some pea-sized pieces remaining. This step is crucial for tender tortillas. If using your hands, work quickly to prevent the fat from melting too much.
- Add Wet Ingredients: Pour in the warm water and vegetable oil (if using). Mix with a spoon or your hands until a shaggy dough forms. It will look a bit rustic and unformed at this stage.
- Knead the Dough: Turn the shaggy dough out onto a lightly floured surface. Knead for 5-7 minutes. Initially, the dough will feel quite rough, almost “cellulite-y” as the original content describes it. As you knead, it will transform, becoming smooth, elastic, and beautiful. The goal is a soft, pliable dough that springs back when gently pressed. Avoid adding too much extra flour during kneading; a very lightly floured surface is all you need.
- Rest the Dough: This is a critical step! Form the dough into a ball, place it back in the mixing bowl, cover it with a clean kitchen towel or plastic wrap, and let it rest at room temperature for at least 30 minutes. An hour is even better. This rest allows the gluten to relax, making the dough much easier to roll out thinly without shrinking back. It’s the secret to soft, easy-to-handle tortillas.
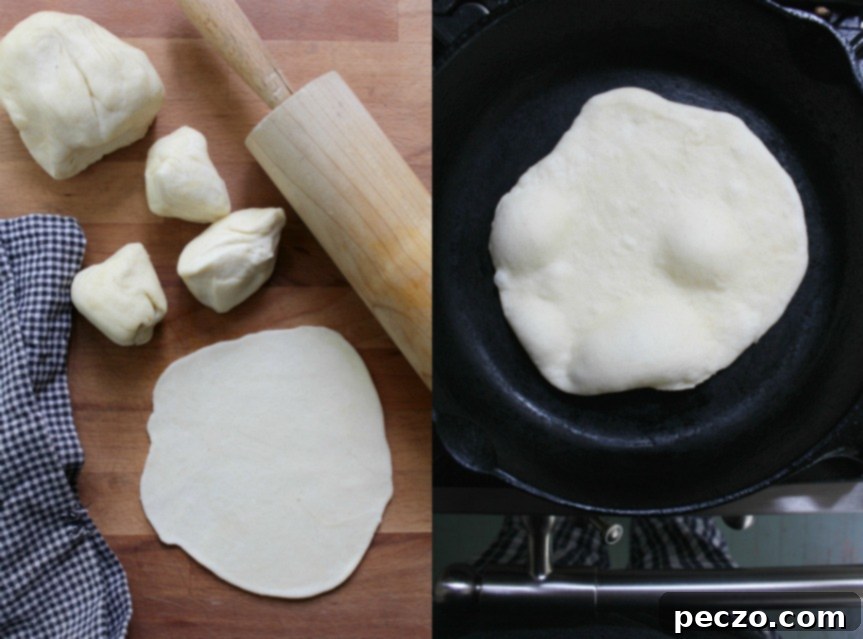
- Divide and Shape: Once rested, gently punch down the dough. Divide it into 12-16 equal pieces (depending on your desired tortilla size). Roll each piece into a smooth ball. Keep the dough balls covered with the kitchen towel while you work to prevent them from drying out.
- Roll Out the Tortillas: Heat your cast iron skillet or griddle over medium-high heat while you roll out the tortillas. On a very lightly floured surface, take one dough ball and flatten it slightly with your palm. Using a rolling pin, roll it out into a thin circle, about 6-8 inches in diameter. Aim for an even thickness; too thick and they’ll be doughy, too thin and they might tear. Don’t add any extra flour to the pan.
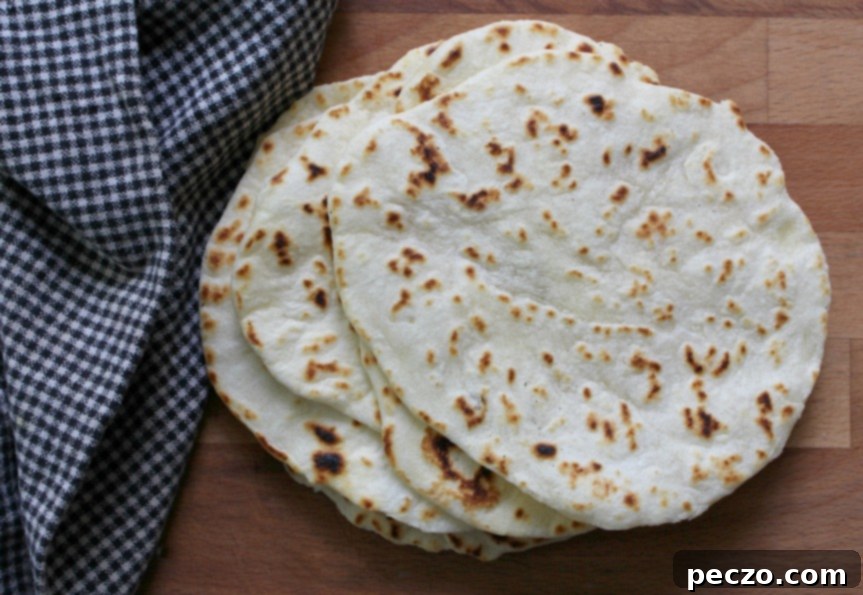
- Cook the Tortillas: Place a rolled tortilla onto the hot, dry skillet. Cook for about 30-60 seconds per side. You’ll see small bubbles forming on the surface, and the edges might start to look dry. Flip it over and cook for another 20-40 seconds, until it’s lightly browned in spots and has puffed up slightly. The key is to cook them just until done, not crispy.
- Keep Them Warm: As each tortilla finishes cooking, immediately transfer it to a plate and cover it with a clean kitchen towel. This traps the steam, keeping the tortillas warm and soft. Continue with the remaining dough balls, stacking the cooked tortillas as you go.
Troubleshooting Common Flour Tortilla Problems
Even with a good recipe, sometimes things don’t go exactly as planned. Here are solutions to common issues you might encounter:
- Tortillas Are Tough or Chewy:
- Solution: You might have over-kneaded the dough, developed too much gluten, or not allowed it enough rest. Ensure you knead for just 5-7 minutes and let it rest for at least 30 minutes (preferably an hour) to relax the gluten. Also, ensure you’re using enough fat.
- Tortillas Are Crispy or Brittle:
- Solution: This usually means they’ve been overcooked or the pan was too hot. Reduce the heat slightly and cook them for less time. You want them soft and pliable, not cracker-like. Also, ensure you’re immediately transferring them to a covered stack to steam and soften.
- Tortillas Aren’t Puffing Up:
- Solution: The pan might not be hot enough, or the dough might be too thick or too thin. Ensure your griddle is adequately hot (medium-high). Also, verify your baking powder is fresh and active. Sometimes, simply pressing gently on the edges with a spatula can encourage puffing.
- Dough is Sticky and Hard to Handle:
- Solution: You might have added too much water. Add a tiny bit more flour (a teaspoon at a time) during kneading until it reaches the right consistency. Conversely, if it’s too dry, add a few drops of water.
- Tortillas Shrink Back When Rolling:
- Solution: This is a sign the gluten hasn’t relaxed enough. Give your dough a longer rest – an hour is ideal. If it still shrinks, let it rest for another 10-15 minutes.
Storage and Reheating Tips for Fresh Tortillas
While homemade tortillas are best enjoyed fresh and warm, you can certainly make a batch ahead of time. Properly stored, they’ll remain delicious for days:
- Room Temperature: Once cooled completely, stack the tortillas and store them in an airtight plastic bag or container at room temperature for up to 2-3 days.
- Refrigerator: For longer storage, refrigerate them for up to a week.
- Freezer: For extended freshness, stack cooled tortillas with parchment paper between each one to prevent sticking. Place the stack in a freezer-safe bag or container. They can be frozen for up to 3 months. Thaw in the refrigerator overnight or directly reheat from frozen using the methods below.
Reheating Your Tortillas:
To bring your stored tortillas back to their fresh-from-the-griddle glory, use one of these methods:
- On the Stovetop: This is the best method. Heat a dry cast iron skillet or griddle over medium heat. Place a tortilla on the hot surface for 15-30 seconds per side, until soft and pliable.
- In the Microwave: Stack a few tortillas, wrap them in a damp paper towel, and microwave for 15-30 seconds, or until warm and soft. Be careful not to overcook, or they can become tough.
- In the Oven: Preheat your oven to 300°F (150°C). Wrap a stack of tortillas tightly in aluminum foil and bake for 10-15 minutes, or until heated through.
Conclusion: The Joy of Homemade
Making your own flour tortillas is one of those simple culinary endeavors that yields incredibly satisfying results. From the tactile pleasure of kneading the dough to the delightful aroma filling your kitchen as they cook, the entire process is a rewarding experience. And the taste? Unbeatable. Once you’ve enjoyed the tender, warm embrace of a homemade tortilla, you might find it hard to go back to store-bought. So, gather your ingredients, set aside a little time, and prepare to elevate your taco nights, breakfast burritos, and everyday snacks to a whole new level. Your taste buds will thank you!
