From Travel Snacks to Kitchen Bliss: The Ultimate Guide to Making Homemade Yogurt & Healthy Granola
After what feels like an endless journey through Vegas, Toronto, and Vancouver, the most comforting sound is the creak of my own front door. We’re finally home, and while little W is still navigating the lingering sniffles and a persistent cough – perhaps a souvenir from our adventures – there’s an undeniable sense of relief. Those chlorine-red eyes and his insistence that everything be done “EXACTLY” as he demands are a clear sign that recovery is underway. My partner, Mike, and I had our moments of feeling dragged down, but a truly restorative sleep in Salmon Arm, possibly aided by a bottle of Shiraz (sipped from plastic Travelodge cups, because sometimes that’s just how you roll), helped us bounce back.

We returned to a scene of typical late-season charm: snow still dusting the ground, slush puddles reflecting the winter sky, and icicles adorning every window. But honestly, I don’t mind one bit, because the true luxury is being back in my own kitchen. The road, as delightful as it can be, often leads to an overdose of car snacks and restaurant meals. Despite my best intentions and efforts to arm myself with healthier options, the siren call of convenience often wins.
The Indispensable Travel Companion: Homemade Granola
One of my steadfast strategies for combating unhealthy travel eating, ever since that memorable trip to Vegas, has been to pack generous amounts of granola. And I’m not talking about just any granola; I mean the real, wholesome stuff. Like the fantastic, nutty blend filled with chewy dried cherries from Joy Road Catering, which I fondly remember picking up at the Penticton farmers’ market. This kind of granola is a nutritional powerhouse, offering a perfect balance of complex carbohydrates, healthy fats, and protein, especially when you load it up with nuts, seeds, and flax, as I love to do.
The beauty of good granola for travel is multifaceted. It’s incredibly resilient – it doesn’t spoil quickly, won’t go soggy, and resists crushing in your luggage or backpack. It takes up minimal space yet delivers maximum satisfaction, effectively filling that hunger void even when a proper meal isn’t feasible. And for those moments when you need something a bit more substantial, it pairs exquisitely with a simple cup of yogurt. If I’m lucky enough to get a hotel room with a mini-fridge, my first stop is always a grocery store to grab a large tub of plain yogurt. I’ve been known to spoon it directly into the zip-lock baggies holding my homemade granola – a sophisticated, leak-proof take on those nostalgic little cereal boxes where you poured milk right in. The yogurt-granola combo, thankfully, is far less prone to spills.

Unlock Your Kitchen’s Potential: The Art of Making Homemade Yogurt
Speaking of yogurt, it reminds me of a secret I’ve been meaning to share for ages: just how incredibly easy it is to make your own at home. My apologies for the delay; it’s been on my mental to-do list for far too long, and now it’s time to finally scratch it off. Prepare to be amazed by the simplicity and satisfaction of crafting your very own fresh, creamy yogurt with minimal effort and equipment.
Forget everything you think you know about elaborate yogurt-making machines. There is absolutely no need for those clunky, 70s-era incubator contraptions with their cords, dials, and tiny glass jars. We once owned one; it served a noble second life as a spaceship for our Smurfs for nearly a decade before it found a new home at a garage sale. (I often wonder how many hands that same machine has passed through since then, a testament to its enduring, if unnecessary, existence.) The truth is, making exceptional yogurt requires nothing more than a pot, a spoon, and a jar. It’s a testament to the power of simple ingredients and a little patience.
Why Choose Homemade Yogurt? The Benefits are Abundant!
- Unbeatable Freshness: Enjoy yogurt that’s just hours old, with a vibrant, clean taste.
- Ingredient Control: You dictate what goes in – no thickeners, stabilizers, or artificial flavors.
- Cost-Effective: Making your own can be significantly cheaper than buying premium store-bought brands.
- Customizable: Adjust the thickness, tanginess, and flavor to your exact preference.
- Active Cultures Galore: Ensure your yogurt is brimming with beneficial probiotics for gut health.
Mastering the Art of DIY Yogurt: A Step-by-Step Guide
The fundamental process for creating your own silky, fresh yogurt is elegantly simple: you boil milk, let it cool, introduce a live yogurt culture (your starter), keep it warm for several hours, and voilà – a batch of delicious, homemade goodness. Once you experience the rich, satiny texture and pure flavor, especially when swirled with fresh berries mashed with a touch of honey, the store-bought varieties might never quite measure up again.
Making yogurt shares a beautiful kinship with baking sourdough. Once you establish your starter, you can perpetuate the cycle, using a small amount from your last batch to culture your next, creating an endless supply. To embark on this culinary journey, you’ll need one crucial initial ingredient: a small container of the best plain yogurt you can find, explicitly labeled as containing active cultures. The quality of your starter significantly impacts your final product. I personally favor locally produced yogurts like Vital Green Farms or Bles-Wold, which are known for containing only milk and bacterial cultures, devoid of unnecessary additives, thickeners, or stabilizers.
Essential Ingredients:
- 2 ½ cups of fresh milk (whole, 2%, or 1% milk work wonderfully. I haven’t experimented extensively with soy milk, but goat’s milk also yields excellent results. Avoid skimmed milk as it often results in a thinner texture.)
- 1 tablespoon of plain yogurt with active cultures (your starter)
The Simple Steps to Perfect Homemade Yogurt:
-
Scald the Milk:
Pour your 2 ½ cups of milk into a clean saucepan. Bring it to a full boil over medium-high heat, stirring occasionally to prevent scorching. Once it reaches a rolling boil, reduce the heat to a simmer and let it continue for 2 minutes. This scalding process is crucial; it alters the milk proteins, allowing for a thicker yogurt, and also kills off any unwanted bacteria that might compete with your beneficial yogurt cultures.
-
Cool the Milk to the Ideal Temperature:
Carefully pour the scalded milk into a clean bowl. If you notice any brown bits around the edges of your saucepan, you can strain the milk through a fine-mesh sieve or cheesecloth for a smoother result, though this is optional. Now, let the milk cool. This is a critical step! The milk needs to cool to a temperature that is warm to the touch but not hot enough to kill your active cultures. The traditional “finger test” is remarkably effective: when you can comfortably hold your clean finger in the milk and count slowly to 10, it’s at the perfect temperature (roughly 105-115°F or 40-46°C). If it’s too hot, you’ll kill the cultures; too cold, and they won’t activate properly.
-
Activate the Starter Culture:
In a small dish or cup, place your 1 tablespoon of plain yogurt starter. Ladle a small amount (about ¼ cup) of the warm, cooled milk into the starter. Whisk this mixture gently until smooth. This step “wakes up” the cultures and tempers the starter, making it easier to incorporate evenly into the larger batch of milk without shocking the bacteria.
-
Combine and Incubate:
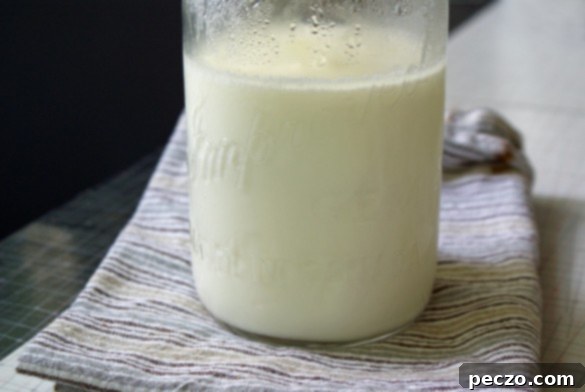
Whisk the activated starter mixture back into the main bowl of warm milk, ensuring it’s thoroughly combined. Next, carefully pour the inoculated milk into a clean glass jar. Glass is an excellent choice as it holds heat well, which is essential for the incubation process. Now, the magic happens: wrap the jar snugly in a towel or an old sweater. This acts as an insulator to maintain a consistent warm temperature. Place the wrapped jar in a warm spot in your kitchen – perhaps a slightly warm oven (turned off, but preheated briefly then cooled), a sunny windowsill, or even on top of your refrigerator. Let it incubate for about 6 hours, or preferably overnight, typically 8-12 hours for a firmer, tangier yogurt. The longer it incubates within the ideal temperature range, the thicker and tangier your yogurt will become.
-
Chill and Enjoy:
In the morning, unwrap your jar of yogurt. You should find a beautifully set, creamy, and jiggly fresh yogurt. Place the jar directly into the fridge to chill thoroughly for a few hours. Chilling not only halts the fermentation process but also significantly improves the texture and flavor, making it even thicker and more palatable. Once chilled, you’ll be rewarded with a lovely jar of fresh, wholesome, and delicious homemade yogurt.
Beyond the Basic: Flavoring and Serving Your Homemade Creation
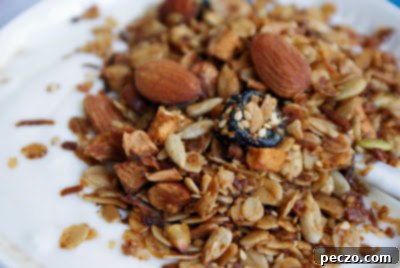
Your freshly made yogurt is a blank canvas, ready for your culinary imagination. While it’s delightful on its own, you can elevate it further with simple additions. Stir in a spoonful of local honey or maple syrup for sweetness, fold in fresh berries or chopped fruit for a burst of flavor and nutrients, or add a sprinkle of your homemade granola for extra crunch and texture. It’s also a fantastic base for savory dips, dressings, or even in baking.
Making your own yogurt is more than just a kitchen skill; it’s a step towards greater self-sufficiency and a deeper connection with the food you eat. It’s an empowering realization that fresh, wholesome food doesn’t require complex gadgets or a hefty price tag. It just requires a little bit of time, a few basic ingredients, and the simple joy of creating something truly delicious and nourishing in your own home. So go ahead, give it a try. For real!