The Ultimate Guide to Homemade Buffalo Chicken Potato Skins: A Game-Day Favorite

For many, the roaring crowds and thrilling plays of football season are synonymous with one thing: an irresistible spread of delicious, often gooey, cheesy, crunchy, and dippable snacks. While I might not be the biggest fan of the game itself, I confess to being an avid admirer of the culinary traditions that accompany it, especially during the nail-biting playoffs. The sheer volume of food consumed during these events is staggering – I once read that collectively, we’re expected to devour around 1.3 billion chicken wings on a single major game day. This fact alone sparked a delicious idea in my mind: what if we could elevate the classic potato skin, transforming it into the perfect vessel for that iconic, buttery-peppery Buffalo chicken flavor, all crowned with a generous blanket of melty cheese?
And so, the Buffalo Chicken Potato Skin was born – a harmonious fusion of two beloved appetizers, designed to satisfy every craving for savory, spicy, and utterly comforting fare.


Why These Two Classics Belong Together
The beauty of Buffalo chicken wings lies in their simple yet explosive flavor profile: crispy fried chicken coated in a tangy, spicy, and buttery sauce, often served with cooling blue cheese or ranch dressing and crisp celery sticks. Potato skins, on the other hand, offer a delightful textural contrast with their crispy shell and soft, fluffy interior, traditionally loaded with cheese, bacon, and green onions. Combining these two creates a synergy that is truly unmatched. You get the irresistible heat and tang of Buffalo sauce, the tender bite of chicken, and the comforting heartiness of a potato, all held together by a sturdy, crispy skin and gooey melted cheese. It’s an appetizer that delivers on all fronts – flavor, texture, and satisfaction.
Crafting Your Own Buffalo Chicken Potato Skins: A Step-by-Step Guide
Making homemade potato skins might seem like a gourmet endeavor, but it’s surprisingly straightforward. The key is starting with the right potatoes and following a few simple steps to ensure maximum crispiness and flavor.
Ingredients You’ll Need:
- 6-8 small to medium Russet potatoes (their sturdy skins are perfect for holding fillings)
- 2 tablespoons olive oil or neutral cooking oil
- Salt and freshly ground black pepper to taste
- 2 cups cooked chicken, shredded or finely diced (leftover roast chicken, rotisserie chicken, or freshly cooked chicken breast work perfectly)
- 1/2 cup unsalted butter, melted
- 1/2 cup Frank’s Red Hot Original Sauce (this is the classic Buffalo sauce base)
- 1.5 – 2 cups grated mozzarella cheese, white cheddar, Monterey Jack, Gouda, or Friulano (or a blend!)
- Optional garnishes: chopped fresh chives or green onions, blue cheese crumbles, a drizzle of ranch or blue cheese dressing
Equipment:
- Baking sheet
- Foil or parchment paper
- Small bowl for mixing sauce
- Larger bowl for tossing chicken
- Pastry brush (optional, for oiling potatoes)
Step 1: Preparing and Baking the Potatoes for Crispy Skins
The foundation of any great potato skin is a perfectly baked potato. Russets are ideal because their skins are thick and sturdy enough to hold a generous filling without collapsing.
- Preheat Oven: Start by preheating your oven to 400°F (200°C).
- Wash and Pierce: Thoroughly wash the potatoes under cold water, scrubbing away any dirt. Pat them completely dry. Using a fork, pierce each potato several times all over. This allows steam to escape during baking, preventing them from bursting.
- Oil and Season: Lightly coat each potato with a thin layer of olive oil (a pastry brush works well here, or simply rub with your hands). Season generously with salt and pepper. This step helps achieve that delicious crispy skin.
- Bake Until Tender: Place the seasoned potatoes directly on a baking sheet or on a rack set over a baking sheet. Bake for 45-60 minutes, or until they are fork-tender. The baking time will vary depending on the size of your potatoes.
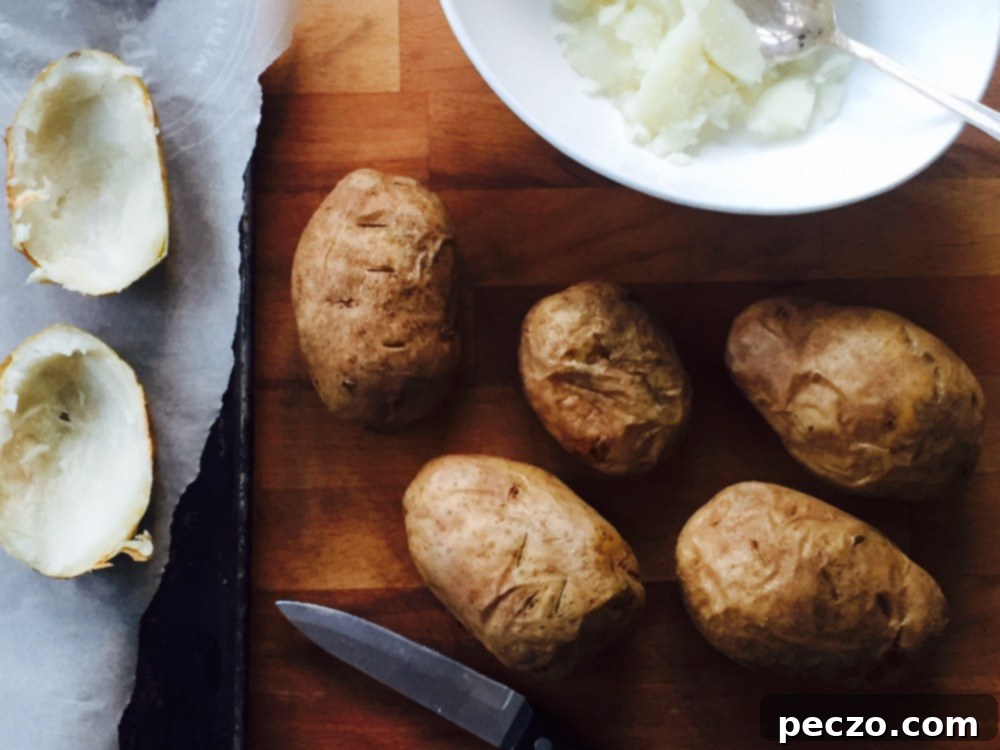
- Cool and Halve: Once baked, remove the potatoes from the oven and let them cool until they are comfortable enough to handle, about 10-15 minutes. Once cooled, carefully slice each potato in half lengthwise.
Step 2: Scooping and Second Bake for Extra Crispiness
This is where the “skin” part really comes into play. We want to create sturdy boats for our filling.
- Scoop Out Flesh: Using a spoon, carefully scoop out most of the fluffy potato flesh from each half, leaving about a 1/4 to 1/2-inch border of potato attached to the skin. Be gentle to avoid tearing the skin. You can save the scooped-out potato flesh for mashed potatoes, potato salad, or even a different kind of loaded potato dish!
- Second Bake for Crispness: Return the hollowed-out potato skins to the baking sheet, skin-side down. Place them back into the 400°F (200°C) oven for another 10-15 minutes. This crucial step helps to dry out the skins and make them extra crispy, creating the perfect base for your filling.
Step 3: Preparing the Buffalo Chicken Filling
The secret to authentic Buffalo chicken flavor lies in the simple, yet perfect, combination of butter and Frank’s Red Hot sauce.
- Melt Butter: In a small saucepan or microwave-safe bowl, melt the unsalted butter.
- Combine with Hot Sauce: Stir in the Frank’s Red Hot Original Sauce until well combined. This is the classic ratio, but you can adjust it slightly to your preference – more hot sauce for extra spice, or a touch more butter for a richer, milder flavor. Precise measurements don’t much matter; you just want the sauce to be nice and coat the chicken. Go by your gut!
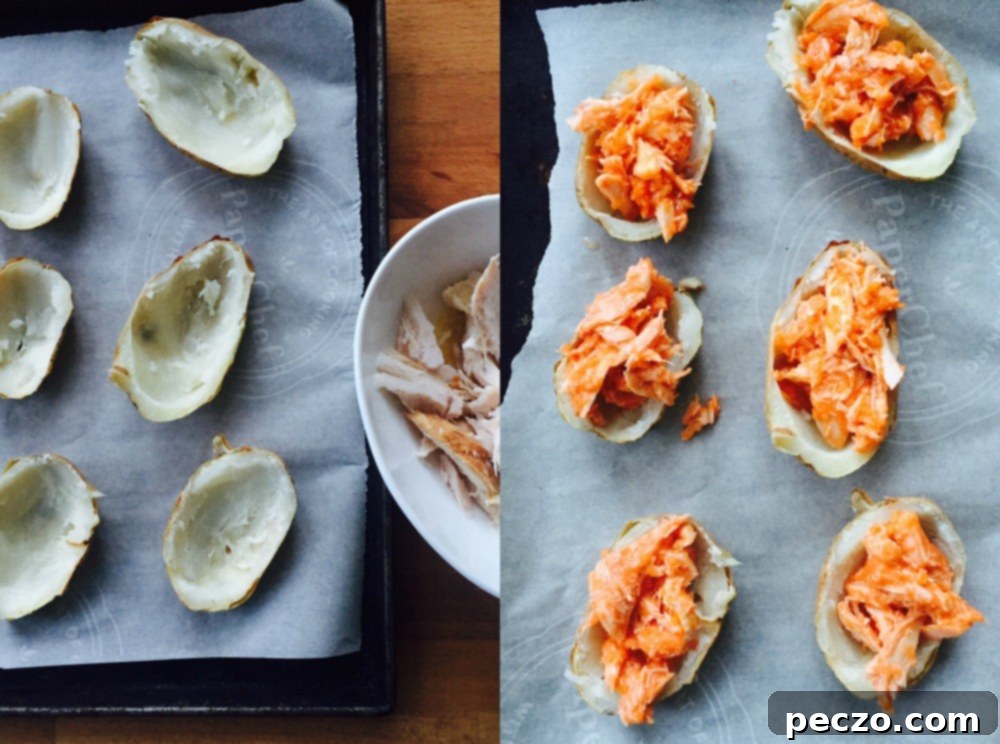
- Toss Chicken: Place your shredded or diced cooked chicken in a medium bowl. Pour the Buffalo sauce mixture over the chicken and toss thoroughly until every piece is evenly coated and glistening with that vibrant orange-red sauce.

Step 4: Assembling and Final Bake
Now comes the fun part – loading up those crispy potato skins!
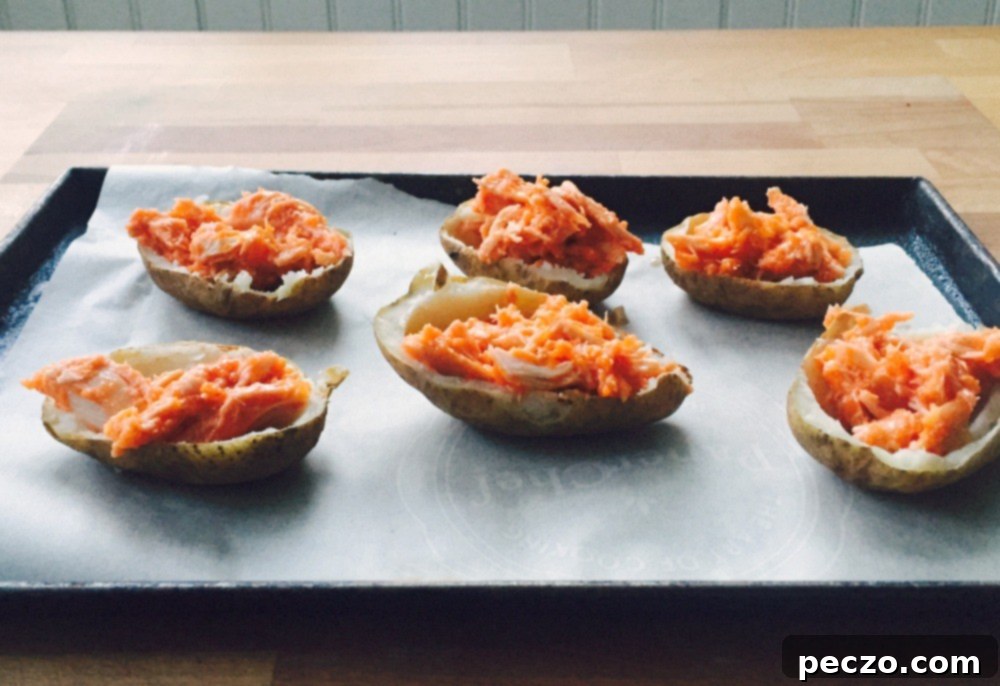
- Fill the Skins: Spoon a generous amount of the Buffalo chicken filling into each crispy potato skin. Don’t be shy, but avoid overfilling to ensure everything stays contained.
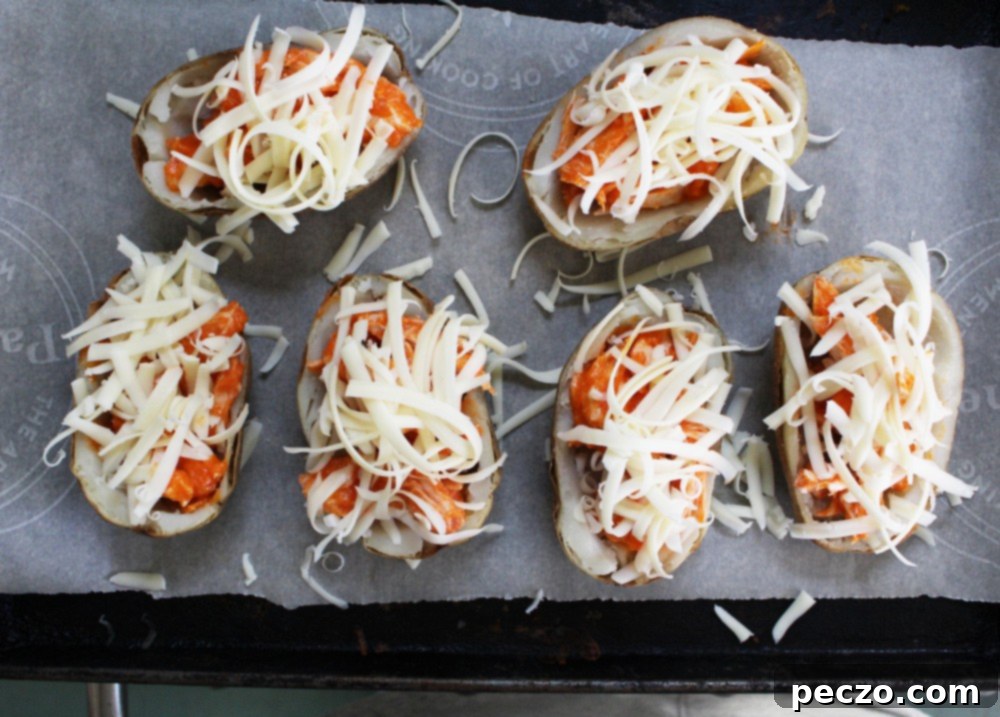
- Top with Cheese: Sprinkle your choice of grated cheese over the Buffalo chicken filling. Mozzarella is a classic for its melty qualities, but white cheddar, Monterey Jack, Gouda, or Friulano will also provide fantastic flavor and a beautiful melt.
- Return to Oven: Pop the loaded potato skins back into the 400°F (200°C) oven for another 8-12 minutes, or until the cheese is beautifully melted, bubbly, and slightly golden brown around the edges. The skins should be piping hot and the chicken warmed through.

Tips for the Perfect Buffalo Chicken Potato Skins
- Don’t Skip the Double Bake: The initial bake makes the potato tender, but the second bake (after scooping) is essential for achieving truly crispy skins that won’t get soggy under the filling.
- Choose Your Chicken Wisely: Leftover roasted chicken or a store-bought rotisserie chicken makes this recipe incredibly quick and easy. If cooking chicken from scratch, poach or bake boneless, skinless chicken breasts and then shred them.
- Adjust the Heat: If you prefer a milder flavor, use slightly less Frank’s Red Hot or increase the butter ratio. For extra heat, a dash of cayenne pepper or a spicier hot sauce can be added to the Buffalo mixture.
- Experiment with Cheese: While mozzarella is a great melting cheese, don’t limit yourself! A sharp cheddar adds a robust flavor, Monterey Jack offers a creamy melt, and a smoky Gouda can introduce an exciting new dimension.
- Garnish for Freshness: A sprinkle of fresh chopped chives or green onions adds a lovely pop of color and a fresh oniony bite. Blue cheese crumbles are also a classic pairing with Buffalo flavor.
Serving Suggestions and Variations
These Buffalo Chicken Potato Skins are fantastic on their own, but they truly shine when served with a few classic accompaniments:
- Cooling Dips: A side of creamy blue cheese dressing or ranch dressing is practically mandatory. The cool, tangy dip perfectly balances the heat of the Buffalo chicken.
- Fresh Veggies: Offer celery sticks and carrot sticks alongside for a refreshing crunch, just like with traditional Buffalo wings.
- Make it a Meal: While often served as an appetizer, a couple of these hearty potato skins can easily make a satisfying lunch or light dinner, especially when paired with a crisp green salad.
- Spicy Ranch Skins: Instead of traditional Buffalo sauce, you could mix the chicken with a spicy ranch seasoning and a touch of hot sauce for a different kick.
- BBQ Chicken Skins: For a non-spicy variation, toss the chicken in your favorite barbecue sauce before filling the skins.
Storage and Reheating
If you happen to have any leftovers (which is unlikely!), store them in an airtight container in the refrigerator for up to 2-3 days. To reheat, place them on a baking sheet in a preheated oven at 350°F (175°C) for 10-15 minutes, or until heated through and the skins crisp up again. Microwaving is an option for quick reheating, but the skins may lose some of their crispness.

Embrace the Delicious Fusion
These Buffalo Chicken Potato Skins are more than just an appetizer; they’re a celebration of flavor, texture, and the joy of creative cooking. They’re perfect for game day gatherings, casual parties, or simply a comforting weekend snack. The combination of crispy potato, tender spicy chicken, and gooey cheese is utterly addictive and surprisingly simple to achieve at home. So, next time you’re craving that classic Buffalo flavor or looking for an exciting twist on a beloved appetizer, skip the takeout and whip up a batch of these incredible potato skins. And who knows, looking at these now, I’m already thinking a butter chicken potato skin might be next on my list for a completely different but equally delicious fusion!
