The Ultimate DIY Guide to Crafting Stunning Breakable Chocolate Hearts for Any Occasion
Are you searching for a truly memorable, fun, and unique way to show your loved ones how much you care? Look no further! Breakable chocolate hearts have taken the internet by storm, becoming a delightful trend that combines sweet indulgence with an exciting element of surprise. Whether it’s for Valentine’s Day, a birthday, an anniversary, or just a thoughtful “thinking of you” gesture, a homemade breakable heart is the perfect way to make any occasion extra special. Forget traditional chocolates and flowers – this interactive treat offers a personalized experience that will leave a lasting impression.
This comprehensive guide will walk you through everything you need to know to create your own beautiful and delicious smashable chocolate heart. From choosing the right chocolate and mastering the art of tempering to creative filling ideas and step-by-step instructions, you’ll gain the confidence to craft a show-stopping edible gift. Get ready to impress with a gift that’s as fun to break as it is to eat!
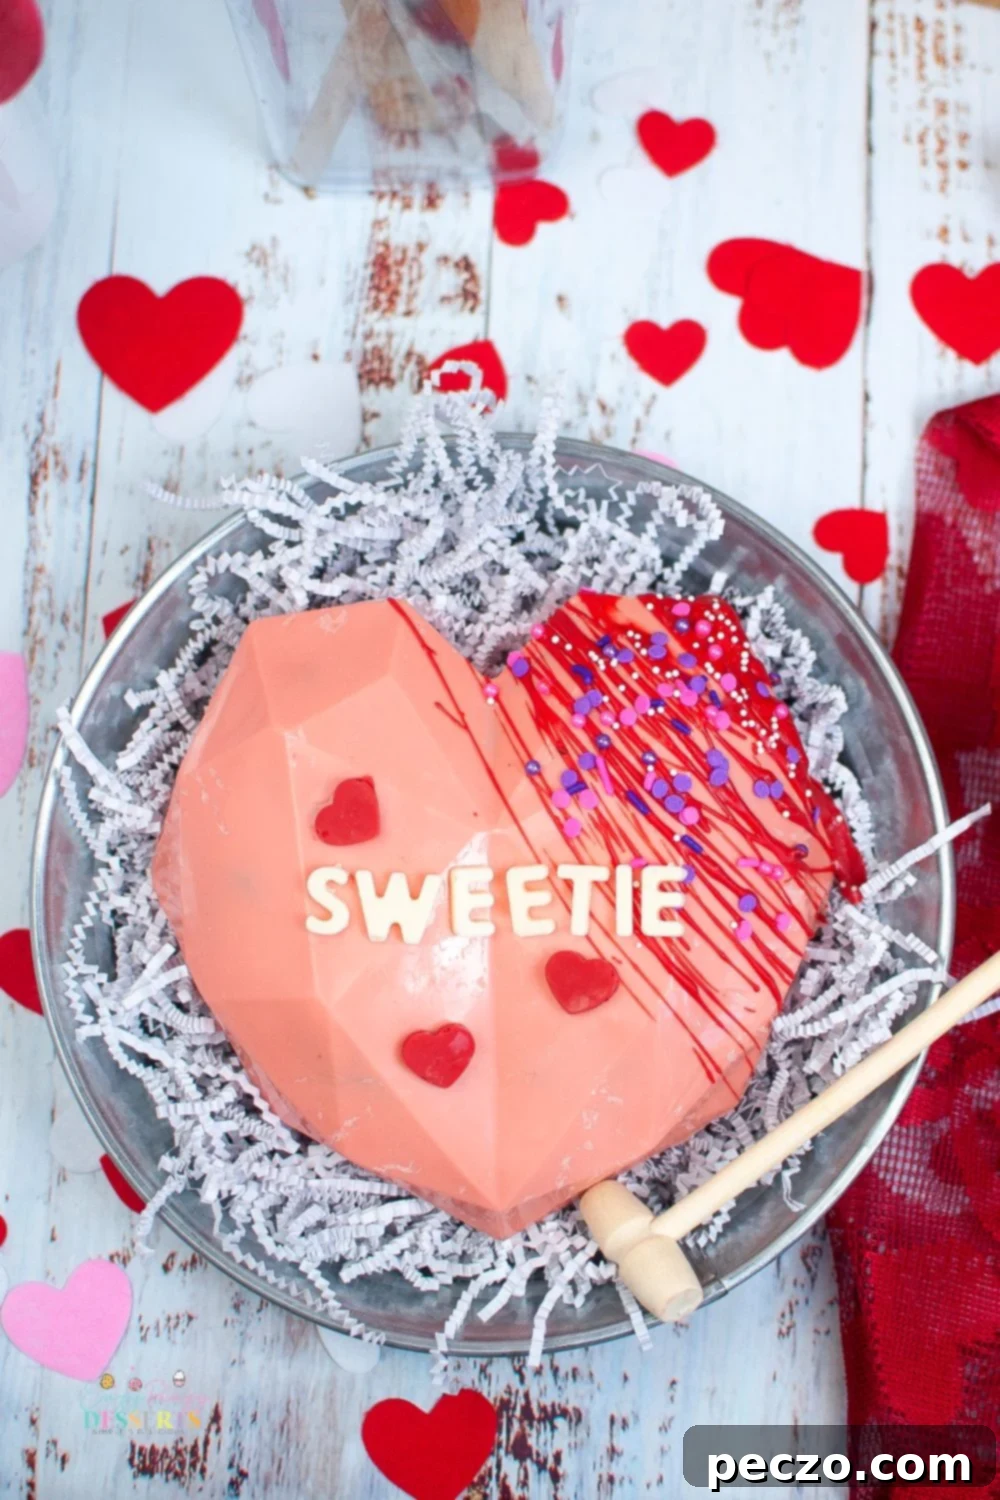
What Exactly Is a Breakable Chocolate Heart?
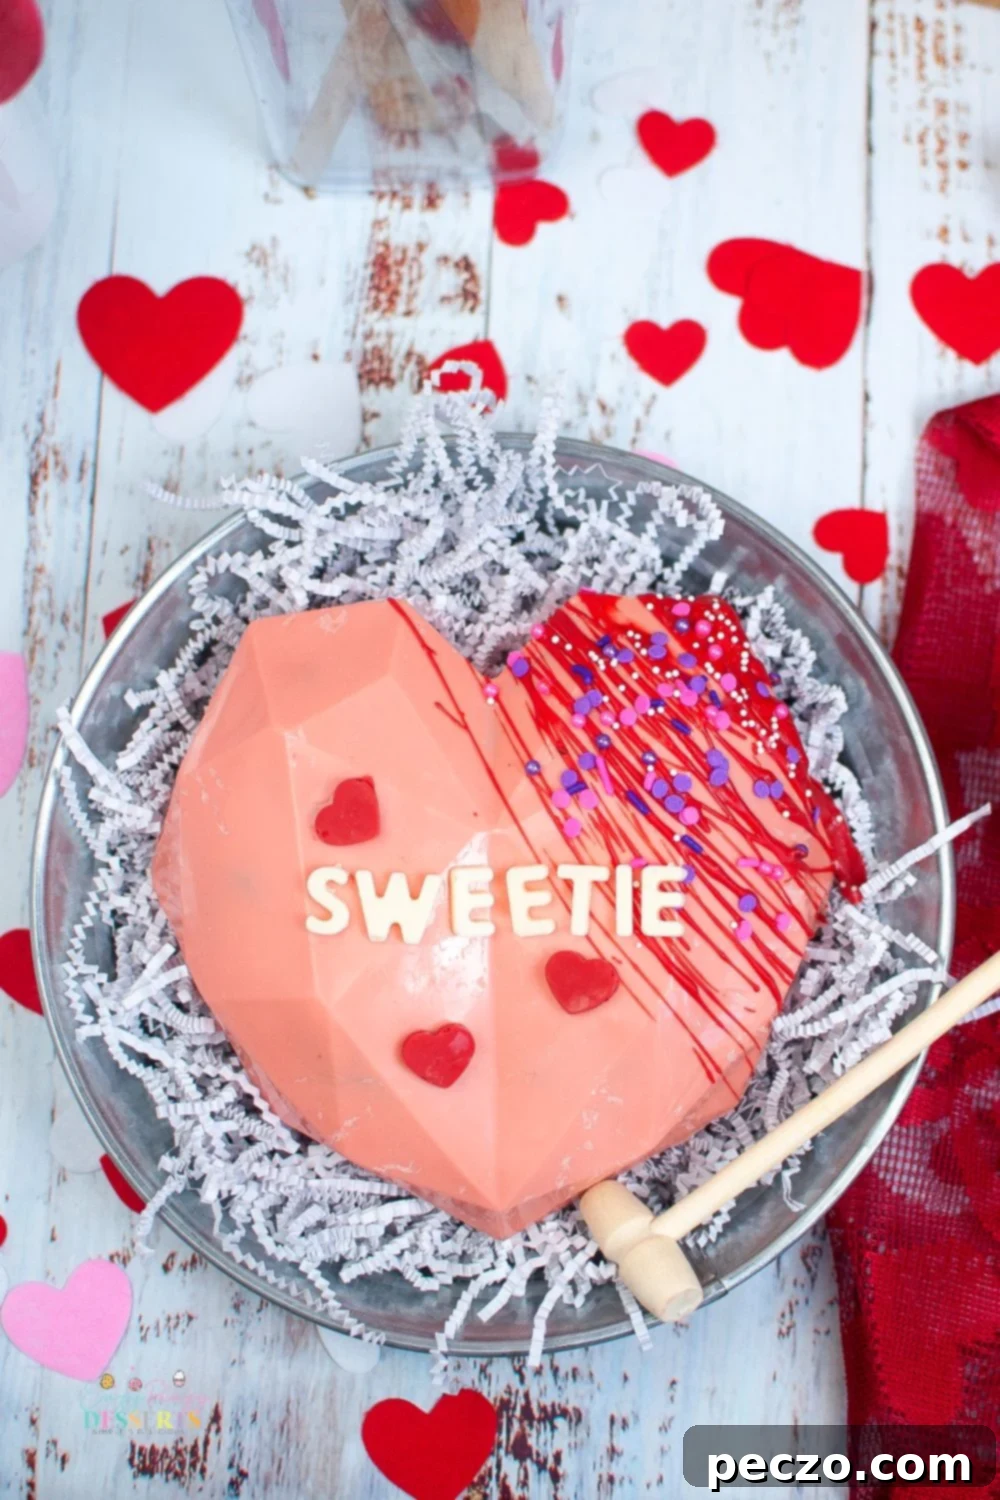
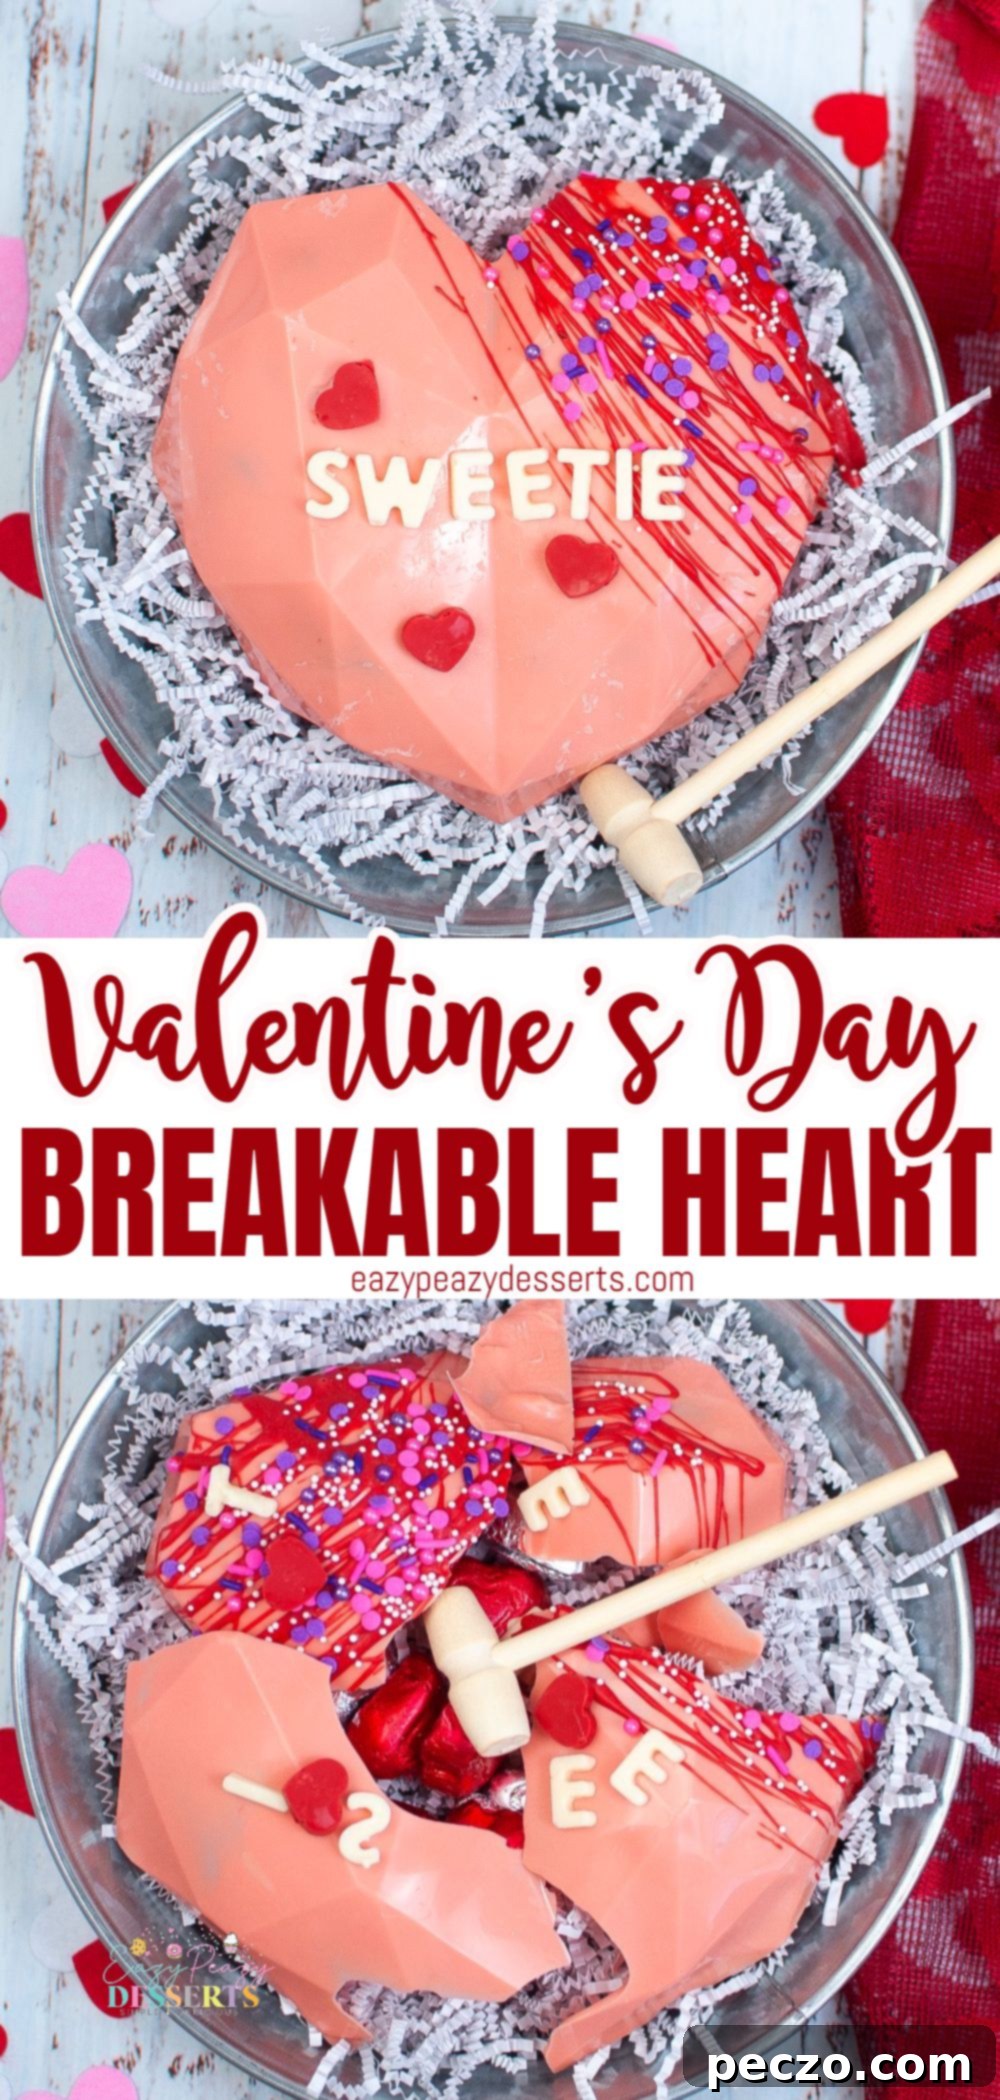
For those new to this enchanting dessert trend, a breakable chocolate heart is essentially a hollow, heart-shaped chocolate shell designed to be filled with an array of delightful surprises. Think of it as a mini chocolate piñata! Instead of simply unwrapping a box of chocolates, the recipient uses a small wooden mallet (often included with the gift) to smash open the chocolate shell, revealing the hidden treasures inside. This interactive “smash and reveal” moment is what makes these gifts so incredibly popular and enjoyable.
The beauty of a breakable heart lies in its versatility. While they are a massive hit for Valentine’s Day, their customizable nature makes them suitable for virtually any celebration. Imagine filling a pink heart with baby shower gender reveal candies, a birthday heart with mini bottles of liquor or jewelry, or even a proposal heart with an engagement ring! The possibilities are truly endless, allowing you to tailor the surprise to the recipient and the occasion. Beyond the thrill of the break, the chocolate itself is a delicious treat, making this a multi-senssensory experience from start to finish.
Beyond Valentine’s: Occasions for a Smashable Surprise
While often associated with Valentine’s Day due to its heart shape, the concept of a smashable chocolate surprise extends far beyond February 14th. Their customizable nature makes them an ideal gift for a multitude of celebrations throughout the year:
- Birthdays: Fill with small gifts, favorite candies, or a personalized message for an unforgettable birthday surprise.
- Anniversaries: A romantic and fun way to celebrate your love, perhaps with a piece of jewelry or a thoughtful note hidden inside.
- Gender Reveals: A popular choice for expectant parents, hide gender-specific colored candies or sprinkles for a sweet reveal moment.
- Proposals: Imagine hiding an engagement ring within the heart – a truly unique and memorable way to pop the question!
- Graduations: Fill with gift cards, money, or small mementos to celebrate academic achievements.
- Bridal Showers/Bachelorette Parties: A playful treat that can be customized with fun, themed fillers.
- Mother’s Day/Father’s Day: A thoughtful, handmade gift filled with treats specific to their tastes.
- Holiday Gifts: Adapt the colors and fillings for Christmas, Easter, or other festive occasions.
The magic of a breakable heart is in its ability to deliver joy and excitement, no matter the reason for the celebration. The anticipation built before the “smash” creates a moment of pure delight, transforming a simple chocolate treat into an experience.
Why DIY Your Breakable Heart?
While some retailers offer pre-made breakable hearts, crafting your own brings an unparalleled level of personalization and sentiment. A homemade gift carries a piece of your love and effort, making it significantly more meaningful to the recipient. Here’s why going the DIY route is the best choice:
- Complete Customization: Choose the chocolate type, colors, decorative elements (sprinkles, edible glitter, sugar flowers), and, most importantly, the hidden treasures inside.
- Budget-Friendly: Making your own can often be more cost-effective than purchasing a gourmet version, especially if you plan to make multiple hearts.
- Creative Outlet: It’s a fun and rewarding craft project that allows you to express your creativity.
- Involvement for Kids: It’s a fantastic activity to do with children (with adult supervision). They can help with measuring, stirring, decorating, and choosing the fillings, making it a memorable family project.
- The Sentiment of Handmade: A gift made with your own hands speaks volumes, conveying thoughtfulness and personal effort that store-bought items simply cannot replicate.
More Chocolate Delights You’ll Love:
If you enjoy working with chocolate, be sure to check out these other irresistible chocolate dessert recipes:
- Valentine Hot Chocolate Bombs
- Chocolate Mousse Cake with Ladyfingers
- Chocolate Fudge Cupcakes
- Easy Chocolate Buttercream Frosting
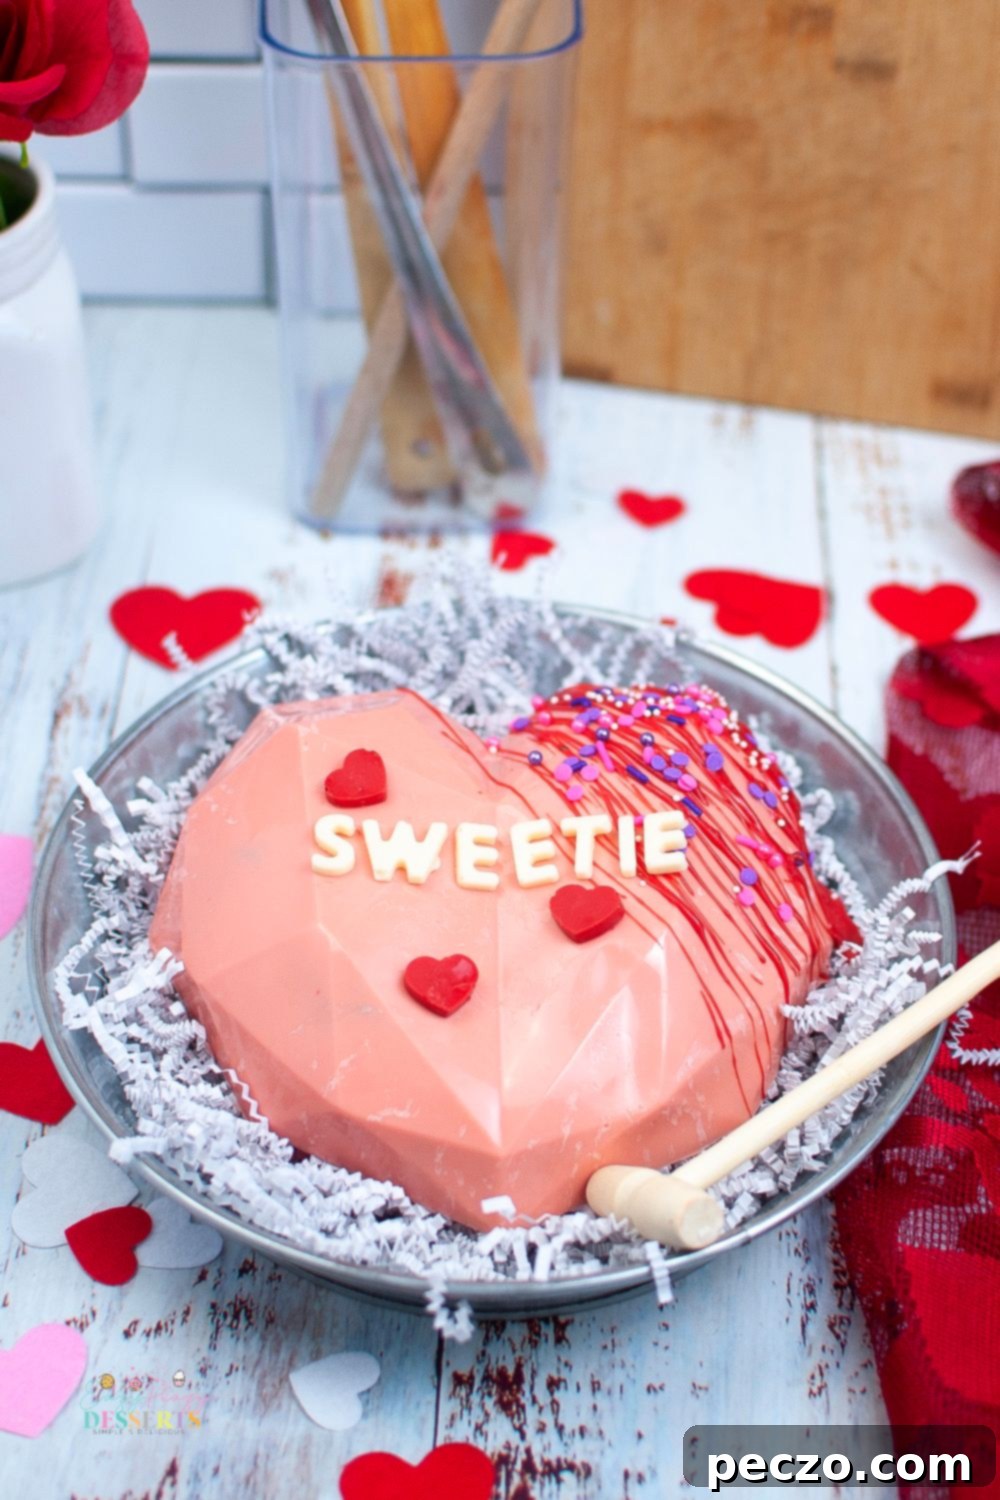
Choosing Your Chocolate: The Key to a Perfect Breakable Heart
The quality and type of chocolate you use are paramount to the success of your breakable heart. The goal is a shell that is firm, shiny, and snaps beautifully when broken. Understanding the difference between real chocolate and compound chocolate is the first step.
Real Chocolate vs. Compound Chocolate: What You Need to Know
- Real Chocolate (Couverture Chocolate): This is made with cocoa butter as its primary fat. It melts smoothly, has a rich flavor, and a satisfying “snap” when properly tempered. You’ll often see it in the form of high-quality chocolate bars or callets (small discs). For a truly professional-looking and tasting breakable heart, real chocolate is the preferred choice. It requires tempering to achieve its best qualities.
- Compound Chocolate (Candy Melts/Melting Wafers): These are made with vegetable oils (like palm kernel oil) instead of cocoa butter. They are designed to melt easily and set quickly without requiring tempering, making them very beginner-friendly. While convenient, compound chocolate generally lacks the same depth of flavor, luxurious mouthfeel, and crisp snap of real chocolate. It also tends to melt at a higher temperature, meaning it won’t melt as readily in your mouth.
For breakable hearts, especially if you’re looking for that impressive “snap” and a rich chocolate flavor, using real couverture chocolate and tempering it correctly is highly recommended. However, if ease and vibrant colors are your priority, high-quality candy melts can also produce a sturdy and visually appealing heart.
Mastering Chocolate Tempering for That Perfect Snap
Tempering chocolate is the process of precisely heating and cooling chocolate to stabilize its cocoa butter crystals. This process is crucial when using real chocolate because it achieves several desirable characteristics:
- Shiny Finish: Untempered chocolate can look dull or streaky. Properly tempered chocolate has a beautiful, glossy sheen.
- Firm Texture: It sets hard and holds its shape at room temperature, making it ideal for a sturdy breakable shell.
- Satisfying Snap: The hallmark of well-tempered chocolate is its crisp, audible snap when broken, rather than a soft bend or crumble.
- Smooth Release from Molds: Tempered chocolate contracts as it cools, making it easy to release from silicone or polycarbonate molds without sticking.
Without proper tempering, real chocolate will likely bloom (develop white streaks), be soft or sticky, and won’t release cleanly from the mold. The key is to melt the chocolate to a specific temperature, cool it down while agitating it to form stable crystals, and then gently warm it back up to a working temperature. This delicate temperature control ensures the cocoa butter crystallizes correctly. If you accidentally overheat your chocolate during the process, don’t despair! You can often re-temper it using the seeding method, which involves adding finely chopped tempered chocolate to cool the overheated batch down and encourage proper crystallization.
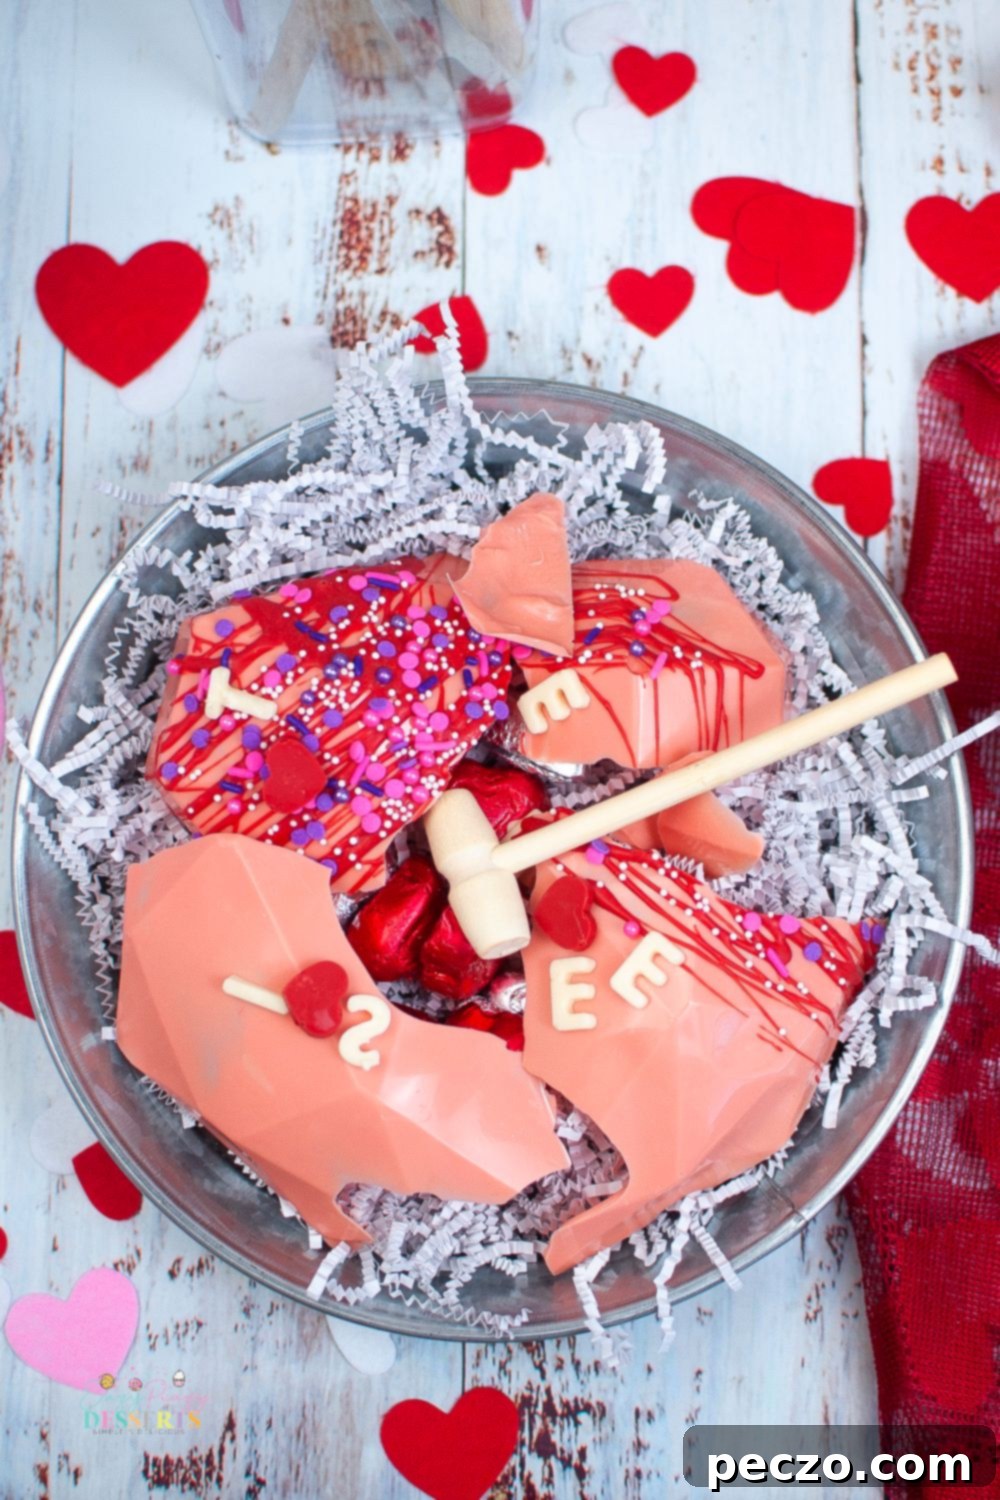
Step-by-Step Guide to Tempering Chocolate (Seeding Method)
For best results, use a reliable digital thermometer. Humidity can affect tempering, so choose a dry day if possible.
- Initial Melt: Start by finely chopping 2/3 of your real chocolate. Place it in a heatproof bowl set over a pot of simmering water (a double boiler), ensuring the bottom of the bowl does not touch the water. Stir constantly as the chocolate melts, heating it until it reaches between 110ºF – 120ºF (43ºC – 48ºC). Be extremely careful not to let any water or steam come into contact with the chocolate, as this will cause it to seize and become unusable.
- Cool Down (First Stage): Remove the bowl from the heat. Immediately begin adding small amounts of the reserved, finely chopped (unmelted) chocolate to the melted chocolate. Stir continuously. The goal here is to rapidly cool the chocolate down while introducing stable cocoa butter crystals from the solid chocolate. You can also transfer the melted chocolate to a cooler bowl to speed up this process. Continue stirring and adding chocolate until the mixture cools to about 100ºF (38ºC).
- Cool Down (Second Stage): Continue adding more of the chopped tempered chocolate and stirring until the chocolate reaches approximately 96-98ºF (35-37ºC).
- Final Cool Down: Keep stirring, adding small bits of solid chocolate as needed, until the chocolate reaches a working temperature of 79ºF (26ºC). This is the point where the stable crystals form.
- Gentle Reheating to Working Temperature: Very carefully, warm the chocolate slightly over the double boiler or in short bursts in the microwave (a few seconds at a time), stirring constantly. Your aim is to bring the temperature up to 86ºF-90ºF (30ºC-32ºC) for dark chocolate, or 84ºF-88ºF (29ºC-31ºC) for milk or white chocolate. This is the ideal temperature for working with the chocolate in your molds. At this stage, the chocolate should flow smoothly and retain its temper.
Crafting Your Breakable Heart: Tips, Tricks, and Customization
Making a breakable chocolate heart is a rewarding process, and a few expert tips can help ensure your success and elevate your creation:
Essential Tips for Success
- Compound Chocolate for Beginners: If tempering real chocolate seems daunting, start with compound chocolate (candy melts). While it won’t have the same “snap” or rich flavor, it’s very forgiving and will still produce a beautiful, sturdy heart, especially for intricate molds.
- Avoid Water and Steam: As mentioned in tempering, even a tiny drop of water can seize chocolate, turning it into a grainy, unusable mess. Ensure all your tools and bowls are completely dry.
- Even Coating is Key: When coating your mold, ensure the chocolate is evenly distributed. Thin spots can lead to weak points that break prematurely or create holes, ruining the surprise. Use a small, clean paintbrush or the back of a spoon to spread the chocolate up the sides of the mold. You might need two thin coats for extra strength, allowing the first to set before applying the second.
- Mini Breakable Hearts: For smaller treats or party favors, use mini heart-shaped silicone molds. These are perfect for hiding a single piece of candy or a tiny message, creating a charming set of edible gifts. They make excellent wedding or baby shower favors!
- Creative Decorating: Unleash your imagination! Decorate your hearts with a variety of edible elements. Options include colorful sprinkles, edible glitter spray, sugar flowers, chocolate drizzles (using contrasting colors), edible markers for drawing designs, or even edible gold/silver dust.
- Utilize Leftover Chocolate: Don’t let any melted chocolate go to waste! Pour it into small candy molds, drizzle it over pretzels, coat fresh fruits, or make simple chocolate bark by spreading it thinly on parchment paper and adding toppings.
- The Iconic Mallet: Don’t forget the essential accessory for any breakable heart: a small wooden mallet! This is crucial for the “smash” experience. Many heart mold kits come with these, or they can be purchased separately. Presentation is everything for the grand reveal!
- Mold Preparation: Ensure your silicone molds are thoroughly clean and dry before use. For an extra glossy finish on real chocolate, you can lightly buff the inside of polycarbonate molds with cotton before pouring.
- Cooling & Storage: Allow your chocolate hearts to cool and harden completely, preferably at room temperature. If you need to speed up the process, you can refrigerate them briefly (10-15 minutes), but be aware that rapid temperature changes can sometimes lead to blooming (white streaks) on tempered chocolate. Store finished hearts in a cool, dry place away from direct sunlight and strong odors.
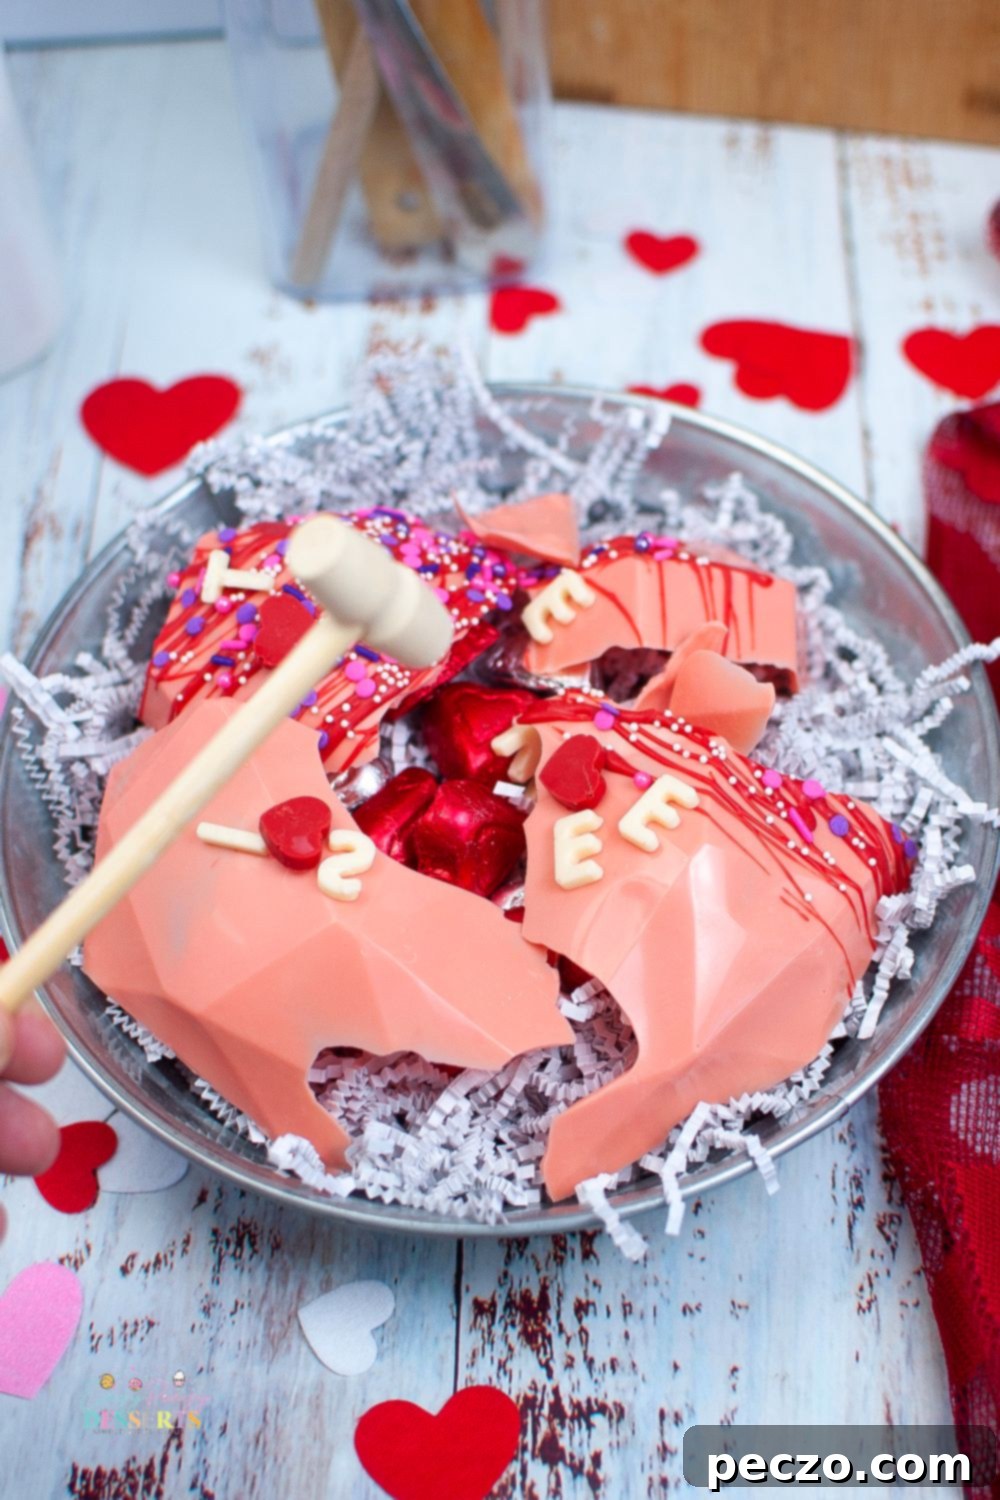
What You’ll Need: Ingredients & Tools
Gathering your supplies is the first step to creating your beautiful breakable chocolate heart. Here’s a comprehensive list of what you’ll need:
Ingredients:
- Chocolate Melting Wafers (or high-quality couverture chocolate) – Choose your main color (red or pink are popular for Valentine’s) and an additional color for drizzle/contrast.
- White Chocolate Melting Wafers (or white couverture chocolate) – Essential for crafting personalized messages and letters.
- Optional Decorations: Sprinkles of any kind, edible glitter spray, edible gold/silver dust, sugar flowers, edible pearls, edible markers.
- Fillings: Your choice of small candies, marshmallows, small toys, jewelry, gift cards, personalized notes, or any other small surprises!
Tools:
- Diamond Heart Mousse Cake Mold (silicone heart mold; many kits come with letter molds). Ensure it’s food-grade silicone.
- Letter Molds (if not included with your heart mold) – Silicone alphabet molds are widely available.
- Microwave-safe bowls – Several small bowls for different chocolate colors.
- Rubber Spatulas or Silicone Brushes – For stirring and spreading chocolate evenly.
- Digital Thermometer – Crucial if you are tempering real chocolate.
- Small Wooden Mallet – For the “smash” reveal.
- Parchment Paper or Silicone Mat – For cooling and working with chocolate.
- Optional: Disposable piping bags with small tips (for fine drizzles or detailed work), food-grade gloves (to avoid fingerprints on the finished chocolate).
How to Make Your Valentine’s Day Breakable Heart: A Simple Guide
Once you have your ingredients and tools ready, follow these straightforward steps to create your magnificent breakable chocolate heart:
-
Melt the Heart Chocolate: Separate your chosen colors of chocolate into individual microwave-safe bowls. Take 6 ounces of your main chocolate color (e.g., pink or red for Valentine’s). Melt it in the microwave in 30-second increments, stirring thoroughly after each interval. Continue until the chocolate is smooth and completely melted. If using real chocolate, ensure it’s properly tempered using the method described above. Pour the melted chocolate into your heart mold. Use the back of a spoon or a small silicone brush to evenly distribute the chocolate, ensuring it fully coats the sides and leaves no thin spots. Allow the chocolate heart shell to cool and harden completely. You can place it in the refrigerator for about 10-15 minutes to speed up the setting process.

-
Prepare the Chocolate Letters: Next, melt 2 ounces of white chocolate (or any desired color for your message) using the same 30-second microwave increment method, stirring after each. Decide on the message you want to spell out (e.g., “LOVE,” “BFF,” a name) and carefully spoon the melted white chocolate into the corresponding letter molds. Ensure the chocolate fills the molds evenly. Set these aside to cool and harden fully; this can also be done in the refrigerator for a few minutes.

-
Demold and Drizzle: Once your chocolate heart shell is firm, carefully peel the silicone mold away from the hardened chocolate. Take your time to avoid any breakage. Now, melt 2 ounces of your chosen chocolate for the drizzle (this could be a contrasting color or the same as the heart). Use a whisk or a small spoon to create an artistic drizzle pattern over one corner or across the top of the heart. If you’re adding sprinkles or other small decorations, apply them immediately while the drizzle chocolate is still wet, ensuring they adhere securely before it dries.

-
Attach the Letters: Gently remove your hardened chocolate letters from their molds. Carefully arrange them on the surface of your decorated chocolate heart to form your personalized message. For a secure attachment, you can use a tiny dab of freshly melted chocolate on the backside of each letter as an edible adhesive. This will ensure they stay in place until the heart is broken.

-
Fill with Surprises & Prepare for the Smash: This is the exciting part! Carefully lift your beautifully decorated chocolate heart. Beneath it, on a plate or in a box, arrange your chosen surprises. This could be an assortment of candies, a small piece of jewelry, miniature toys for children, a heartfelt handwritten note, or even gift cards. Once your surprises are arranged, gently place the chocolate heart on top, encasing them. Present your completed masterpiece to your loved one with a small wooden mallet, inviting them to smash it open and reveal the delightful treasures hidden within! The anticipation and the eventual “smash” are what make this gift truly unforgettable.

Make it Personal: Beyond the Smash
As emphasized throughout, the breakable chocolate heart is not just a seasonal treat; it’s a versatile canvas for your creativity and affection. Its appeal extends far beyond Valentine’s Day, making it a perfect handmade gift for almost any milestone or celebration in a loved one’s life. Think about the recipient’s favorite colors, hobbies, or inside jokes to truly personalize their experience.
For a birthday, perhaps fill it with their favorite gourmet candies and a small, cherished item. For an anniversary, a heartfelt message etched in chocolate and a token of your love. For a graduation, small rolled-up bills or a gift card to their favorite store. The “smash” experience itself is a moment of pure fun and anticipation, making the unveiling of the hidden treasures all the more exciting. This isn’t just a dessert; it’s an experience, a memory, and a heartfelt gesture all rolled into one delightful package.
Please share your unique ideas and stories in the comments below! We’re always eager to hear how you’ve personalized your breakable chocolate hearts and made them special. Your creative touches might inspire others!
Pin this recipe to save for later!
Print the Recipe Card
Valentine’s Day Breakable Heart
Looking for a fun and unique way to celebrate Valentine’s Day? A breakable heart is the perfect way to show your loved one how much you care.
Details
- Author: Petro
- Prep Time: 5 mins
- Cook Time: 0 mins
- Cooling Time: 15 mins
- Total Time: 20 mins
- Course: Dessert
- Cuisine: American
- Servings: 1 heart
Equipment
- Diamond Heart Mousse Cake Mold (often comes with letter molds)
- Letter molds (if not included with heart mold)
- Microwave safe bowls
- Rubber Spatulas or Silicone Brushes
- Digital Thermometer (if tempering real chocolate)
- Small Wooden Mallet
Ingredients
- 6 oz chocolate melting wafers (red or pink)
- 2 oz chocolate melting wafers (white)
- 2 oz chocolate melting wafers (color of your choosing for drizzle)
- Sprinkles of any kind for decorating
- Assorted candies, small gifts, or other surprises for filling
Instructions
-
Separate each color chocolate into microwave-safe bowls. Melt 6 oz of your chosen chocolate for the heart by microwaving in 30-second intervals, stirring thoroughly after each interval until smooth. Pour the melted chocolate into your heart mold. Ensure the chocolate is evenly distributed, coating all sides of the mold. Allow it to cool completely and harden.

-
Melt 2 oz of white chocolate for the letters using the same 30-second microwave intervals, stirring each time. Carefully spoon the melted white chocolate into your chosen letter molds to spell out your desired message. Let these cool and harden fully.

-
Once the heart is completely set, carefully peel the silicone mold away from the hardened chocolate. Next, melt 2 oz of your chosen chocolate for the drizzle, again using 30-second microwave increments. Use a whisk or spoon to artfully drizzle the melted chocolate over one corner or across the top of the heart. If you’re using sprinkles or other decorations, add them immediately before the drizzle sets.

-
Gently remove the hardened chocolate letters from their molds. Position them on your breakable heart to form your personalized message. For extra adhesion, you can apply a tiny dab of freshly melted chocolate to the backside of each letter before placing it on the heart.

-
To prepare for the grand reveal, lift your finished chocolate heart and place it over a selection of delightful surprises! These could include candies, small jewelry items, tiny toys for children, heartfelt notes, or even gift cards. Present your masterpiece with a small wooden mallet, inviting your loved one to smash it open and discover the treasures within!

Nutrition Information (per 1 heart serving)
- Calories: 1228 kcal
- Carbohydrates: 205 g
- Protein: 19 g
- Fat: 40 g
- Saturated Fat: 12 g
- Polyunsaturated Fat: 12 g
- Monounsaturated Fat: 14 g
- Cholesterol: 6 mg
- Sodium: 1956 mg
- Potassium: 595 mg
- Fiber: 10 g
- Sugar: 84 g
- Vitamin A: 34 IU
- Calcium: 88 mg
- Iron: 11 mg
Keywords
breakable chocolate, pink breakable heart, smashable heart, valentine’s day breakable heart, DIY chocolate heart, homemade gift, surprise dessert, chocolate tempering, personalized gift
Tried this recipe? Let us know how it was!
