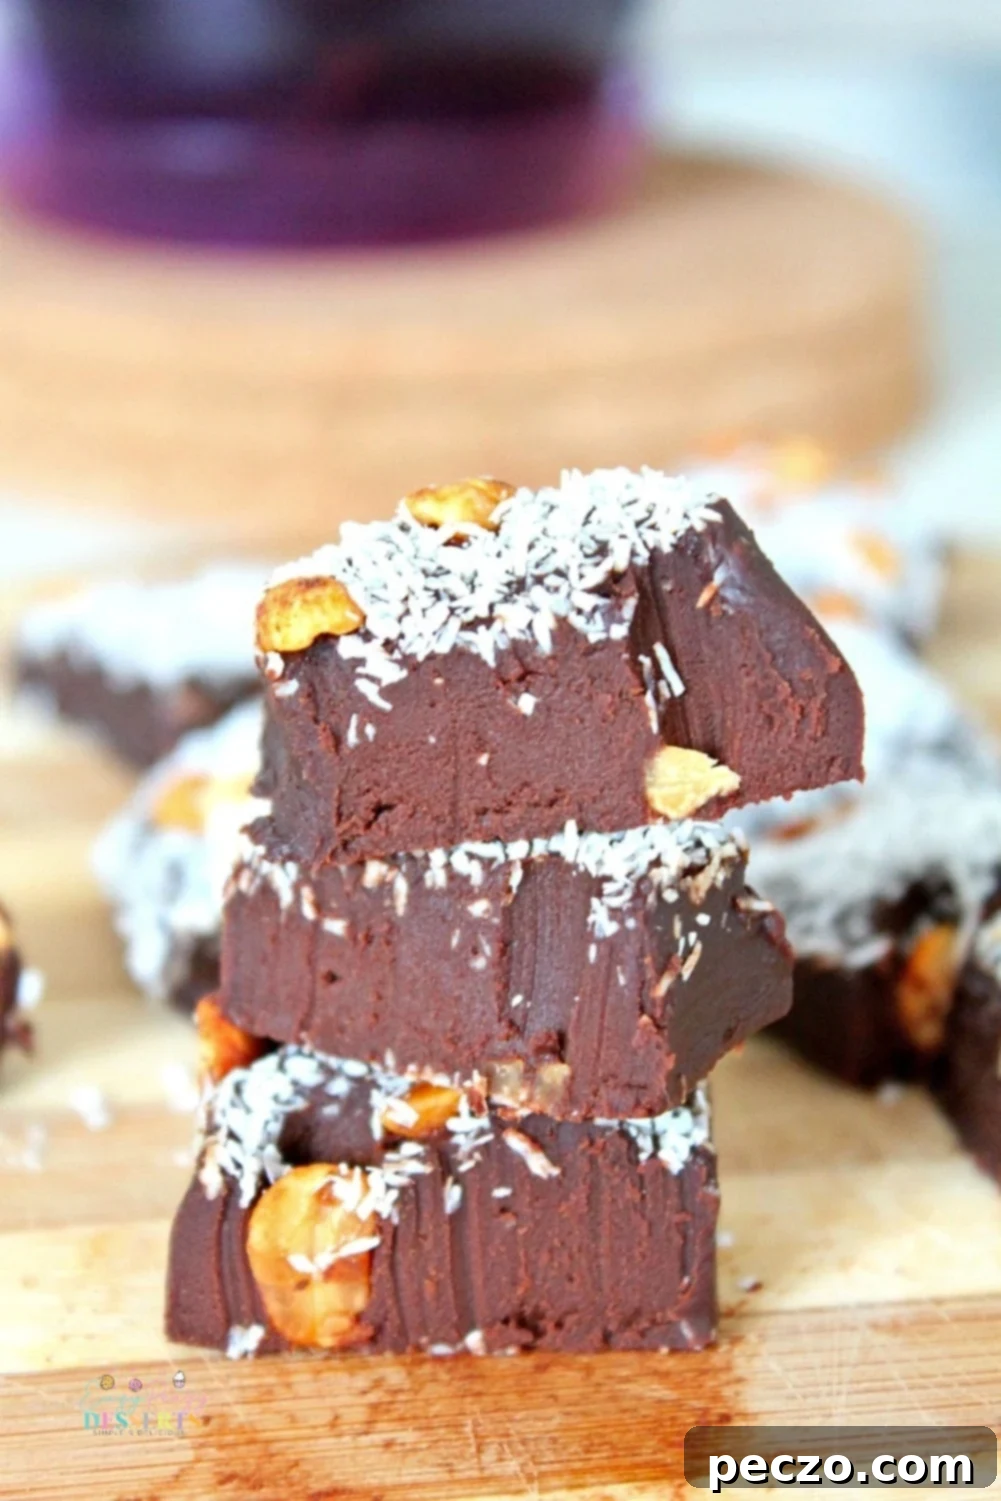
The Easiest 2-Ingredient Fudge Recipe: Quick, Delicious, and Foolproof!
Imagine a dessert so simple, so quick, and so unbelievably delicious that it feels like magic. This ultra-easy, lightning-fast 2-ingredient fudge is precisely that! In mere minutes, you can whip up a batch of rich, creamy chocolate fudge that will have everyone convinced you’re a seasoned candy-making superstar. Say goodbye to complicated steps and endless ingredient lists – this recipe is all you need in your life for instant gratification!
Irresistible 2-Ingredient Fudge in Minutes
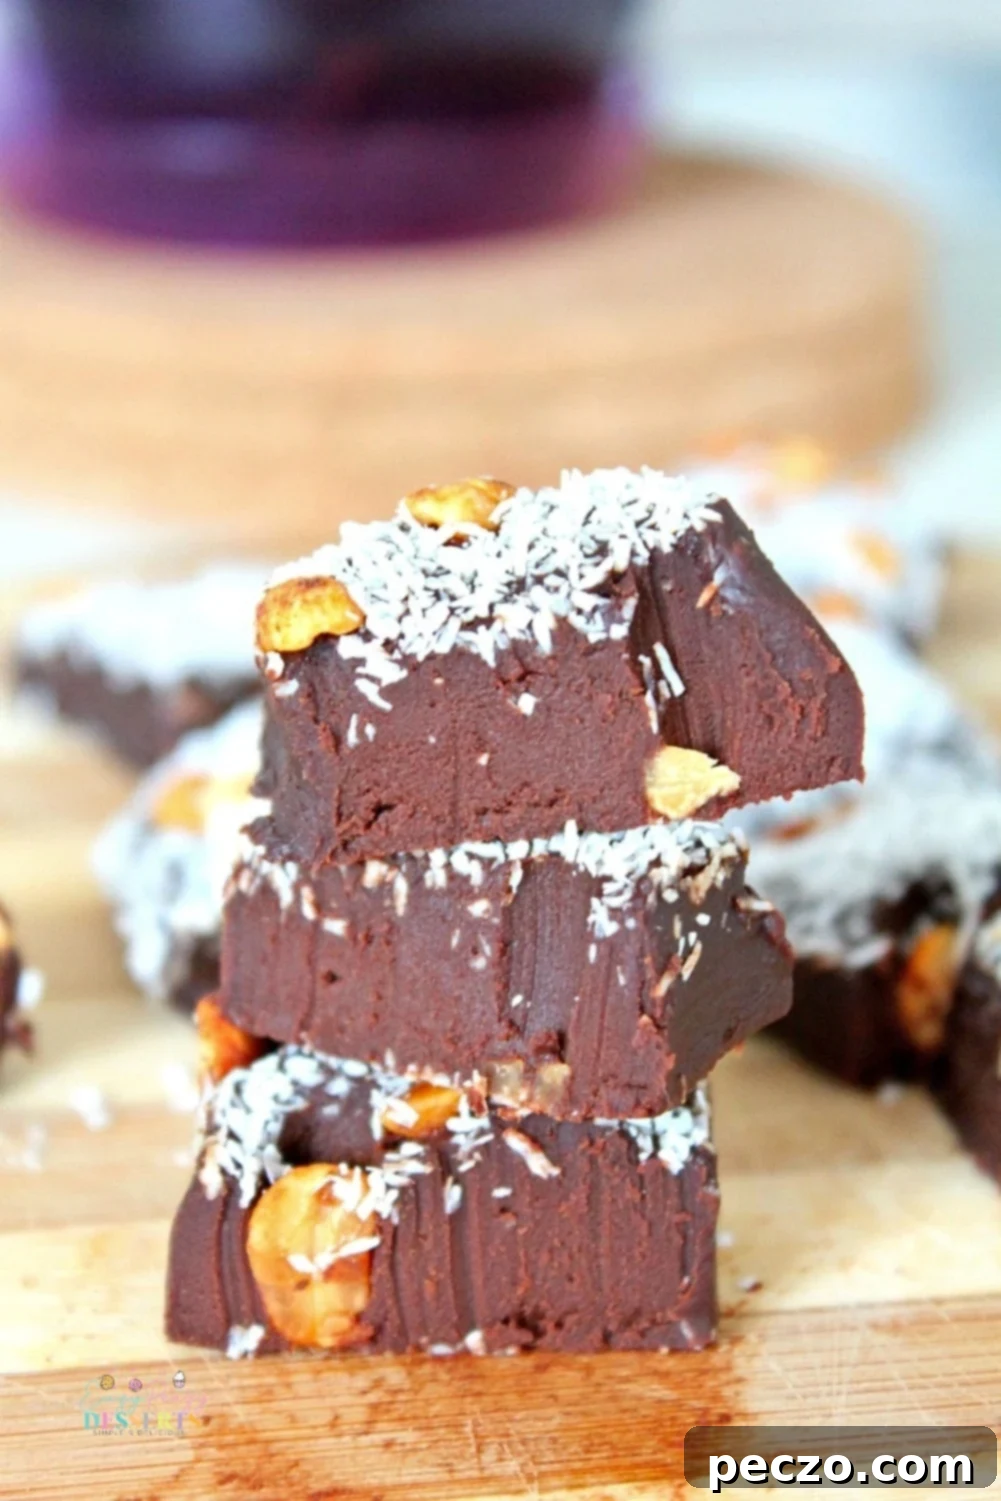
Are you craving the silky smooth indulgence of homemade fudge but find yourself short on time or patience? Look no further! This remarkable recipe for 2-ingredient fudge is so incredibly straightforward, even a novice in the kitchen can achieve perfect results. All you truly need are two pantry staples and the convenience of a microwave, making it one of the simplest sweet treats you’ll ever prepare. Best of all, this delightful dessert requires just about 5 minutes of your active time, transforming your kitchen into a haven of chocolatey aroma with minimal effort.
Who doesn’t adore the rich, melt-in-your-mouth texture of a perfectly crafted fudge? It’s the quintessential dessert, ideal for any gathering, a quiet evening in, or simply to satisfy an intense chocolate craving. Its sweetness and depth of chocolate flavor are universally appealing. With this incredibly quick and effortless recipe for 2-ingredient fudge, that beloved treat is no longer a distant dream but an anytime reality. Forget hours of stirring over a hot stove; your journey to fudge bliss is now just minutes away!
Many traditional chocolate fudge recipes can be daunting, demanding precise temperatures, constant stirring, and a multitude of ingredients. While the outcome is often rewarding, the process can deter even enthusiastic bakers. Achieving a truly superb chocolate fudge that is both easy to make and doesn’t require a significant time commitment has often seemed like an elusive goal – until now.
This innovative recipe for 2-ingredient chocolate fudge is the ultimate solution to those challenges. By combining just two essential ingredients – quality chocolate and sweetened condensed milk – and eliminating any extensive prep time or baking, you can effortlessly create this luxurious and satisfying dessert. It’s a game-changer for anyone who loves homemade treats but values efficiency and simplicity. Prepare to impress yourself and everyone else with your newfound fudge-making prowess!
Explore More Delicious Fudge Recipes:
- Homemade Chocolate Fudge with Milk Powder
- Creamy Peanut Butter Fudge Cheesecake Bars
- Festive No-Bake Grinch Fudge
- Colorful Funfetti Strawberry Fudge
Fudge is a universally loved confection, and this particular rendition is no exception. It’s the perfect sweet addition to any party, potluck, or family gathering – watch it vanish before your eyes! With just a few straightforward steps, you can create a truly delectable chocolate fudge that will earn rave reviews. Plus, it’s an excellent way to utilize any leftover chocolate you might have lingering in your pantry.
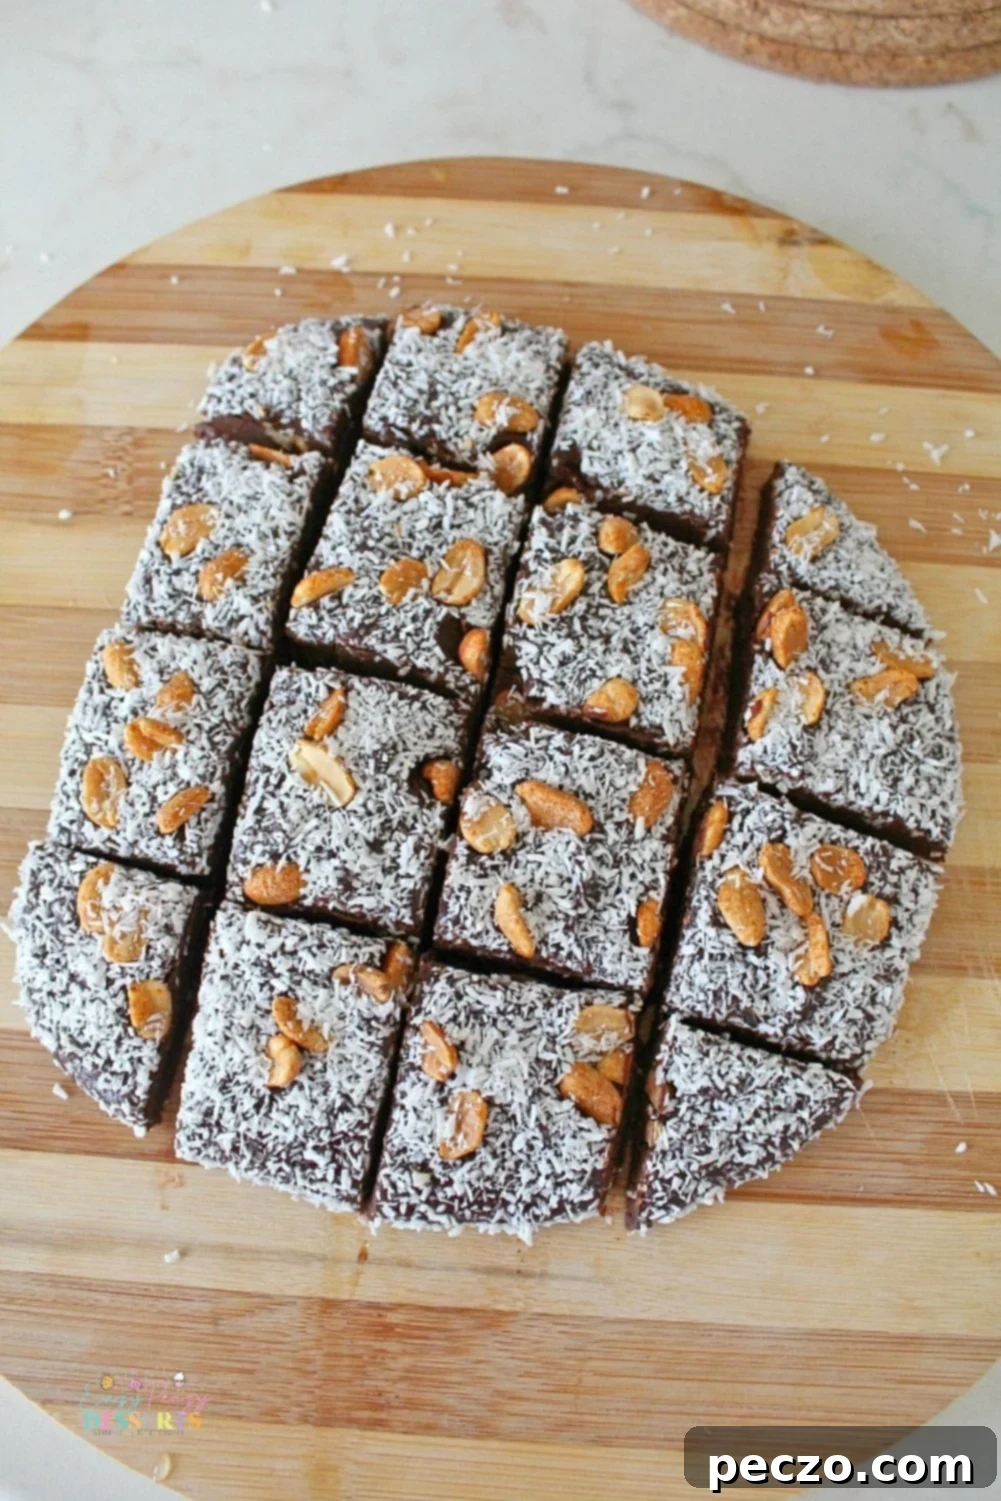
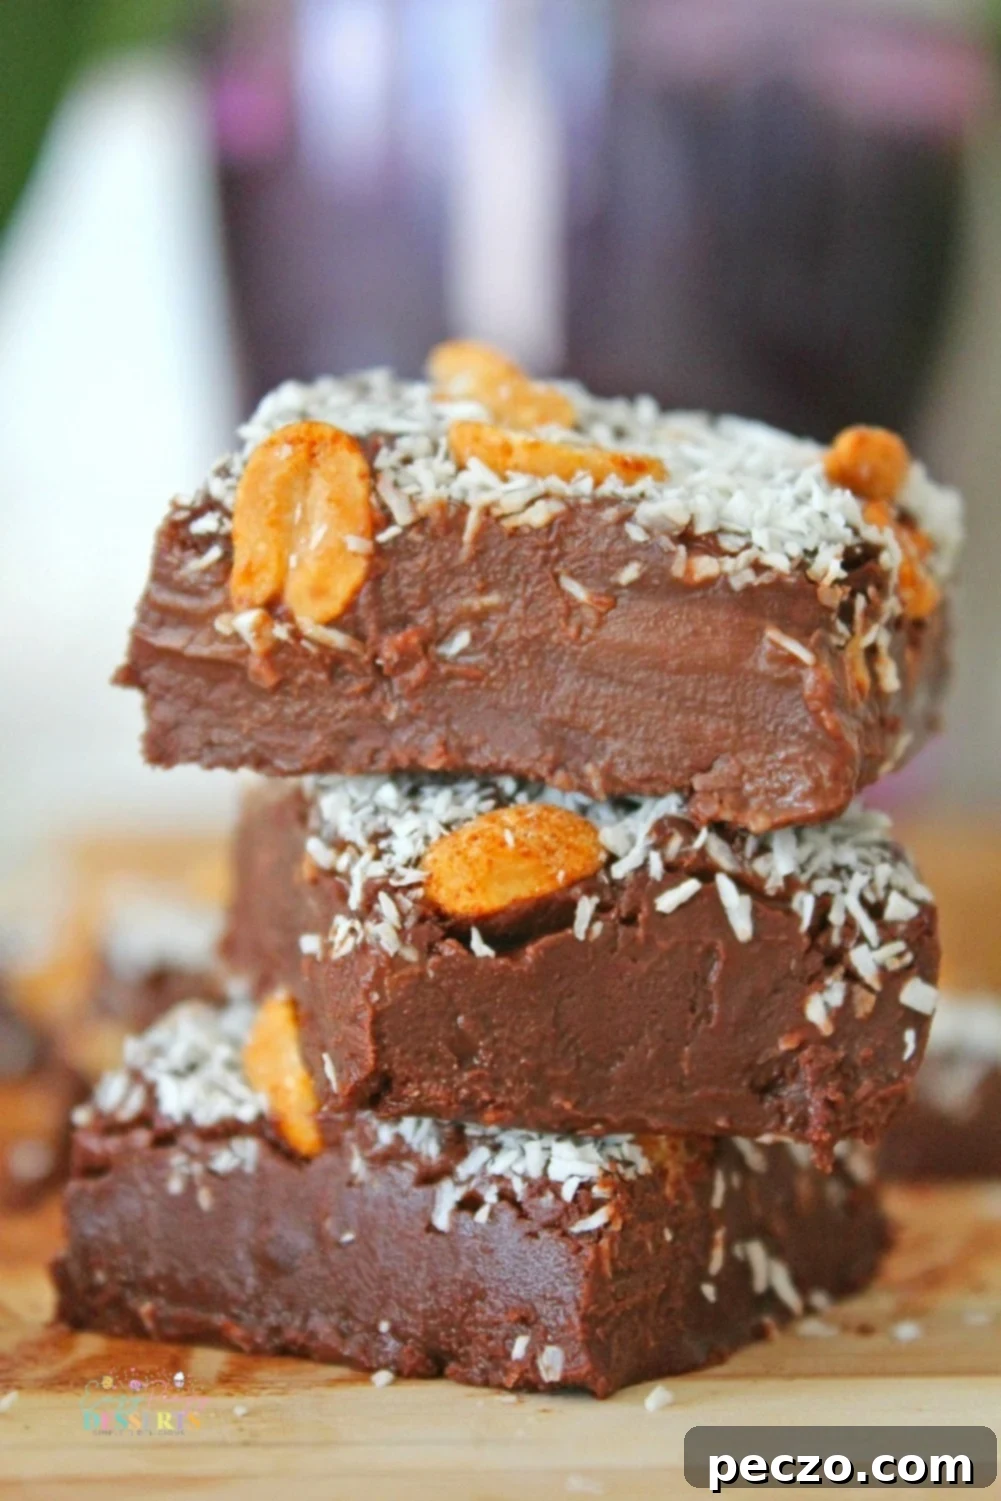
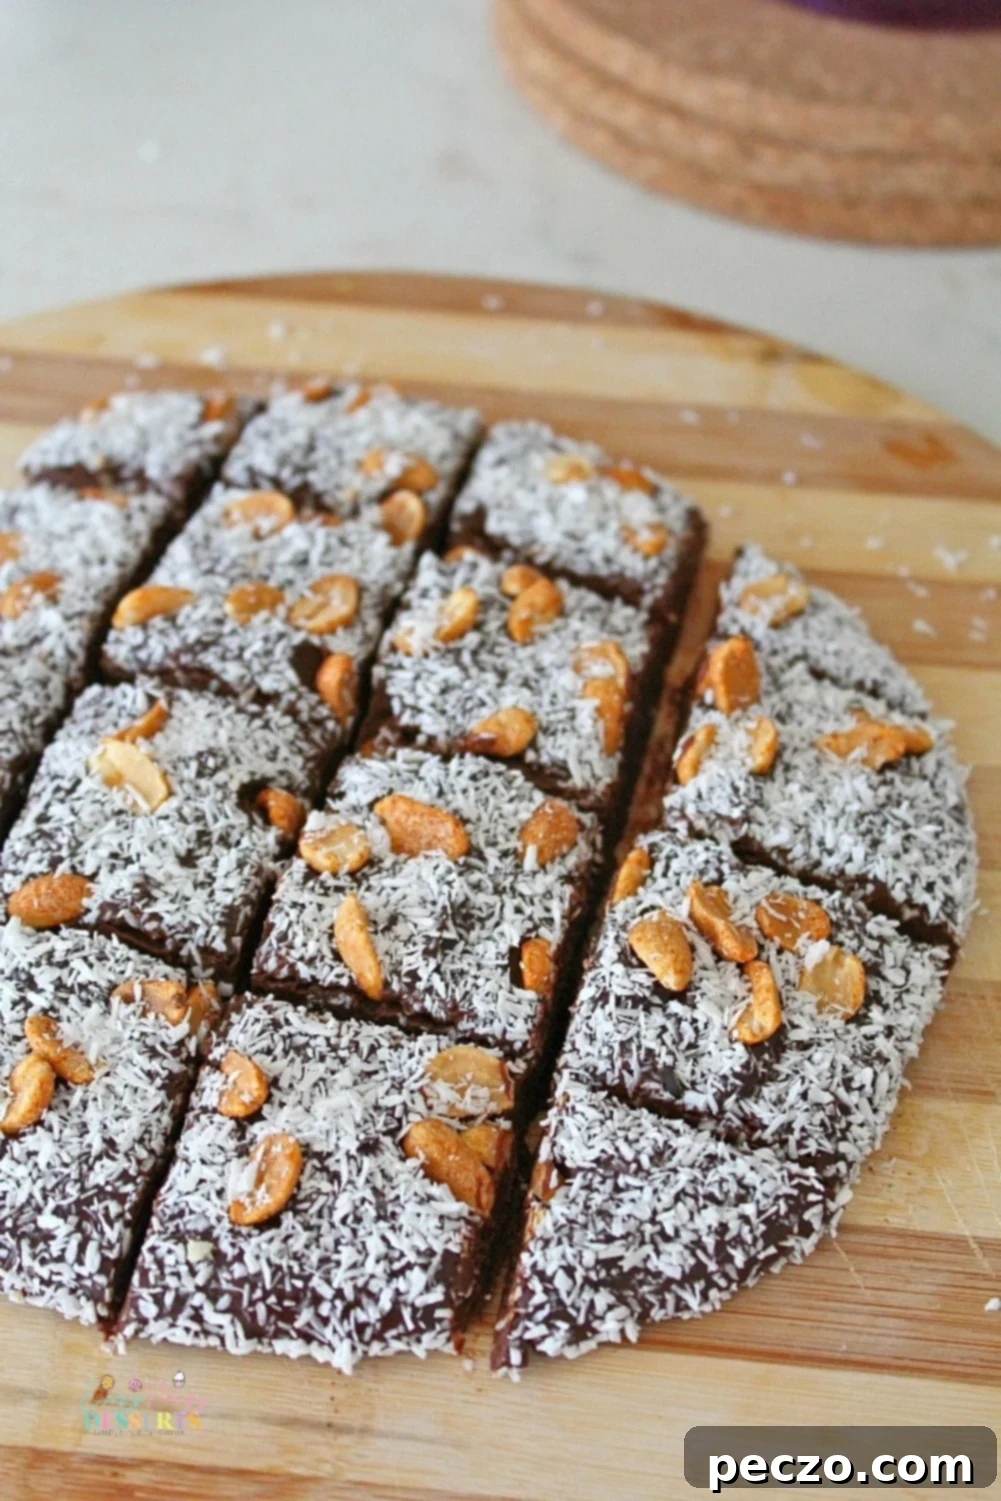
Consider this foolproof and incredibly simple microwave chocolate fudge as the perfect blank canvas for endless flavor possibilities. It serves as an ideal base for nearly any fudge creation. Once you’ve mastered the basic two-ingredient technique, you can easily customize it by adding your favorite nuts, toppings, or extracts. For example, I recently added a touch of vanilla extract, chopped peanuts, and delicate coconut flakes at my daughter’s request, elevating an already amazing treat. But honestly, it tastes absolutely incredible and stands perfectly on its own, showcasing the pure goodness of chocolate and sweetened condensed milk!
What Exactly Defines Fudge?
At its core, fudge is a type of confectionery typically made by heating sugar, butter, and milk (or cream) to a specific temperature, then beating the mixture while it cools to achieve a smooth, crystalline texture. It’s known for its soft, melt-in-your-mouth consistency that is richer and less sticky than caramel, and smoother than nougat. While the classic definition involves a cooked sugar mixture, our 2-ingredient version brilliantly bypasses the complex cooking process by leveraging the emulsifying properties of condensed milk and melted chocolate.
When made with only chocolate and condensed milk, the result is a dense, creamy bar that resembles a very soft, intensely flavored chocolate bar. However, the true beauty of fudge lies in its adaptability. Introducing various flavors and mix-ins can dramatically transform its character. A classic addition like vanilla extract can deepen the chocolate notes, while incorporating crunchy nuts such as walnuts or pecans, or tropical coconut flakes, provides delightful textural contrast and an extra layer of flavor. The possibilities for customization are vast, allowing you to tailor this simple base to your exact preferences.
Condensed Milk vs. Evaporated Milk: Which is Better for Fudge?
Both condensed milk and evaporated milk are canned milk products, but they are distinctly different and impact fudge differently. Evaporated milk has had about 60% of its water removed, but it remains unsweetened. Sweetened condensed milk, on the other hand, is not only thickened by removing water but also heavily sweetened with sugar, making it much sweeter and thicker than evaporated milk. For this particular 2-ingredient recipe, sweetened condensed milk is crucial as it provides both the sweetness and the thick, creamy base necessary for the fudge to set correctly with minimal effort.
While some traditional fudge recipes might use evaporated milk in combination with additional sugar and butter, for simplicity and guaranteed success in a 2-ingredient microwave recipe, sweetened condensed milk is the star. Its inherent sweetness and viscosity are what allow the fudge to come together so effortlessly. Both approaches can yield delicious fudge, but for the ease and speed promised by this recipe, sweetened condensed milk is the superior choice.
What Can I Substitute for Sweetened Condensed Milk?
Sweetened condensed milk has become a popular ingredient in many quick dessert recipes, including this fudge. However, if you find yourself without a can or prefer an alternative, finding a direct, 2-ingredient substitute for *this specific recipe* is challenging, as the condensed milk provides both sweetness and a crucial binding agent. For a truly 2-ingredient fudge, it’s really the unique properties of sweetened condensed milk that make it work.
If you’re willing to add a third ingredient or switch to a slightly more traditional (but still simple) method, you could explore options like:
- **Evaporated Milk + Sugar + Butter:** This would require more than two ingredients but would mimic a more classic fudge base.
- **Heavy Cream + Sugar:** Again, more than two ingredients and would likely involve more cooking.
For the absolute easiest, true 2-ingredient fudge as presented here, it’s highly recommended to stick with sweetened condensed milk. Its unique composition is what makes this recipe so incredibly simple and effective.
What If I Don’t Have a Microwave?
The beauty of this incredibly versatile 2-ingredient fudge recipe extends beyond the microwave! While the microwave offers unparalleled speed, you can absolutely achieve the same delicious results using a conventional oven or even a stovetop double boiler. If a microwave isn’t an option or you simply prefer an alternative method, here’s how you can adapt the recipe:
Oven Method:
Prepare your baking dish by buttering it and lining it with parchment paper, just as you would for the microwave method. Place your chocolate chips and sweetened condensed milk in an oven-safe bowl. Bake at 350 degrees Fahrenheit (175 degrees Celsius) for approximately 15-20 minutes, or until the chocolate is visibly melted and glossy. Carefully remove from the oven and stir with a spatula until the mixture is perfectly smooth and combined. Pour into your prepared pan and let it cool completely before slicing. This method yields a delicious chocolate candy bar-style fudge with a slightly different depth of flavor.
Stovetop Double Boiler Method:
For those who prefer a more controlled melting process, a double boiler works beautifully. Fill a saucepan with about an inch or two of water and bring it to a simmer. Place a heat-safe bowl (make sure it fits snugly without touching the water) over the simmering water. Add your chocolate chips and sweetened condensed milk to the bowl. Stir continuously until the chocolate is fully melted and the mixture is smooth and well combined. This gentle heat ensures the chocolate melts evenly without scorching. Once smooth, pour into your prepared pan and allow it to cool.
No matter your kitchen setup, you can still enjoy this fantastic two-ingredient fudge!
Can I Substitute the Chocolate?
Absolutely! The type of chocolate you choose will significantly influence the final taste and texture of your 2-ingredient fudge. This recipe is incredibly adaptable to your chocolate preferences. Here are some considerations:
- Baking Chocolate vs. Chocolate Chips: Using high-quality baking chocolate (like bittersweet or semi-sweet chocolate bars, finely chopped) is generally recommended over standard chocolate chips. Baking chocolate often contains fewer stabilizers, which means it melts more smoothly and results in a richer, more luxurious flavor and creamier texture. Chocolate chips, while convenient, are designed to hold their shape when baked, so they might require a bit more stirring to achieve a perfectly smooth consistency.
- Dark Chocolate: For an intense, less sweet fudge, opt for dark chocolate. If using very dark chocolate (70% cocoa or higher), you might find the fudge a bit firmer, and you may want to slightly reduce the amount of chocolate or slightly increase the condensed milk for a softer bite, though typically, a 1:1 ratio works well.
- Milk Chocolate: If you prefer a sweeter, milder fudge, milk chocolate is a great choice. It melts beautifully and produces a very creamy, classic fudge flavor.
- White Chocolate: Yes, you can make a delightful white chocolate fudge with this recipe! Just swap out the dark or milk chocolate for white chocolate chips or chopped white baking chocolate.
- Flavor Adjustments: Keep in mind that the higher the cocoa content of your chosen chocolate, the less naturally sweet it will be. While the sweetened condensed milk provides the primary sweetness, the overall sweetness level will vary. If using a very bitter chocolate, you might find the fudge less sweet overall.
The most important factor is to use a chocolate you genuinely enjoy eating on its own, as its flavor will be prominent in the finished fudge. Don’t hesitate to experiment to find your perfect balance!
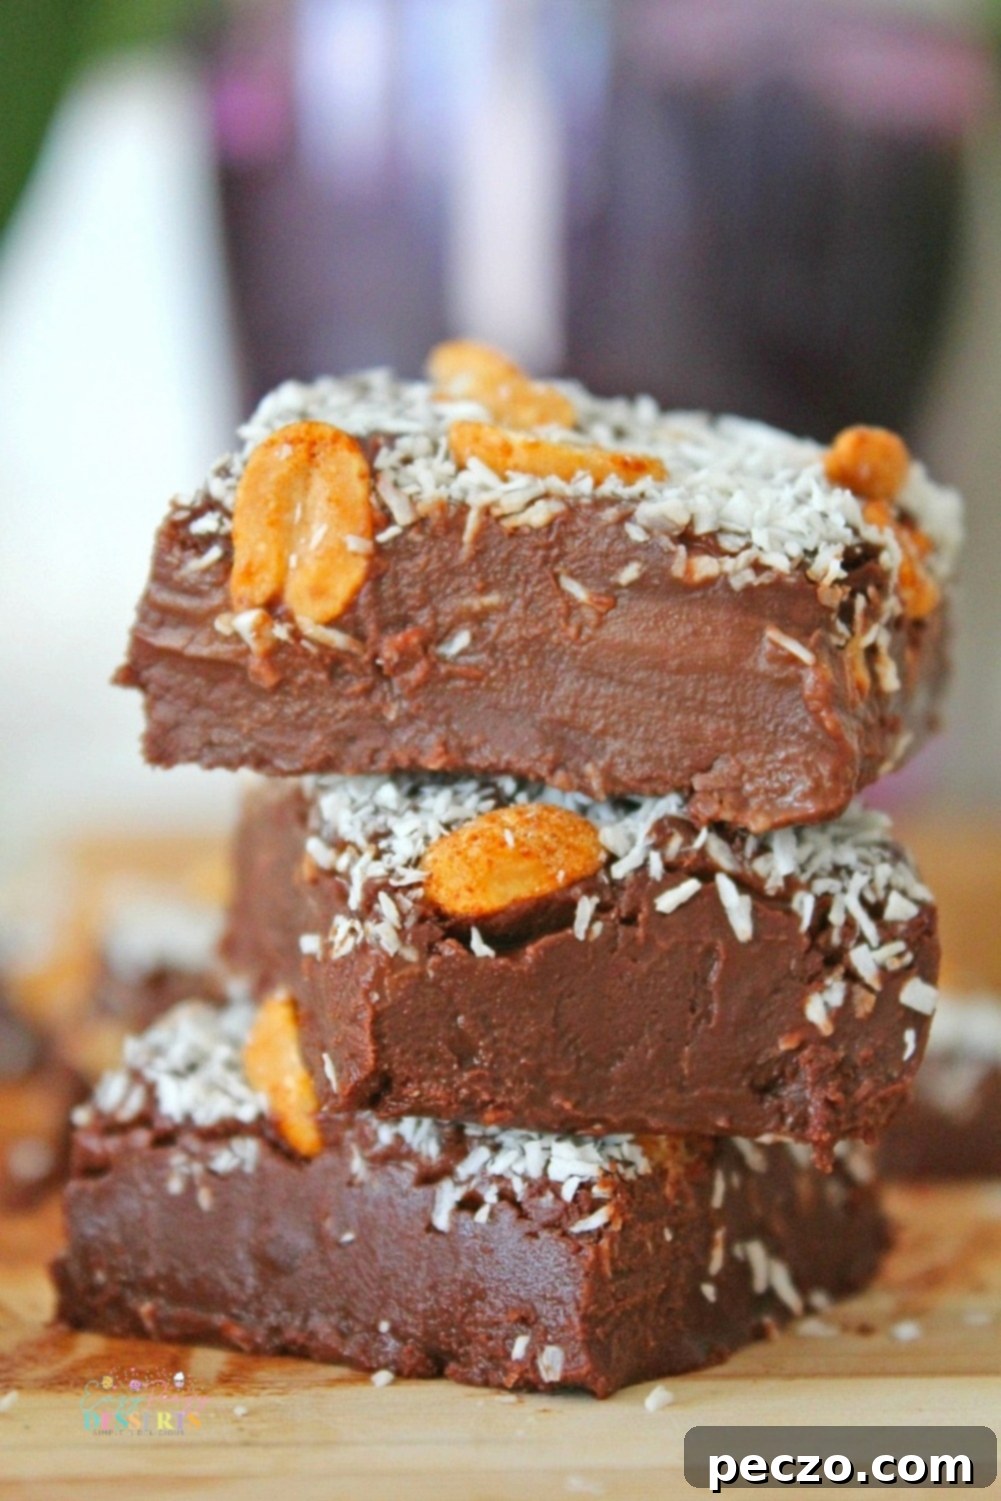
Unleash Your Creativity: What Can I Add to Chocolate Fudge?
This 2-ingredient chocolate fudge recipe is an incredible base, ready to be transformed into countless delightful variations! Once your basic fudge mixture is smooth and melted, the possibilities for customization are virtually endless. Think of it as a blank canvas for your culinary imagination:
- Nuts: Add crunch and flavor with chopped walnuts, pecans, almonds, pistachios, or hazelnuts. Lightly toast them beforehand for an enhanced nutty aroma.
- Dried Fruits: Introduce chewy texture and bursts of flavor with dried cranberries, cherries, raisins, or even candied orange peel.
- Candies: Crush up your favorite candy bars (like Snickers, Butterfingers, or Heath bars), mini M&M’s, peanut butter cups, or chopped caramels.
- Sprinkles: For a festive touch, stir in some colorful sprinkles, especially for birthday parties or holiday treats.
- Coconut: Toasted or untoasted coconut flakes add a lovely tropical flavor and texture.
- Extracts: Enhance the flavor profile with a few drops of extract. Classic vanilla extract is always a winner, but consider almond, peppermint (for mint chocolate fudge!), coffee, or even orange extract.
- Marshmallows: Mini marshmallows can be folded in for a Rocky Road-style fudge.
- Pretzels: Crushed pretzels offer a delightful salty-sweet crunch.
- Cookies: Crumble in Oreo cookies, graham crackers, or shortbread for an extra layer of texture and flavor.
For truly special occasions, you can even swirl in a dollop of cream cheese frosting or vanilla frosting after pouring the fudge into the pan, creating beautiful marbling and an extra layer of decadence. Experiment with different types of chocolate too! Swap the dark chocolate for white chocolate chips to create a luscious white chocolate fudge, perfect for adding colorful mix-ins. Or, for a festive holiday treat, add a few drops of green food coloring and a dash of mint extract to your white chocolate fudge for a vibrant and refreshing mint chocolate creation. The key is to think about what flavors and textures you love and incorporate them – this is truly such a versatile and simple fudge recipe!
How Do I Get Fudge to Harden Perfectly?
Once you’ve poured your delectable 2-ingredient chocolate fudge into the pan, the waiting game begins. For optimal firmness and ease of cutting, proper setting is key. If, after initial cooling at room temperature, your fudge isn’t quite as firm as you’d like, a simple solution is at hand: pop it into the refrigerator. A chilling period of at least half an hour, or even an hour, will significantly help it firm up to a perfect, sliceable consistency. The cooler temperature helps the chocolate re-solidify more quickly and completely, ensuring your fudge is ready to enjoy without delay.
Why is My 2-Ingredient Fudge So Liquidy?
If you meticulously followed the recipe and your fudge still appears too liquidy, don’t despair! Several factors can contribute to a softer-than-desired texture. One common culprit is the ambient temperature; fudge, particularly this microwave version, is more susceptible to staying soft on warmer, more humid days than on cooler ones. The warmth in the air can prevent the chocolate from fully setting. The quickest and most effective fix for this problem is to simply place your pan of fudge in the refrigerator. The consistent chill will encourage it to firm up perfectly.
Another factor could be the type of chocolate used. As mentioned earlier, chocolate chips contain stabilizers that can sometimes make them melt thicker or set differently than pure baking chocolate. Ensuring your ingredients are of good quality and within their expiration dates also plays a role. If your condensed milk is old, it might not provide the necessary binding and thickening properties.
How Do You Fix Condensed Milk Fudge That Is Too Soft?
While this 2-ingredient chocolate fudge recipe is generally foolproof, sometimes a batch can turn out a little softer than ideal. If you notice your condensed milk fudge is too soft after its initial setting period, there are a few effective strategies you can employ to rectify the situation:
- Refrigerate Longer: The first and often most successful step is to simply chill the entire pan of fudge for an extended period. Sometimes, a full 20-30 minutes, or even an hour, in the refrigerator is all it takes for the fudge to firm up to the perfect consistency. The cold environment aids in the crystallization of the chocolate and sugar, leading to a firmer set.
- Add More Chocolate & Re-Melt: If refrigeration alone isn’t sufficient, you can gently reheat the fudge. Place the soft fudge back into a microwave-safe bowl (or use a double boiler on the stovetop). Add a small handful of additional chocolate chips or chopped chocolate (start with about 1/4 to 1/2 cup for a standard batch). Heat in short bursts (15-30 seconds in the microwave) or over the double boiler, stirring until the new chocolate is melted and fully incorporated, and the mixture is smooth again. The increased ratio of chocolate will help the fudge set firmer. This is also a great opportunity to stir in any additional flavorings or mix-ins if you wish!
- Bake to Harden (if applicable): As a last resort, if you’ve tried the above methods and your fudge is still stubbornly soft, the oven method can come to the rescue.
Can You Bake Fudge to Harden It?
Yes, absolutely! While typically a no-bake treat, if your condensed milk fudge turns out too soft and other methods haven’t quite fixed it, a brief stint in the oven can work wonders to firm it up. This is an excellent trick for salvaging an overly soft batch. Simply line a baking pan with parchment paper, spread your soft fudge evenly into it, and bake at 350 degrees Fahrenheit (175 degrees Celsius) for about 10-15 minutes. The gentle heat will help to further meld and firm up the ingredients, driving off any excess moisture and promoting a more solid candy. Keep a close eye on it to prevent burning, and once firm, let it cool completely before slicing. This process essentially gives your fudge an extra boost to achieve that perfect, stable consistency!
How Do You Make Fudge Even Better?
While this 2-ingredient fudge is already fantastic, there are two primary factors that can elevate it from delicious to truly exceptional, ensuring every bite is a luxurious experience:
- Quality of Chocolate: This is arguably the most critical element. Since chocolate is one of only two ingredients, its quality shines through. Opt for high-quality baking chocolate over generic chocolate chips. Premium chocolate, whether dark, milk, or semi-sweet, typically has a higher cocoa butter content and fewer additives, which results in a smoother melt, a richer, more complex flavor, and a superior texture. Using a good quality chocolate will give your fudge a more sophisticated, melt-in-your-mouth feel that is undeniably more luxurious than using cheaper alternatives.
- Freshness of Sweetened Condensed Milk: While expiration dates on condensed milk cans can be quite long, the product can still lose its optimal properties if stored improperly or for too long, especially once opened. Condensed milk that is past its prime or has been opened and stored for an extended period might not set properly, leading to a sticky or overly soft fudge. Always try to use a fresh, unopened can of sweetened condensed milk for the best results. A fresh can ensures the right consistency and sweetness, which are crucial for this simple recipe to work its magic.
By paying attention to these two key ingredients, you can consistently produce a homemade fudge that rivals any artisanal confection!
Do You Put Fudge in the Fridge to Set?
Yes, chilling is a fantastic way to ensure your fudge sets perfectly and quickly! While fudge can set at room temperature, placing it in the refrigerator significantly speeds up the process and results in a firmer, cleaner slice. If you find that your fudge isn’t firming up as quickly as you’d like, or if you prefer a very firm texture, definitely place the pan in the fridge. A period of 20-30 minutes, or even up to an hour, in the cold will help the chocolate solidify completely. This chillier temperature ensures your delectable candy is firm enough to cut into neat squares and enjoy without any sticky mess!
How Long Does Fudge Last?
This delightful 2-ingredient fudge, while incredibly easy to make, is best enjoyed within a reasonable timeframe to maintain its optimal freshness and texture.
- At Room Temperature: Stored in an airtight container, your fudge will stay fresh and delicious for up to 2 days. Keep it in a cool, dry place away from direct sunlight.
- In the Refrigerator: For a longer shelf life and a firmer texture, store the fudge in an airtight container in the refrigerator for up to 2 weeks. The cool environment helps preserve its quality and prevents it from becoming too soft.
While it’s not a type of fudge designed for months of storage, its quick preparation time means you can always whip up a fresh batch whenever a craving strikes! It’s perfectly suited for immediate enjoyment or for sharing with friends and family over a couple of weeks.
Can I Freeze This 2-Ingredient Fudge?
Absolutely! This convenient 2-ingredient fudge is not only delicious when freshly made but also freezes beautifully, making it perfect for meal prepping your sweet cravings or preparing gifts in advance. To freeze, simply cut the cooled and set fudge into individual slices or squares. Arrange them in a single layer on a parchment-lined baking sheet and freeze for about an hour until firm. Once firm, transfer the frozen fudge pieces to an airtight freezer bag or container, separating layers with parchment paper to prevent sticking. It can be stored in the freezer for up to 2-3 months.
When you’re ready to enjoy, simply remove the desired amount of fudge from the freezer and place it in the refrigerator overnight to thaw gently. For a quicker thaw, you can leave it at room temperature for an hour or two. Freezing is a fantastic way to extend the life of your homemade fudge and ensure you always have a delightful treat on hand!
What Are the Core Ingredients for This 2-Ingredient Fudge?
The magic of this recipe lies in its beautiful simplicity, requiring just two fundamental ingredients to create a rich and satisfying chocolate fudge:
- Chocolate: You’ll need high-quality chocolate chips or finely chopped baking chocolate. As discussed, the type and quality of your chocolate will significantly impact the final flavor and texture. Dark, milk, or even white chocolate can be used based on your preference.
- Sweetened Condensed Milk: This is the other essential ingredient. It provides the necessary sweetness, creaminess, and binding properties that allow the fudge to set without additional cooking or sugar.
That’s truly all there is to it! With these two items, you won’t need to spend money on a long list of specialty items to make this incredibly easy and effective recipe work. It’s a testament to how simple ingredients can create something truly extraordinary.
How Do You Make This Quick Chocolate Fudge? (Step-by-Step)
Creating this delicious, quick chocolate fudge is incredibly easy. Here’s a detailed guide to ensure your success:
- Prepare Your Pan: Begin by buttering a square baking dish. This crucial step helps prevent sticking. Then, line the buttered dish with wax paper or parchment paper, allowing an overhang on the sides. This overhang will act as “handles,” making it incredibly easy to lift the set fudge out of the pan. Set this prepared pan aside.
- Melt the Ingredients: In a microwave-safe bowl, combine your chocolate chips (dark chocolate is recommended for a rich flavor, but any type works!) and the can of sweetened condensed milk. Heat the mixture on high power in the microwave for 1 minute.
- Stir Until Smooth: After the initial microwave minute, carefully remove the bowl. Let the mixture sit undisturbed for another minute; this allows the residual heat to continue melting the chocolate. Then, with a spatula, begin stirring the mixture. Stir patiently and thoroughly until the chocolate chips are completely melted and the entire fudge mixture is wonderfully smooth and uniform. If you notice any stubborn lumps or unmelted chocolate, you may need to return the bowl to the microwave for an additional 30 seconds, then stir again until perfectly smooth.
- Optional Flavor Enhancements: At this stage, if you desire to add a deeper dimension of flavor, stir in your extract of choice. A teaspoon of vanilla extract is a classic enhancement, but almond extract or even a touch of peppermint can create exciting variations.
- Pour and Set: Pour the smooth fudge mixture evenly into your prepared pan. This is also the perfect moment to press in any desired toppings like chopped nuts, dried fruit, or sprinkles on top of the warm fudge. Gently press them down so they adhere. Allow the fudge to cool completely at room temperature until it is firm enough to cut. For a faster set, you can place the pan in the refrigerator for about 30-60 minutes. Once fully set, use the parchment paper overhang to lift the fudge from the pan and slice it into squares.
- Storage: Store your homemade fudge in an airtight container. It will keep fresh at room temperature for up to 2 days or in the refrigerator for up to 2 weeks, ensuring you can savor this delightful treat for a good while.
This 2-ingredient fudge is a truly remarkable recipe: rich, luscious, and incredibly quick, melting in your mouth with every bite. It’s a perfect treat to share with friends and family, making an excellent homemade gift for holidays like Christmas or any special occasion. With such a simple yet effective recipe, you’ll never need another one for quick chocolate fudge! So, what are you waiting for? Gather your two ingredients and get started on this amazing recipe today, and prepare to be amazed by its simplicity and deliciousness!
I’d love to hear your thoughts! Let me know what your favorite fudge flavor or topping is in the comments below. And don’t forget to sign up for my newsletter to get notified about all our exciting new recipes!
Pin to save for later

Print the recipe card

2-Ingredient Fudge
petro
Pin Recipe
Equipment
-
Microwave-safe bowl
-
Spatula
-
Baking dish (square)
-
Wax paper or parchment paper
Ingredients
- 2 cups chocolate chips I used dark chocolate for a rich flavor
- 14 oz (1 can) of sweetened condensed milk
Instructions
-
Butter a square baking dish and line it with wax paper, ensuring there’s an overhang to easily lift the fudge later. Set aside.
-
Place chocolate chips and sweetened condensed milk in a microwave-safe bowl. Heat on high for 1 minute. Remove from the microwave, let sit for 1 minute (to allow residual heat to melt chocolate), then stir with a spatula until the chips are completely melted and the chocolate is smooth. If needed, heat for an additional 30 seconds and stir again.

-
Pour the smooth fudge mixture into the prepared pan. Optionally, add your favorite toppings evenly over the surface of the warm fudge. Let the fudge cool completely at room temperature or in the refrigerator before cutting into squares.

-
Store the finished fudge in an airtight container to maintain freshness.

Nutrition
