Terrifyingly Tasty Halloween Cupcakes: Your Ultimate Guide to Spooktacular Party Treats
Are you searching for the perfect treat to send shivers down spines and delight taste buds this Halloween? Look no further! These incredibly fun and easy-to-make Halloween cupcakes are exactly what you need. Ideal for any haunted gathering, school party, or even a cozy fright-night dinner, these spooky treats are guaranteed to be a monstrous hit with guests of all ages. What’s more, they are surprisingly simple to create, meaning anyone can whip up a batch of these horrifyingly delicious delights. So, if you’re aiming for an unforgettable Halloween dessert that perfectly balances ease with impressive presentation, these themed cupcakes are your go-to recipe.
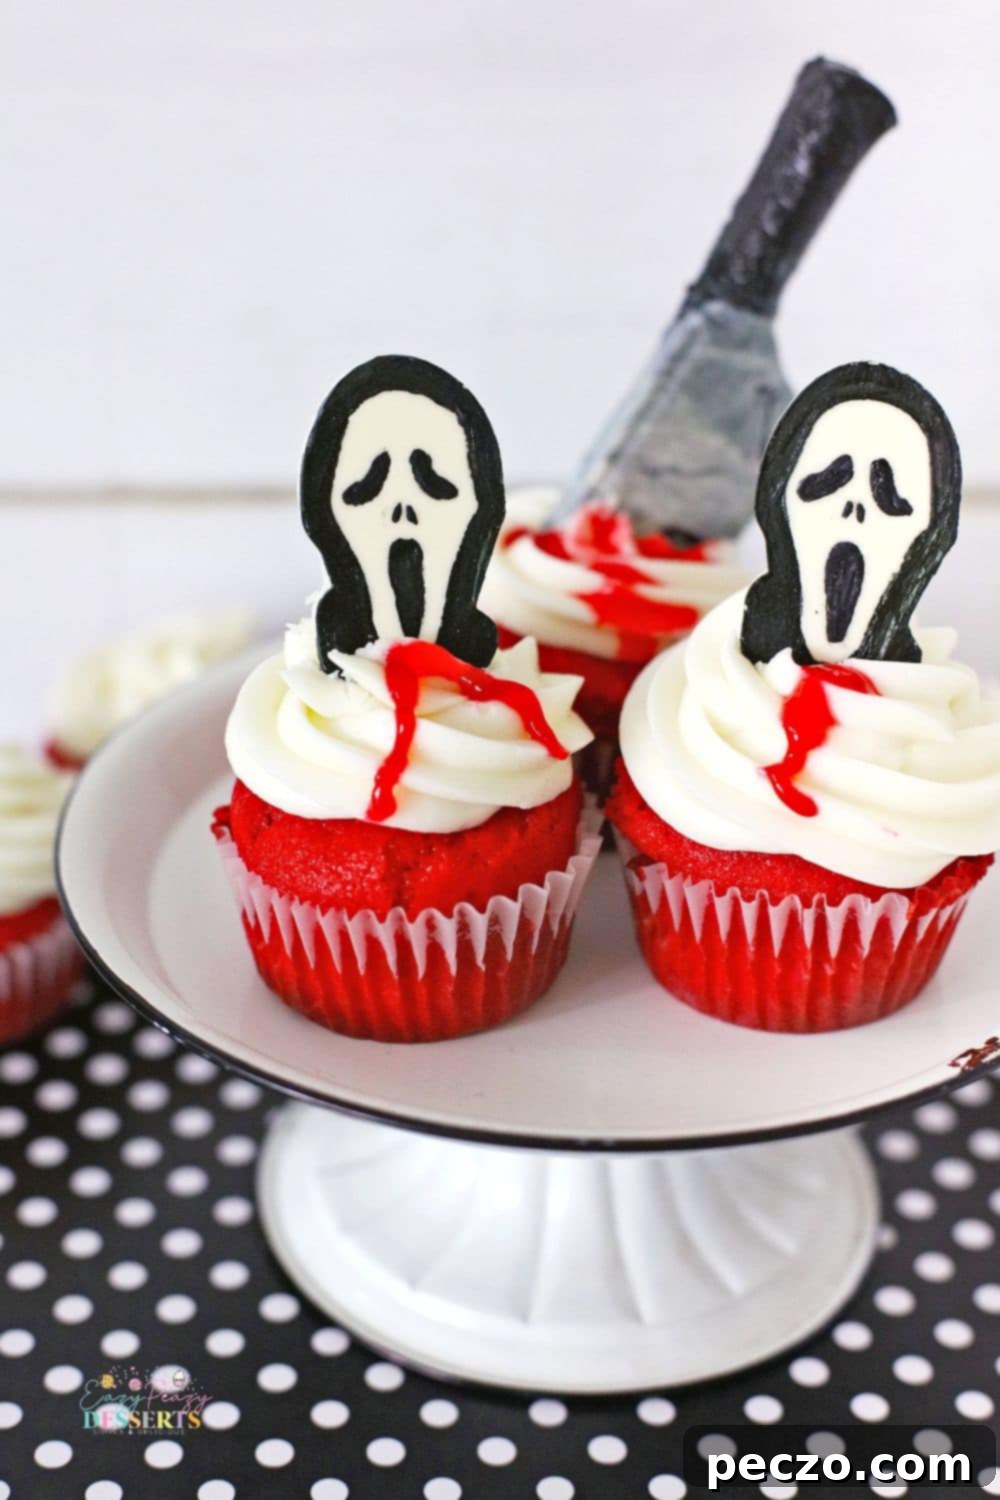
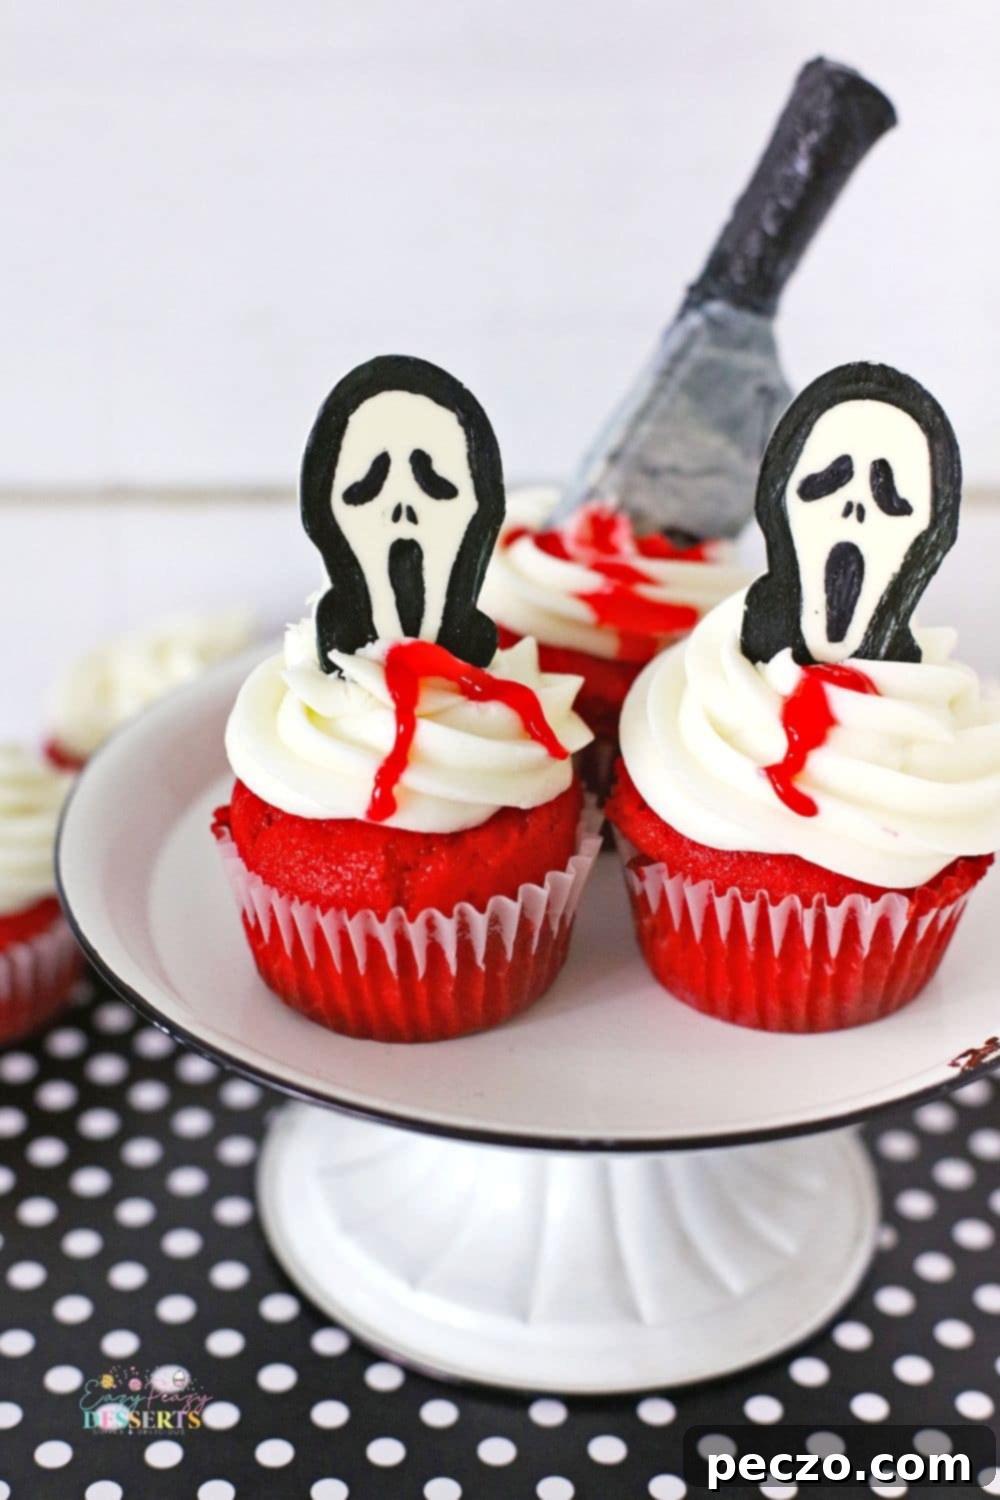
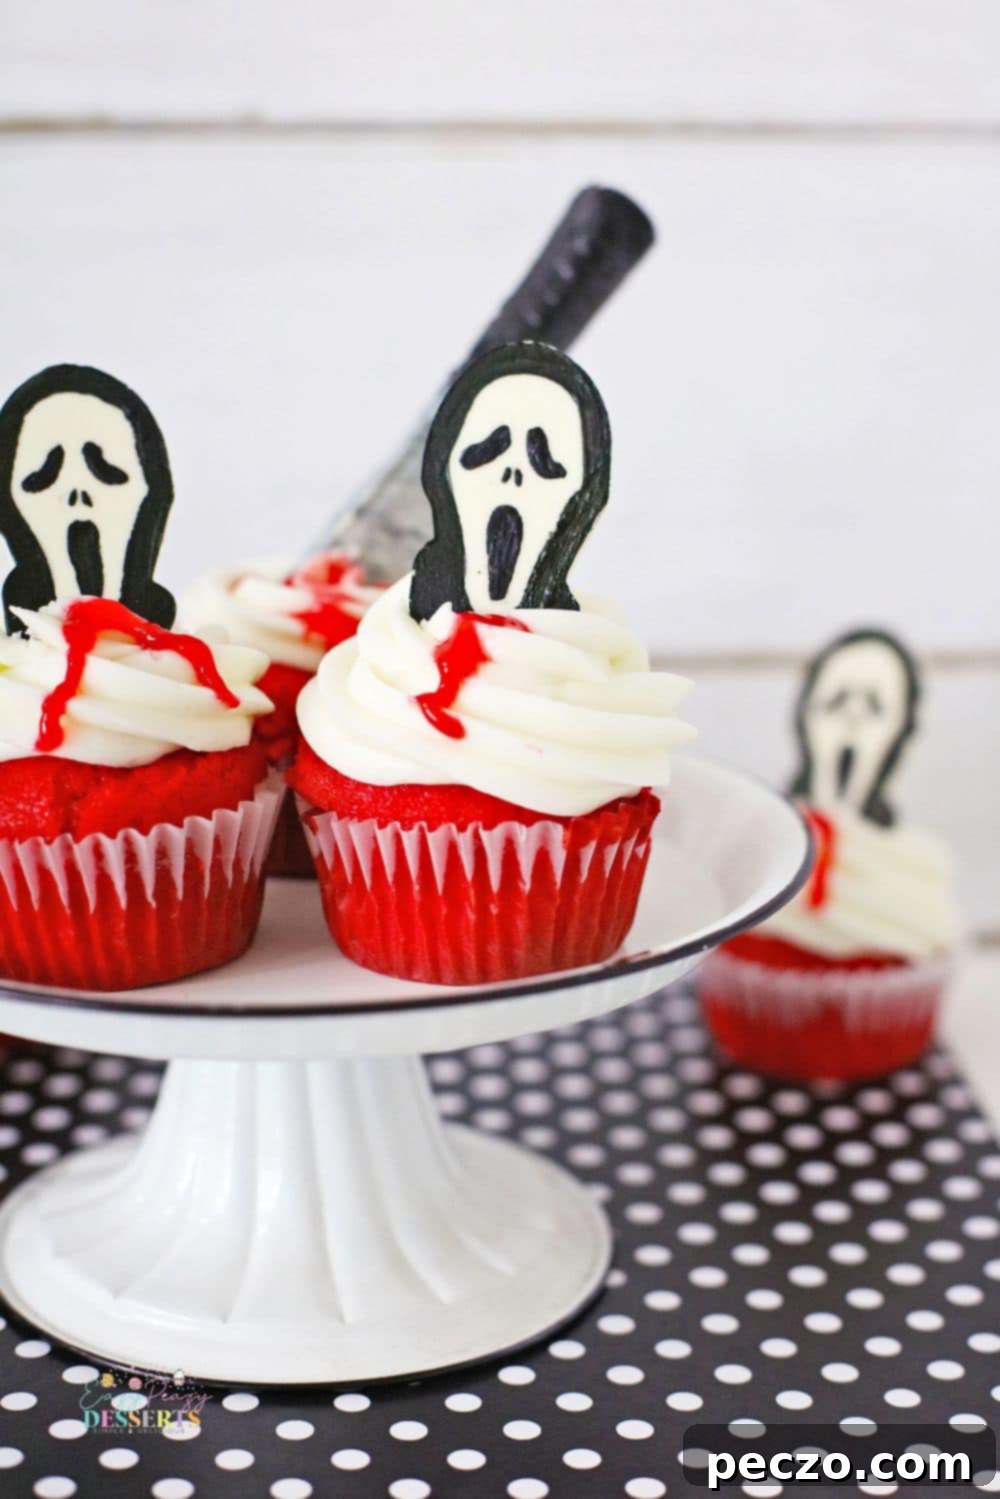
Whether you’re planning an elaborate Halloween bash or simply want a festive dessert to complete your holiday dinner, cupcakes are always a fantastic choice. And when it comes to capturing the eerie spirit of the season, these scary Halloween cupcakes truly excel! Featuring striking decorations inspired by classic horror movies – think iconic scream faces and chilling fake blood splatters – these awesome treats are the ultimate sweet snack for the spookiest night of the year. Dive into the Halloween spirit by crafting some of these delightfully spooky and creative cupcakes. They’re sure to thrill your trick-or-treaters, impress your party guests, and add a touch of ghoulish fun to your family’s celebrations!
Mastering Chocolate Decorations: Tips for Silicone Molds
Utilizing silicone molds is a brilliant way to add intricate and personalized decorations to your Halloween cupcakes, transforming them into edible works of art. However, if you’ve ever worked with melted chocolate and silicone molds, you know that achieving perfectly smooth and detailed designs isn’t always a cakewalk. Don’t let sticky situations or broken chocolate deter you! With a few simple tricks, you can create flawless chocolate cupcake toppers for all your spooky Halloween treats. Here are our top tips to ensure your chocolate detaches from the molds cleanly and perfectly every time:
- Start with impeccably clean molds. The foundation for any perfectly smooth and professional-looking chocolate decoration is a clean mold. Residue from previous uses, dust, or even tiny water spots can negatively impact the final finish of your chocolate. Make sure to thoroughly wash your silicone mold with warm, soapy water, paying extra attention to scrubbing into all the tiny crevices and intricate details to remove any lingering debris or oils. A soft brush can be helpful for those hard-to-reach spots.
- Ensure the molds are completely, thoroughly dry. After washing, moisture is your chocolate’s enemy. Even the smallest droplet of water can cause chocolate to seize and become unusable, or prevent it from setting properly in the mold. Use a lint-free towel, such as a microfiber cloth, to meticulously dry the molds. For optimal results, especially with detailed molds, it’s best to allow the silicone molds to air dry overnight. If time is of the essence, take extra care to thoroughly dry inside each mold, making sure to soak up any hidden moisture. You can use a toothpick or a cotton swab to gently push the towel or swab down into small crevices and intricate design elements, ensuring every nook and cranny is bone-dry.
- Chill the melted chocolate promptly. Once you’ve carefully poured the melted chocolate into your molds, the next critical step is to quickly transfer them to the refrigerator to chill. This rapid chilling helps the chocolate harden more quickly and uniformly. More importantly, it ensures that the entire design, including any delicate edges or thin sections, is fully and firmly hardened. This complete solidification is absolutely essential for successfully removing the chocolate decorations without them cracking, breaking, or losing their shape. Avoid the freezer unless you’re truly in a rush and monitor closely, as condensation can be an issue.
- Push from the bottom with care. Once the chocolate is completely hardened (it should pop out easily with slight pressure), remove the mold from the refrigerator. To release the chocolate without damaging it, gently push up from the bottom of the mold. Silicone is flexible, so this action should cause the chocolate to pop out cleanly. If a piece seems a bit stubborn, carefully pull the sides of the silicone mold away from the candy first to create some space and release any suction, then push up again from the bottom. Patience and a gentle touch are key here.
Planning Ahead: Can You Make Scream Cupcakes in Advance?
Organizing any party, especially a Halloween celebration, can involve a significant amount of work. Savvy hosts often look for ways to reduce stress by preparing recipes in advance. The good news is that these spooky Halloween cupcakes are perfect for make-ahead planning! You can prepare several components of this recipe days before your event and then assemble the cupcakes closer to party time, ensuring they are fresh and impressive without last-minute rush.
- Bake the cupcakes themselves. You have the flexibility to bake your cupcake bases up to one or even two days in advance. After baking, it’s crucial to allow the cupcakes to cool completely on a wire rack. Any residual heat can cause condensation, leading to soggy cupcakes. Once thoroughly cooled, arrange the cupcakes in an airtight container. To prevent them from drying out, you can also wrap them individually in plastic wrap before placing them in the container. Store them at room temperature, away from direct sunlight or heat, until you are ready to begin the fun part – decorating!
- Prepare the elaborate chocolate molds. The eye-catching chocolate decorations for the top of your cupcakes, such as the Scream faces and edible knives, are ideal for making well in advance. These can be crafted up to four days ahead of your party. Once the chocolate has fully hardened within its molds, carefully pop out each decoration. Transfer them to an airtight container, preferably with layers separated by parchment paper to prevent sticking or breakage. Store these chocolate decorations in the refrigerator to maintain their firmness and intricate details. This step alone saves significant time on party day!
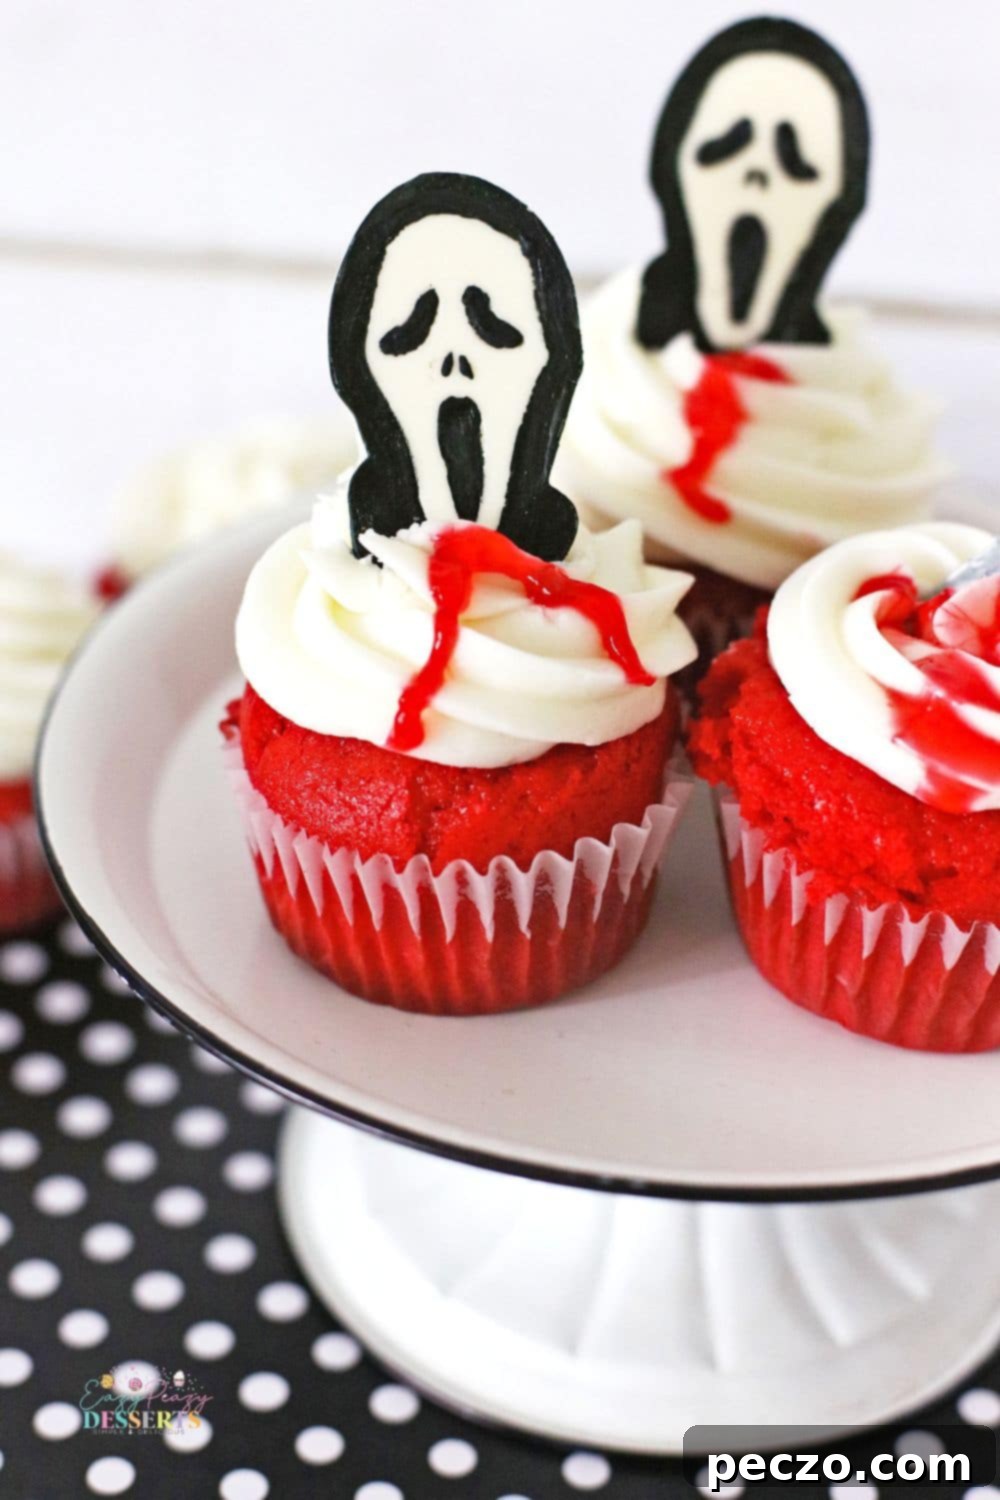
- Decorate and assemble the cupcakes on party day. To ensure your Halloween cupcakes look their best, with vibrant frosting and perfectly placed ‘blood’ effects, it’s best to complete the final decoration and assembly on the day of your party. Unwrap your pre-baked cupcakes and then top them generously with your prepared frosting. Next, carefully position the chocolate cupcake toppers (Scream faces and knives). Finally, add the dramatic red gel ‘blood’. Serving the cupcakes immediately after this last step is recommended to prevent the decorative gel from potentially dripping, smudging, or staining your beautiful party treats. This ensures maximum visual impact and freshness for your guests.
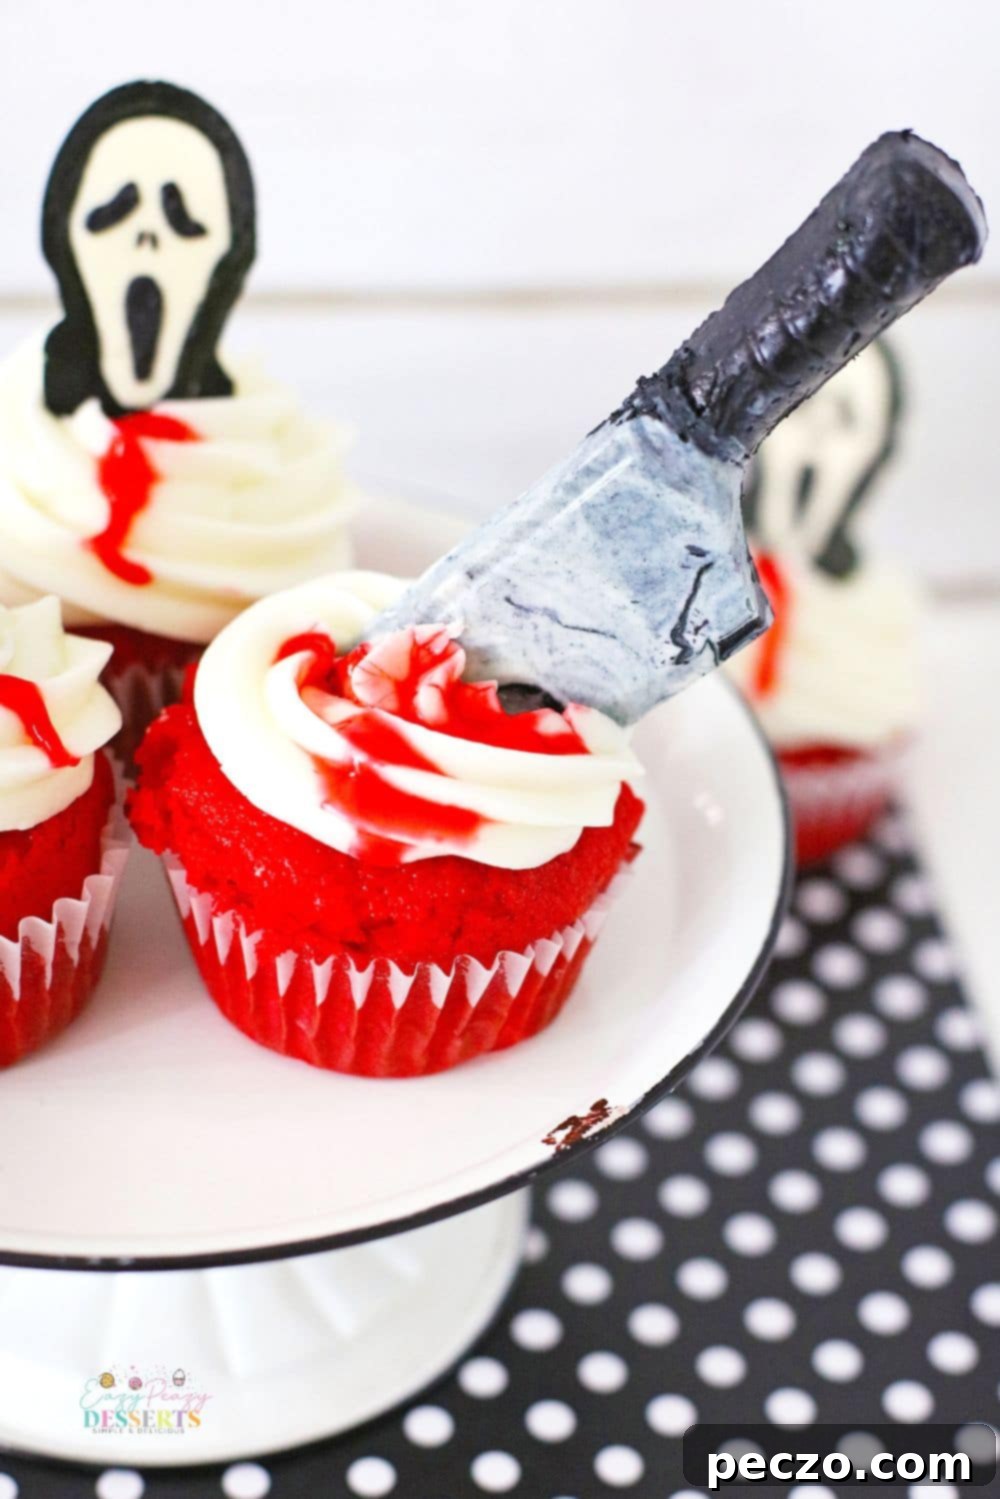
These Scream-themed cupcakes are undoubtedly poised to be the highlight of any Halloween gathering! Their spooky, slightly creepy aesthetic perfectly sets the tone for a truly festive and memorable occasion. Beyond their impressive appearance, they are remarkably easy to prepare and, most importantly, deliver a truly delicious treat. They would make a stunning centerpiece on any buffet or dessert table, and the best part is that both the iconic Scream faces and the chilling knife decorations are completely edible, adding to the fun. Be sure to tuck this unique recipe into your collection of holiday favorites!
Essential Ingredients and Tools for Spooky Scream Cupcakes
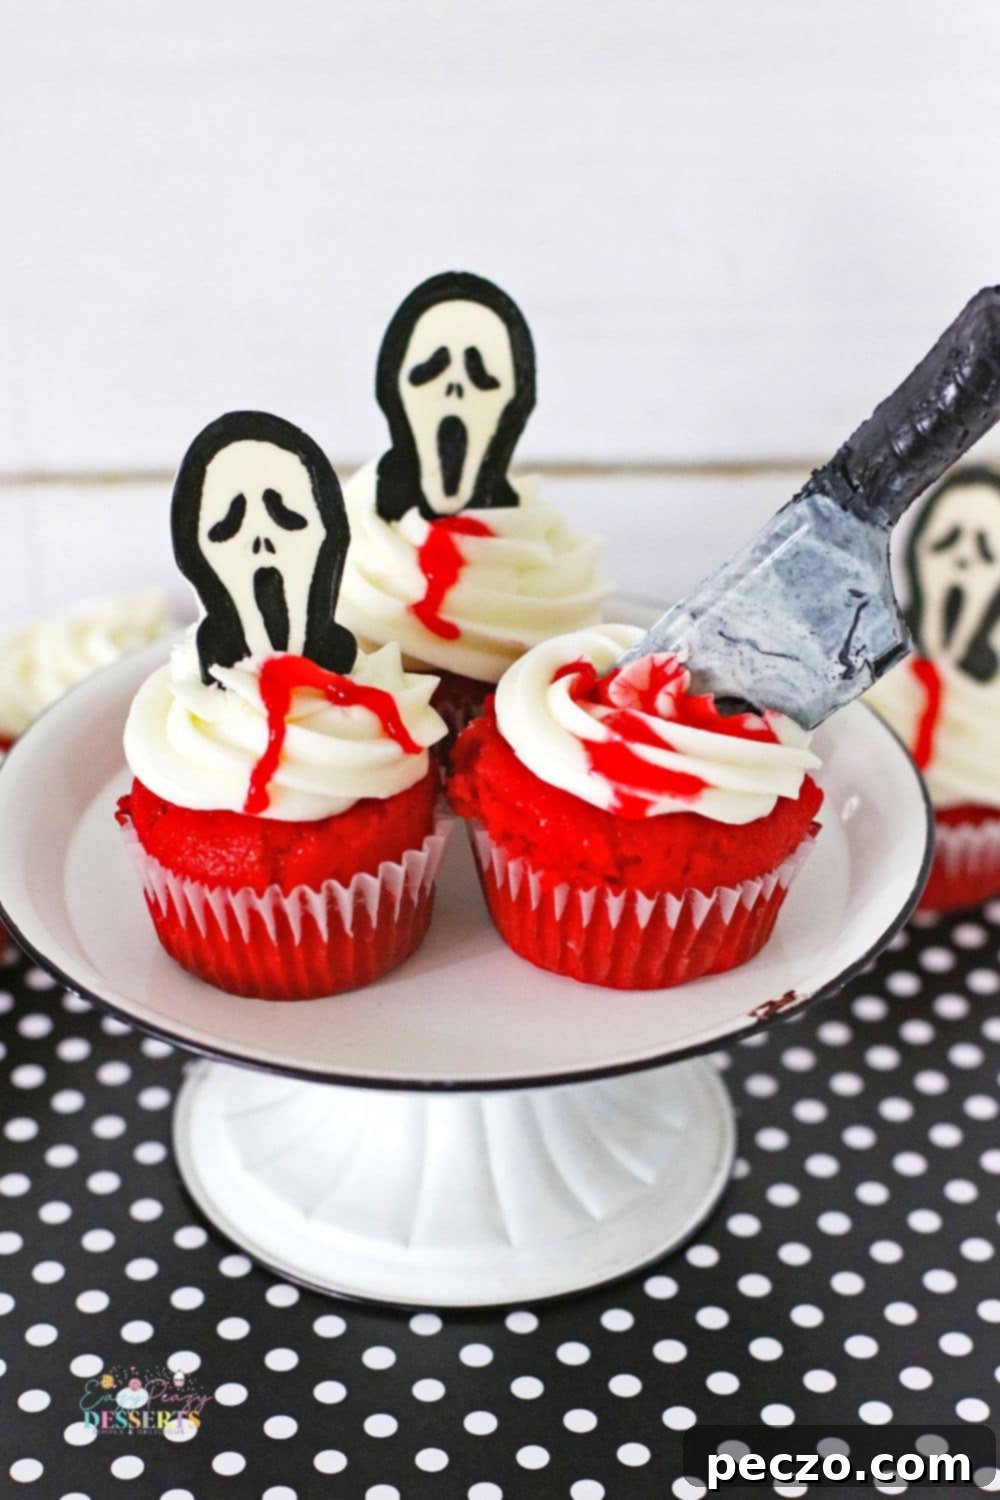
These creative Halloween cupcakes are destined to be the absolute highlight of your next spooky soirée! Their combination of eerie design and delicious flavor makes them a must-have. They’re spooky, a little creepy, and perfectly calibrated to set the ideal chilling yet festive atmosphere. Best of all, despite their elaborate appearance, they are surprisingly straightforward to create, thanks to a simple and accessible list of ingredients. Crafting these ghoulish goodies doesn’t require a master baker, just a bit of enthusiasm and the right components.
To embark on your journey of making these scary Halloween cupcakes, you’ll need the following:
- White chocolate (essential for those iconic white Scream masks and knife blades)
- Black food coloring gel (for detailing the Scream faces and making dark knife handles)
- Red food coloring gel (for the vibrant red cupcake batter)
- Flour (the base for our fluffy cupcakes)
- Baking powder (for light and airy texture)
- Salt (to balance the sweetness and enhance flavors)
- Sugar (for that perfect level of sweetness in the cake)
- Milk (adds moisture to the cupcake batter)
- Vegetable oil (contributes to a moist and tender crumb)
- Vanilla Silk yogurt (adds a unique depth and moisture, can be substituted with plain yogurt or sour cream)
- Egg (provides structure and richness)
- Vanilla extract (enhances all the sweet flavors)
- Cream cheese (the star of our rich, tangy frosting)
- Butter (for a smooth and creamy frosting)
- Heavy cream (adjusts frosting consistency and adds richness)
- Powdered sugar (the main component for a sweet and sturdy frosting)
Beyond the delicious ingredients needed to prepare the cake batter and the rich, creamy icing, you’ll also require a couple of special tools to bring your Halloween treats to life with their signature spooky decorations. To perfectly top each of your cupcakes, you will definitely need specialized silicone molds. Specifically, you’ll want molds for creating the distinct Scream faces and separate molds for crafting those eerily realistic edible knives. These molds are key to achieving the professional and chilling look of these unique holiday desserts.
Step-by-Step Guide: How to Make Haunting Halloween Cupcakes
Creating truly spooky and memorable treats for Halloween doesn’t have to be a daunting task! In fact, with a little creativity and a structured approach, you can easily craft impressive desserts that will be the talk of the town. These scary Halloween cupcakes are simpler to assemble than they look. Just follow these quick and easy steps to bring your ghoulish visions to life:
- Craft the intricate decorations first. Since the iconic Scream face and the chilling knife decorations are the absolute key to achieving that perfectly spooky and recognizable look for your treats, it’s wise to dedicate sufficient time to creating these perfect cupcake toppers. To make the Scream faces, meticulously use your designated Scream face mold to create white chocolate decorations for each cupcake. Ensure the melted chocolate fills all the details of the mold for a crisp design. Once the white chocolate has fully set and hardened, add some black food coloring gel (mixed with a tiny bit of melted white chocolate for paint consistency, as per the recipe card) to carefully outline the facial features and add expression, completing the spooky, mask-like appearance. After that, create the terrifying chocolate knives by using the knife mold. You’ll tint a portion of your melted white chocolate gray for the blade and a darker portion black for the handle. Give all your chocolate decorations ample time to set and harden completely, either in the refrigerator or freezer, ensuring they are firm enough to handle without melting or breaking.
- Prepare and bake your cupcake bases. While your impressive chocolate decorations are chilling and setting to perfection, you can simultaneously prepare your cupcake batter. Follow the detailed instructions provided in the recipe card for mixing the dry and wet ingredients and incorporating the red food coloring for a bloody cake effect. Once the batter is ready, carefully fill your cupcake liners and bake them in a preheated oven until they are golden and a toothpick inserted into the center comes out clean. After baking, allow the cupcakes to cool completely on a wire rack. This is crucial before frosting, as warm cupcakes will melt your carefully piped icing.
- Add the crucial fake blood detail. A truly scary Halloween treat simply isn’t complete without a touch of realistic fake blood! Once your cupcakes are fully cooled and frosted, and your chocolate Scream faces and knives are securely placed on top, it’s time for the final, chilling touch. Use your red decorative gel (which is thicker than regular food coloring and holds its shape) to carefully draw realistic-looking blood droplets or oozing streams on top of each cupcake. Position the “blood” strategically around the knives or dripping from the Scream masks for maximum dramatic effect. This gruesome detail will elevate your cupcakes from simple treats to true Halloween masterpieces!
Achieving Perfect Frosting Swirls: Tips for Icing Cupcakes
To achieve that professional, irresistible swirl of icing on top of each of your cupcakes, a piping bag fitted with a star tip is your best friend. Once your cupcakes are completely cooled to room temperature and your cream cheese frosting is prepared to a smooth, thick consistency, carefully load it into the piping bag. Hold the piping bag perpendicular to the cupcake and apply even, consistent pressure. Start piping from the outside edge of the cupcake and work your way inward in a circular, spiraling motion, gradually building height. Finish with a gentle lift and release of pressure at the top center to create a delicate peak. The key is to maintain steady pressure throughout the process, ensuring that each cupcake is topped with an even and beautifully consistent layer of icing, making them not only delicious but also visually appealing.
Expert Tips for Nicely Icing Your Cupcakes
While there are numerous ways to ice a cupcake, if you’re aiming for cupcakes that look exceptionally special and professional, a few extra tips can make all the difference. Elevate your decorating game with these expert techniques:
- Utilize a piping bag fitted with a large star tip to pipe tall, elegant swirls of icing on top of each cupcake. This creates a classic, appealing look that adds volume and visual interest. Experiment with different star tips (open or closed) for varied textures.
- Experiment with two different colors of icing in the same piping bag to create a mesmerizing swirled or marbled effect. This can be achieved by loading one color on one side of the bag and the second color on the other, or by piping stripes of color inside the bag before filling it. For Halloween, black and white, or orange and purple swirls would look fantastic.
- Always top each cupcake with a unique chocolate decoration, such as our impressive Scream toppers or chilling knife toppers, or sprinkle generously with festive, Halloween-themed sprinkles. Edible glitter, gummy worms, or candy eyeballs can also add a playful or spooky touch.
- Don’t be afraid to get creative and innovative with your icing flavors! While vanilla is a classic, try incorporating a different flavor extract, such as almond, lemon, peppermint, or even a hint of cinnamon, to infuse your buttercream or cream cheese icing with an unexpected and delightful taste that complements your cupcake flavor.
- For a truly smooth and even foundation before you begin piping, use a bench scraper or a small offset spatula to gently level off the very top of each baked cupcake. This creates a flat surface, making it easier to achieve consistent and professional-looking frosting swirls.
Unleashing Your Creativity: How to Decorate Diverse Halloween Cupcakes
While our Scream-themed design is a showstopper, there are countless ways to decorate these easy Halloween cupcakes, allowing your imagination to run wild. If you want your cupcakes to stand out and offer a variety of spooky aesthetics, try incorporating some of these creative ideas:
- For effortlessly easy Halloween cupcake ideas, simply top each cupcake with a different, store-bought or homemade Halloween decoration. Think cute plastic spiders, edible ghost candies, skeleton sprinkles, or small candy pumpkins. This variety adds visual interest without much effort.
- Employ black and white icing to create a dramatic, spooky swirled effect on top of the cupcakes. You can achieve this by swirling two colors of frosting together in a piping bag or by carefully layering them.
- Transform these into enchanting witch cupcakes by piping tall spirals of vibrant green icing on top of the cupcakes. Garnish with a chocolate witch hat, a few black sprinkles, or edible “brew bubbles” made from green candies to create a magical “witch’s brew” look.
- Sprinkle some traditional green, orange, and black sprinkles generously on top of the cupcakes for a classic, festive touch that screams Halloween. You can also find sprinkles in shapes like bats, ghosts, or skulls.
- As an exciting alternative to our standard Halloween cupcake recipe, consider using this delicious carrot cake cupcakes recipe. Then, simply top the flavorful carrot cupcakes with Halloween-themed decorations and a festive frosting for a rich and autumnal holiday treat.
- Use gel food coloring to tint your cream cheese icing in different, vibrant Halloween colors. Think bright orange, slime green, deep purple, or even a ghostly grey to match various spooky themes.
- Get truly creative with your flavor combinations! If you’re craving a comforting pumpkin cupcake, try starting with a pumpkin spice cake mix and pairing it with a rich cream cheese frosting for a delicious fall-inspired treat that fits the season perfectly.
- Just like with any cupcake, you’ll need some liners to bake your Halloween cupcakes in. You can choose classic black or orange cupcake liners, or elevate the festivity by using really creative Halloween-themed cupcake wrappers featuring bats, ghosts, or spiderwebs. These small details add a lot to the overall presentation.
Storage Solutions: Will These Halloween Cupcakes Keep Overnight?
These freshly made Halloween cupcakes are undeniably at their absolute best when enjoyed on the same day they are prepared, as the cake is most moist and the frosting is perfectly set. However, life happens, and sometimes you need to make them ahead or have leftovers. Fortunately, cupcakes will keep beautifully overnight if they are stored correctly. To preserve their freshness and appearance overnight, arrange them in a single layer inside an airtight container. This prevents them from drying out and protects the frosting from being smudged. If stacking is necessary, place a sheet of parchment paper between layers to prevent them from sticking together.
For longer storage, cupcakes can also be frozen for up to two months without significant loss of quality. To freeze cupcakes, first ensure they are completely cooled and, if frosted, that the frosting is firm. Place them in a single layer in a freezer-safe container with a tight-fitting lid, or wrap them individually in plastic wrap and then foil for maximum protection against freezer burn. When you’re ready to indulge in your frozen treats, simply thaw them overnight in the refrigerator. For best results, let them come to room temperature for about 30 minutes before serving to ensure the cake and frosting are perfectly soft and enjoyable.
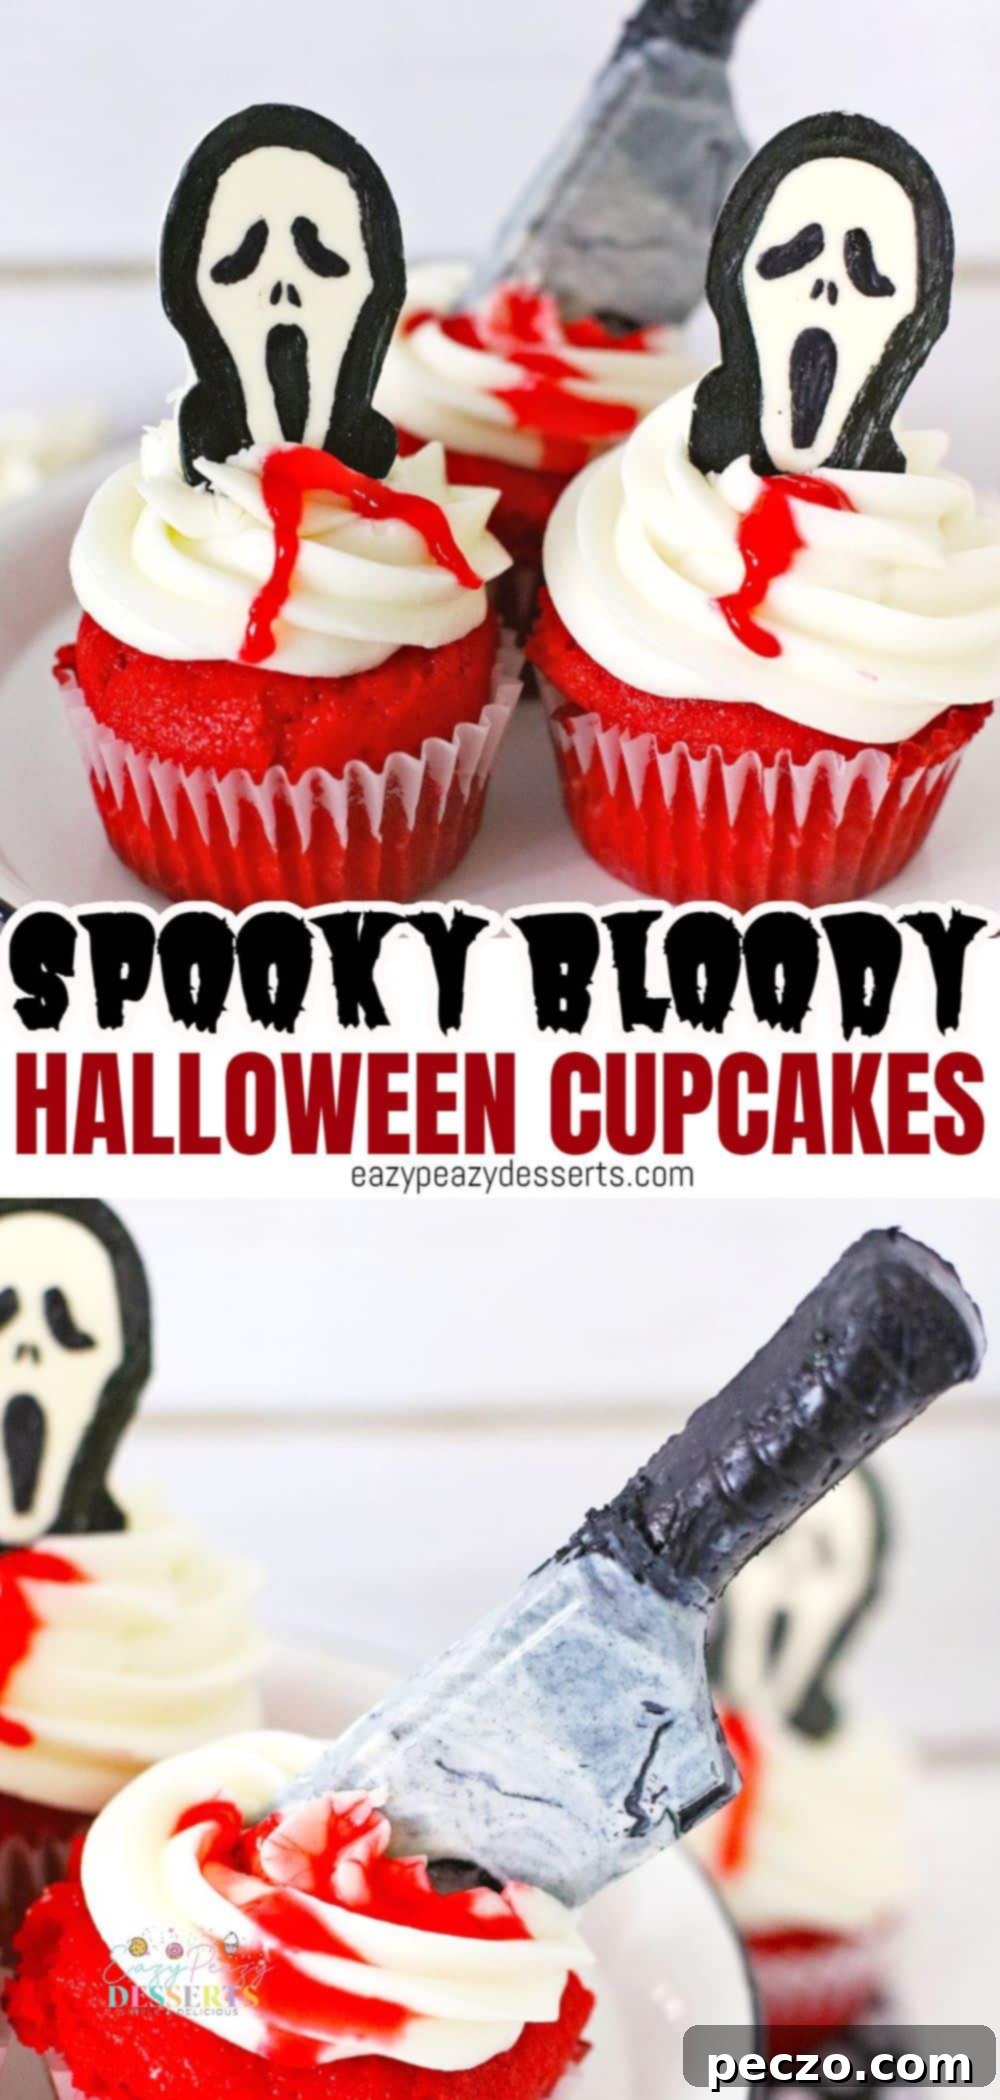
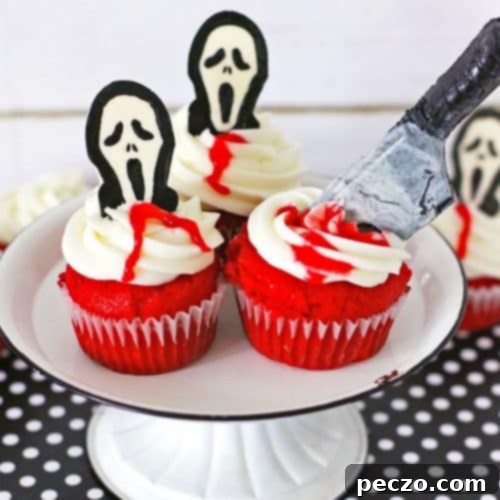
These scary Halloween cupcakes are truly the perfect, ghoulishly delightful addition to any Halloween party or celebration! They are remarkably easy to prepare and decorate, making them accessible for bakers of all skill levels, and they are guaranteed to be an absolute hit with guests young and old. With their chilling Scream face toppers and eerily realistic edible knife decorations, these cupcakes offer a wonderfully creative and delicious way to set the ideal tone for a fun, festive, and frightful holiday celebration. Get ready for gasps and compliments!
So, what are you waiting for? Don’t let the ghosts and goblins beat you to it! Head into the kitchen today and start whipping up a batch of these unforgettable scary Halloween cupcakes. Your guests will undoubtedly rave about them and remember the delicious fright for years to come.
If you thoroughly enjoyed making and devouring these Halloween cupcakes, you might also want to take a look at these equally fun bloody glass cupcakes too for another creative challenge! And as always, if you have any questions at all about the recipe, the decorating process, or need any further tips, please don’t hesitate to leave a comment below. We love hearing from you! Happy baking and Happy Halloween!
Pin to save for later
Print the recipe card
Scary Halloween cupcakes
petro
Pin Recipe
Equipment
-
scream face mold
-
knife mold
-
cookie brush
-
mixing bowl
-
muffin tin
-
cupcake liners
-
piping bag
-
large star tip
Ingredients
For the scream face and knife decorations
- 2 cups White Chocolate melted
- Black Food Coloring Gel
For the cupcakes
- 1 1/4 cup Flour
- 1 1/2 teaspoons Baking Powder
- 1/2 teaspoon Salt
- 1 cup Sugar
- 1/2 cup Milk
- 1/4 cup Vegetable Oil
- 2 Tablespoons Vanilla Silk Yogurt
- 1 Egg
- 1 Tablespoon Vanilla
- Red Food Coloring Gel
For the frosting
- 4 ounces Cream Cheese softened
- 4 Tablespoons Butter softened
- 1 teaspoon Vanilla
- 2 Tablespoons Heavy Cream
- 4 – 5 cups Powdered Sugar
To decorate
- red decorative gel
Instructions
To make the scream face decoration
-
Melt the White Chocolate in the Microwave, and fill the Scream Face Molds with the White Chocolate. Place in Freezer for about 10 minutes to quickly set the Chocolate. Place 1 teaspoonful of the Black Food Coloring Gel in a small dish, and mix in 1/2 a teaspoon of the melted White Chocolate, stirring well. Using a small Cookie Brush paint the outline of the Scream Face with the Black Food Coloring Gel/White Chocolate mixture. Let dry for about 10 minutes. Set aside.
To make the knife decorations
-
Add one drop of the Black Food Coloring Gel to the cup of White Chocolate, and fill the bottom part of the mold, that would be the blade, with the Gray/White Chocolate.
-
Add several more drops to the White Chocolate, making it Black, and fill in with the Black/White Chocolate, for the part that is the knife handle. Set in the refrigerator to harden.
To make the cupcakes
-
In the mixing bowl of a stand mixer, add the Sugar, Milk, Oil, Yogurt, Egg, and Vanilla, and mix on low until blended, then mix on medium, until creamy.

-
In a separate bowl, place the Flour, Baking Powder, and Salt, and stir well to blend. Add to the Mixer, and blend on Low speed, until mixed, then turn up the mixer, and blend until smooth. Scrape down the sides of the mixing bowl, and blend again until completely smooth.

-
Add about 2 or 3 teaspoons of the Red Food Coloring Gel to the Cupcake Batter, until you have the desired color of Red.
-
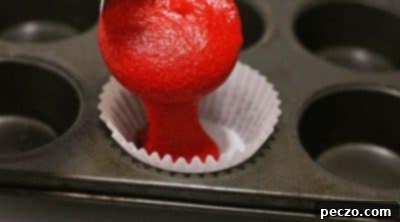
Line a 12 count Muffin Tin with Cupcake Liners, and fill the Liners 2/3 of the way full. Bake at 350 for 13 to 15 minutes, or until Cupcake are done, and a toothpick inserted in the center comes out clean. Remove from the oven to a wire rack to cool.

To make the frosting
-
In the mixing bowl of a stand mixer, place the softened Cream Cheese, softened Butter, Vanilla, and Heavy Cream, and mix until smooth and creamy.
-
Add the Powdered Sugar about a cup at a time and blend well between additions. Scrape down the Mixing bowl, and blend until smooth. The Frosting should be thick and creamy. If you need to add a little more Powdered Sugar, add about 1/4 cup at a time until you have a thick and creamy Frosting.

To decorate
-
When the Cupcakes are completely cool, place the Frosting in a Pastry/Piping bag with the large Star tip, and Pipe the Frosting on the Cupcakes, using a swirling motion around the cupcakes and bringing the Frosting up to a point.
-
Place the Scream White Chocolate Faces in the Frosting, and add the Decorative Red Food Gel in lines, down the Cupcakes, as though it was blood. Place the Knives on some of the Cupcakes, and add blood/Gel to those as well.
-
Keep refrigerated until time to serve. Enjoy!
Notes
Nutrition
