Mastering Homemade Pizza Dough: The Secret to Perfect Pear & Brie Flatbread
Many aspiring home bakers wonder about the ‘secret’ to exceptional pizza dough. The truth is, the fundamental ingredients for most pizza dough recipes are surprisingly simple and consistent: flour, yeast, water, a touch of olive oil, and salt. However, the true game-changer, the often-overlooked ingredient that elevates good dough to greatness, isn’t listed in measurements. It’s time.

The Unsung Hero: Why Time Transforms Your Pizza Dough
Think of yeast doughs much like people: the longer they’re allowed to mature and develop before their final transformation (in this case, baking), the more character, depth, and complexity they acquire. This means that mixing up a batch of dough on a Thursday, even if Friday is your designated pizza night, will make an astonishing difference. This extended period, known as long fermentation or cold proofing, allows the yeast to work its magic slowly, developing incredible flavors and a superior texture that simply can’t be achieved with a quick rise.

Understanding the Magic of Long Fermentation
When you give your dough time, especially in a cool environment like the refrigerator, several beneficial processes occur. The yeast slowly consumes the sugars in the flour, producing alcohol and carbon dioxide. This slow process results in a more complex flavor profile, often described as nutty, earthy, or even slightly tangy, far beyond the one-note taste of quickly risen dough. Furthermore, the enzymes in the flour have more time to break down starches, making the dough more digestible and the final crust incredibly tender yet crisp.
A longer fermentation also significantly improves the dough’s workability. When you go to stretch it, you’ll notice it’s far more pliable, elastic, and less prone to tearing. The gluten network has had ample time to relax and strengthen, creating those beautiful, airy pockets (alveoli) that are the hallmark of a perfectly baked pizza crust. While I was so engrossed in stretching and topping my flatbread (and perhaps chilling the wine!), I regrettably didn’t capture photos of these magnificent stretchy bubbles. Rest assured, they are a true indicator of a well-rested dough.
Crafting the Perfect Pizza Dough: Beyond the Basics
While the ingredients are simple, understanding their roles and the process is key to consistent success.
The Essential Ingredients and Their Purpose
- Flour: For pizza, a strong bread flour or Italian ’00’ flour is ideal due to its higher protein content, which forms a robust gluten network crucial for chewiness and elasticity. All-purpose flour can work, but the texture might be slightly less developed.
- Yeast: Active dry or instant yeast are both suitable. Instant yeast can often be mixed directly with the dry ingredients, while active dry yeast typically benefits from being proofed in warm water first.
- Water: The hydration level (ratio of water to flour) affects the dough’s texture. Generally, warmer water activates yeast faster, but for a long, slow fermentation, room temperature or even slightly cool water is fine.
- Salt: Essential for flavor, salt also helps to regulate yeast activity, preventing it from rising too quickly and allowing for better flavor development.
- Olive Oil: Adds flavor, tenderness to the crust, and helps with browning.
Step-by-Step Dough Creation and Cold Proofing
- Mixing: Combine the dry ingredients, then gradually add the wet ingredients, mixing until a shaggy dough forms.
- Kneading: Knead the dough for 8-10 minutes, either by hand or with a stand mixer, until it’s smooth, elastic, and passes the windowpane test (you can stretch a small piece thin enough to see light through it without tearing).
- First Rise (Bulk Fermentation): Place the dough in a lightly oiled bowl, cover it tightly, and let it rest at room temperature for 1-2 hours until it has visibly increased in size.
- The Cold Proofing Stage: This is where the magic happens! Gently ‘punch down’ the dough to release excess gas. Transfer it to a clean, lightly oiled bowl or container, cover tightly, and place it in the refrigerator. Let it cold proof for at least 24 hours, but ideally 48-72 hours. The longer it rests, the more flavor it develops.
- Portioning and Second Rise: On pizza night, remove the dough from the fridge a couple of hours before you plan to bake. Divide it into individual portions (usually 200-250g per pizza) and gently shape each into a tight ball. Place them on a lightly floured surface, cover with a damp cloth or plastic wrap, and let them come to room temperature and relax for 60-90 minutes. This makes them much easier to stretch.
Mastering the Stretch: Achieving the Perfect Pizza Base
Once your dough balls are proofed and relaxed, stretching them into a perfect circle is an art. Avoid using a rolling pin, as this forces out too much precious gas, resulting in a dense crust. Instead, gently work the dough with your hands:
- Start by pressing out the center with your fingertips, leaving a slightly thicker rim for the crust.
- Then, lift the dough, letting gravity help stretch it. Rotate it slowly, gently stretching the edges outwards.
- For the more adventurous, a quick toss between your hands can further thin and shape the base, but practice makes perfect!
The goal is a thin, even base with a puffy, airy crust that will crisp beautifully in a hot oven.
The Star of the Show: Gourmet Pear & Brie Flatbread
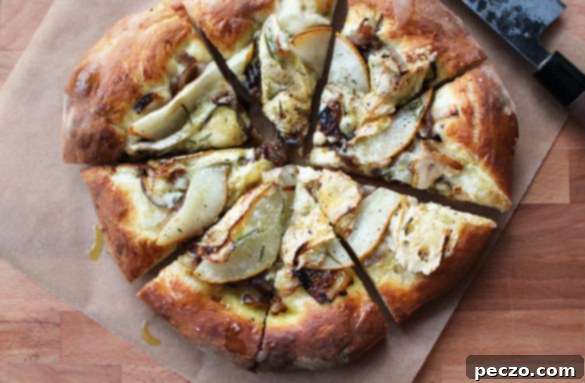
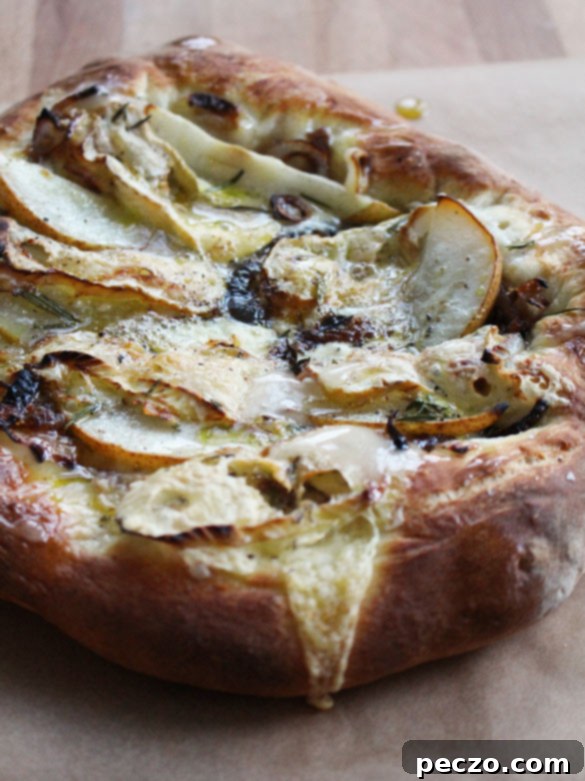
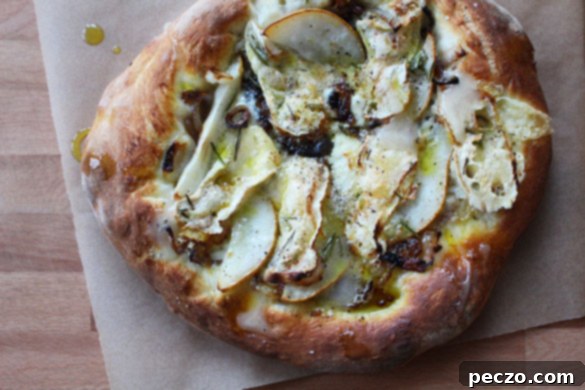
While the perfect dough is a canvas, the toppings are the masterpiece. One of my all-time favorite gourmet flatbread combinations is the elegant Pear & Brie. It’s a delightful blend of sweet, savory, and creamy textures that truly elevates pizza night.

Ingredients for your Pear & Brie Flatbread:
- One portion of your perfectly prepared pizza dough
- 2-3 tablespoons olive oil (for brushing the base)
- 1-2 ripe, firm pears (such as Bosc or Anjou), thinly sliced
- 150-200g Brie cheese, rind on, thinly sliced or crumbled
- A handful of fresh arugula or baby spinach (optional, for after baking)
- A drizzle of balsamic glaze or honey (optional, for after baking)
- Pinch of fresh thyme leaves (optional)
- Freshly cracked black pepper to taste
Assembly and Baking Instructions:
- Preheat Oven: Place a pizza stone or steel in your oven and preheat to the highest possible temperature (250°C / 500°F or higher) for at least 30-60 minutes. This intense heat is crucial for a crispy crust.
- Prepare Dough: On a lightly floured pizza peel or parchment paper, stretch your dough into your desired flatbread shape. Brush the dough lightly with olive oil.
- Add Toppings: Evenly distribute the Brie cheese slices over the dough. Arrange the thinly sliced pears on top of the cheese. If using, sprinkle with fresh thyme and a touch of black pepper.
- Bake: Carefully transfer the flatbread to the preheated pizza stone/steel. Bake for 8-12 minutes, or until the crust is golden brown, puffy, and the cheese is bubbly and slightly caramelized.
- Garnish and Serve: Once out of the oven, let the flatbread cool for a minute. If desired, scatter fresh arugula or baby spinach over the top, then drizzle with balsamic glaze or honey. Slice and serve immediately.
Beyond Pear & Brie: Endless Topping Possibilities
Once you’ve mastered the dough, the world of pizza and flatbread toppings is your oyster! Don’t limit yourself to traditional options. Consider seasonal produce, different cheeses, and herb combinations. Some ideas include:
- Fig and Prosciutto: A sweet and salty combination, often with goat cheese and a drizzle of honey.
- Spicy Sausage and Broccolini: Robust flavors with a slight bitter edge.
- Roasted Vegetable Medley: Bell peppers, zucchini, red onion, and cherry tomatoes with feta or mozzarella.
- Mushroom and Truffle Oil: Earthy and luxurious, often with Fontina cheese.
The Perfect Pairing: Chilling Your Wine
No delicious flatbread is complete without the perfect accompaniment. And for those moments when you realize your wine isn’t quite chilled enough, here’s a fantastic trick: wrap the bottle in a wet paper towel and place it in the freezer. It dramatically speeds up the chilling process! Just make sure not to forget it in there, especially if your freezer is, like ours, a labyrinth of frozen bananas and other oddities. A crisp dry white wine, like a Sauvignon Blanc or Pinot Grigio, would beautifully complement the Pear & Brie Flatbread, cutting through the richness of the Brie and harmonizing with the sweetness of the pear.
Troubleshooting Common Pizza Dough Issues
Even with the best intentions, dough can sometimes be temperamental. Here are quick fixes for common problems:
- Dough not rising: Your yeast might be old or the water was too cold (or too hot). Ensure fresh yeast and appropriate water temperature (around 105-115°F / 40-46°C for active dry yeast).
- Dough too sticky: Gradually add a little more flour, a tablespoon at a time, during kneading until it’s more manageable. The weather (humidity) can sometimes affect dough consistency.
- Dough too stiff: It might be over-floured or under-hydrated. Next time, add a tiny bit more water, or let it rest longer for the gluten to relax.
- Crust is dense: Likely not enough rise time, or you deflated it too much while shaping. Be gentle!
Embrace the Journey to Pizza Perfection
Ultimately, making homemade pizza is a journey of patience and experimentation. By understanding the critical role of time in developing flavor and texture, you’re already well on your way to crafting unforgettable pizza and flatbreads. Don’t be afraid to experiment with different flours, hydration levels, and fermentation times. Each batch will teach you something new, bringing you closer to your personal pizza perfection. So, roll up your sleeves, embrace the process, and get ready to enjoy the most flavorful homemade pizza you’ve ever tasted!
